Quick Take
With just seven knots, you can cover nearly every rope need in camping: pitching tarps, tying to trees, adjusting guy-lines, securing food, joining ropes, making fixed loops, and releasing tie-downs quickly. These are the knots you’ll actually use in the backcountry.
Introduction
Rope is one of the most useful tools in the outdoors, but only if you know how to tie it. Many campers struggle with knots that slip, jam, or take too long to tie.
This guide strips it down to the seven knots that matter most in camping. Each one solves a real trail problem: setting up shelter, securing loads, or adjusting tension.
By the end, you’ll know how to:
- Tie and finish each knot with confidence.
- Match knots to camping tasks.
- Check your work so you never wake up to a collapsed tarp.
Rope Basics
- Standing Line: The long part of the rope that carries the load.
- Working End: The short, free end you tie with.
- Tail: The leftover end after the knot is finished (should stick out 2–6 in).
- Bight: A U-shaped bend in the rope that does not cross itself.
- Loop: A curve in the rope that crosses itself.
- Turn / Round Turn: One or two wraps of rope around an object.
- Hitch: A knot that secures rope to an object (tree, stake, pole).
- Bend: A knot that joins two ropes.
The Core 7 Knots
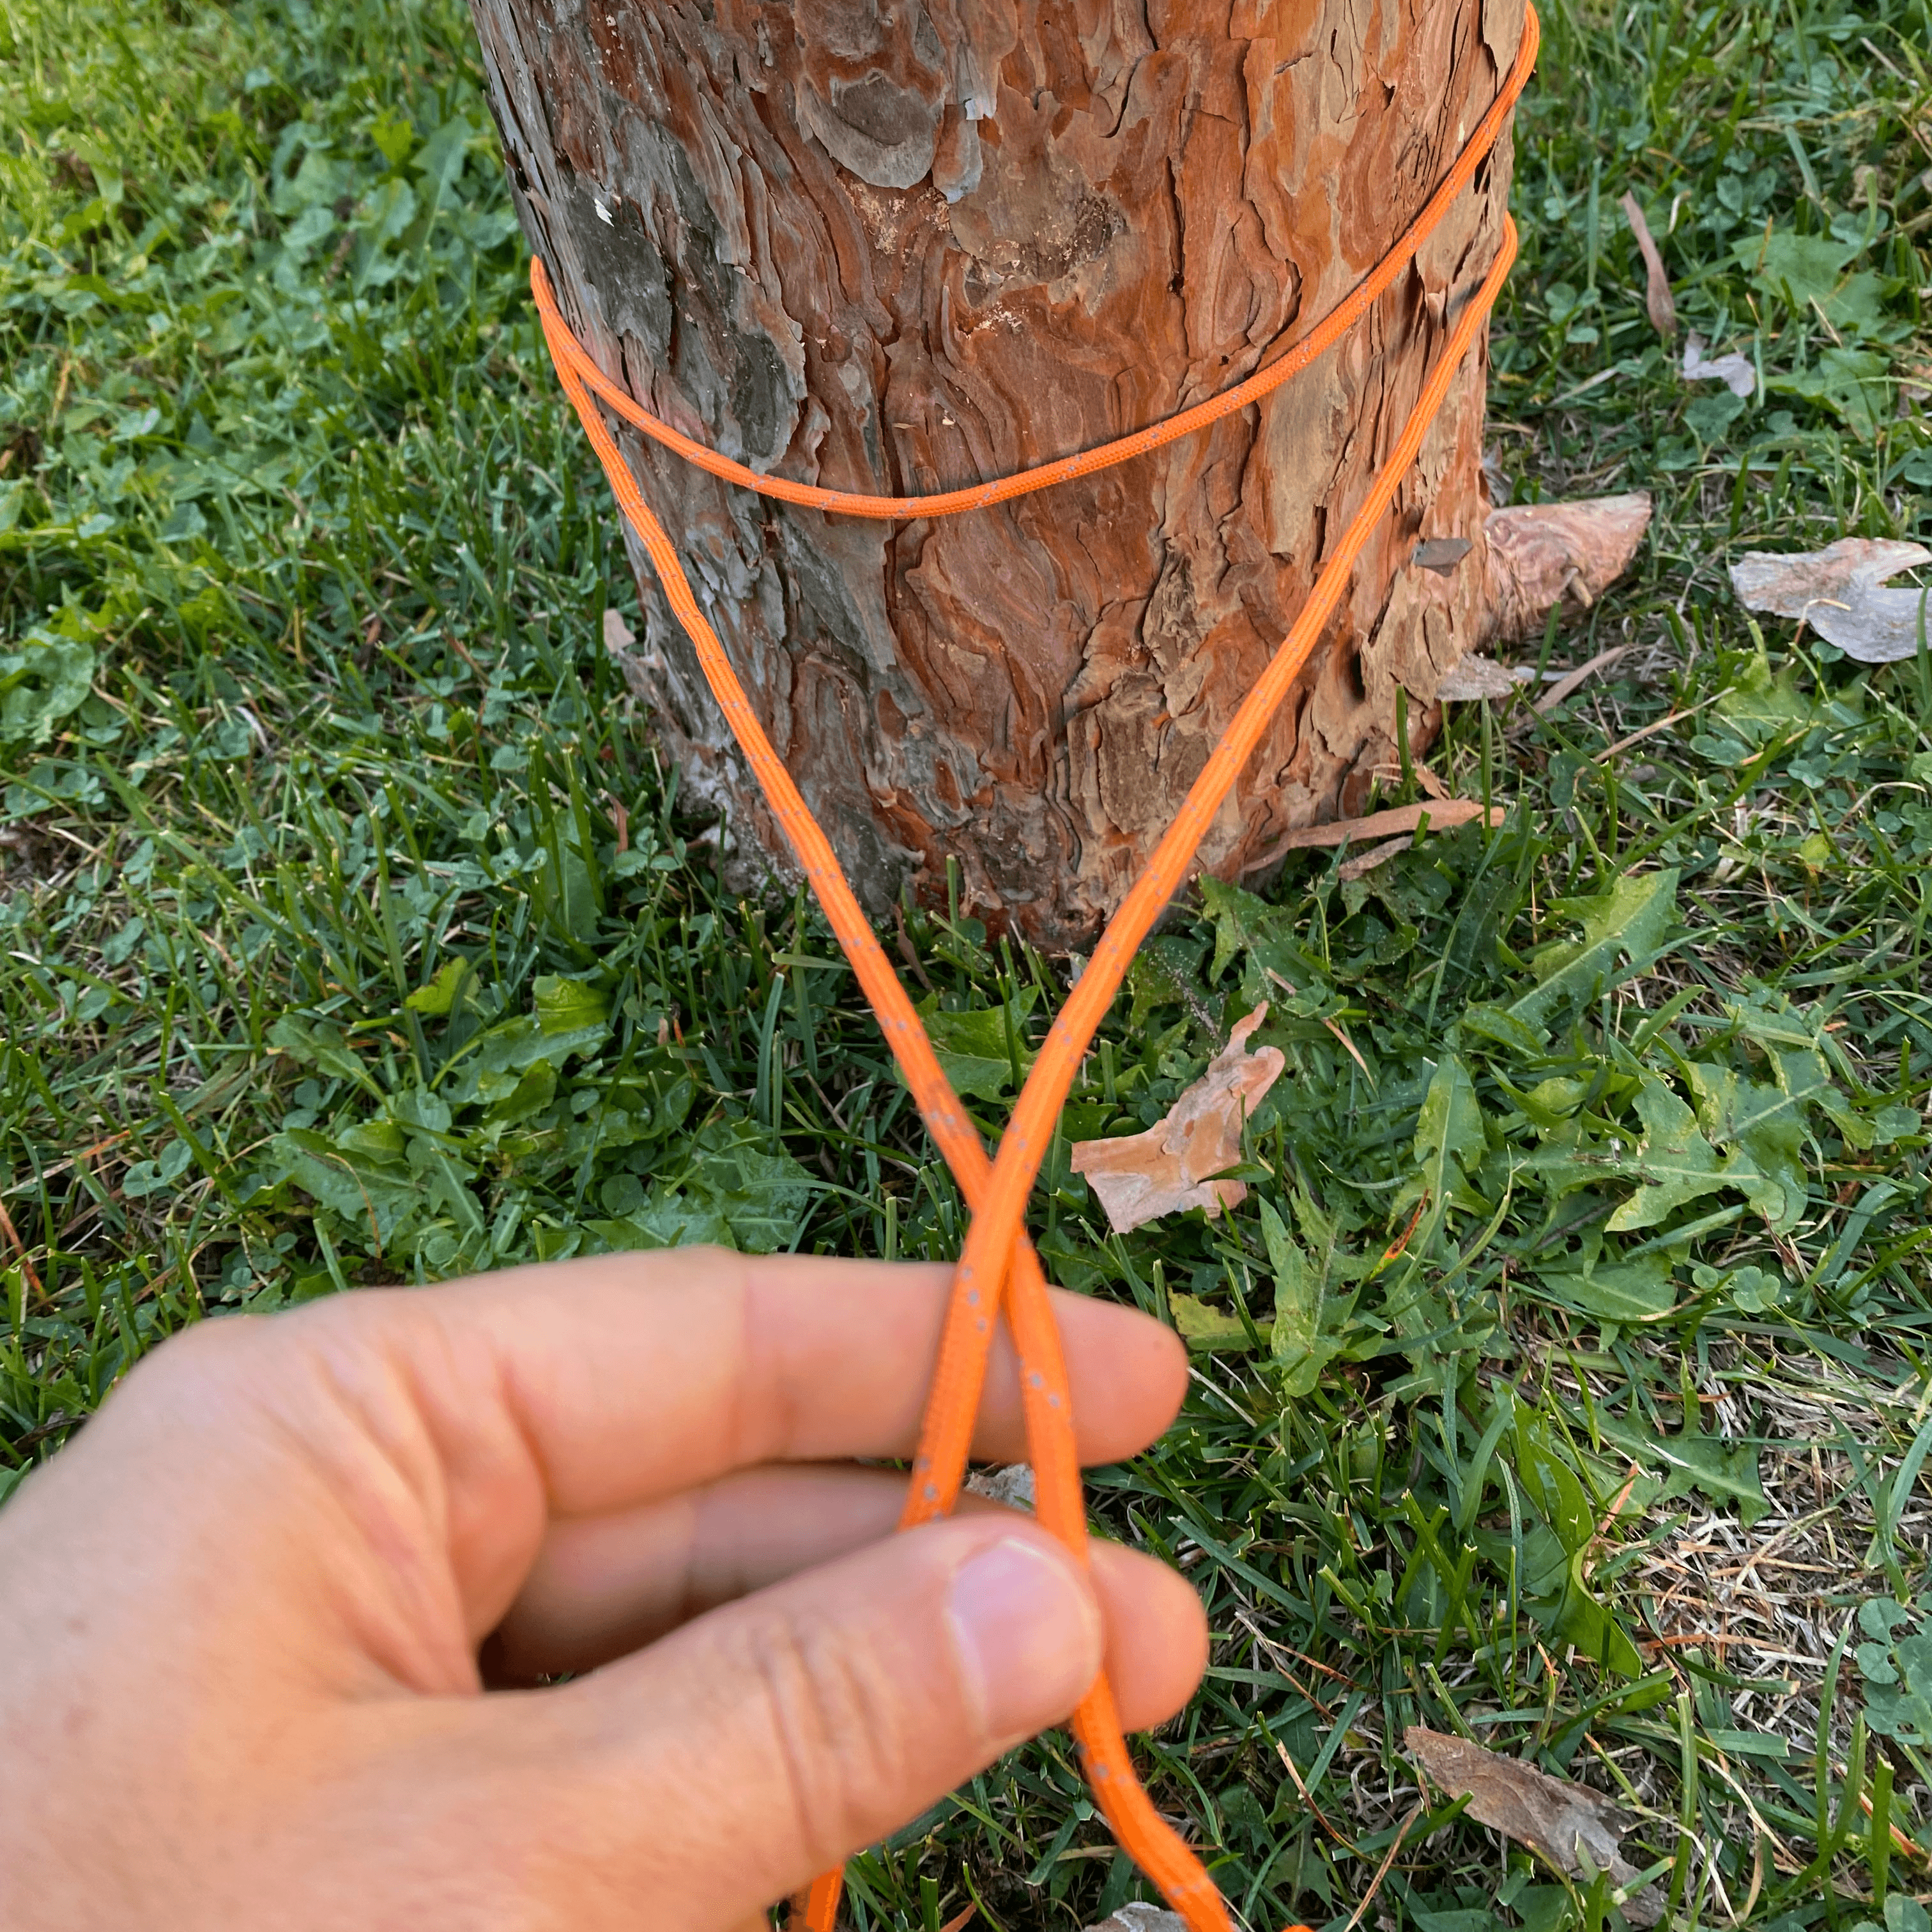
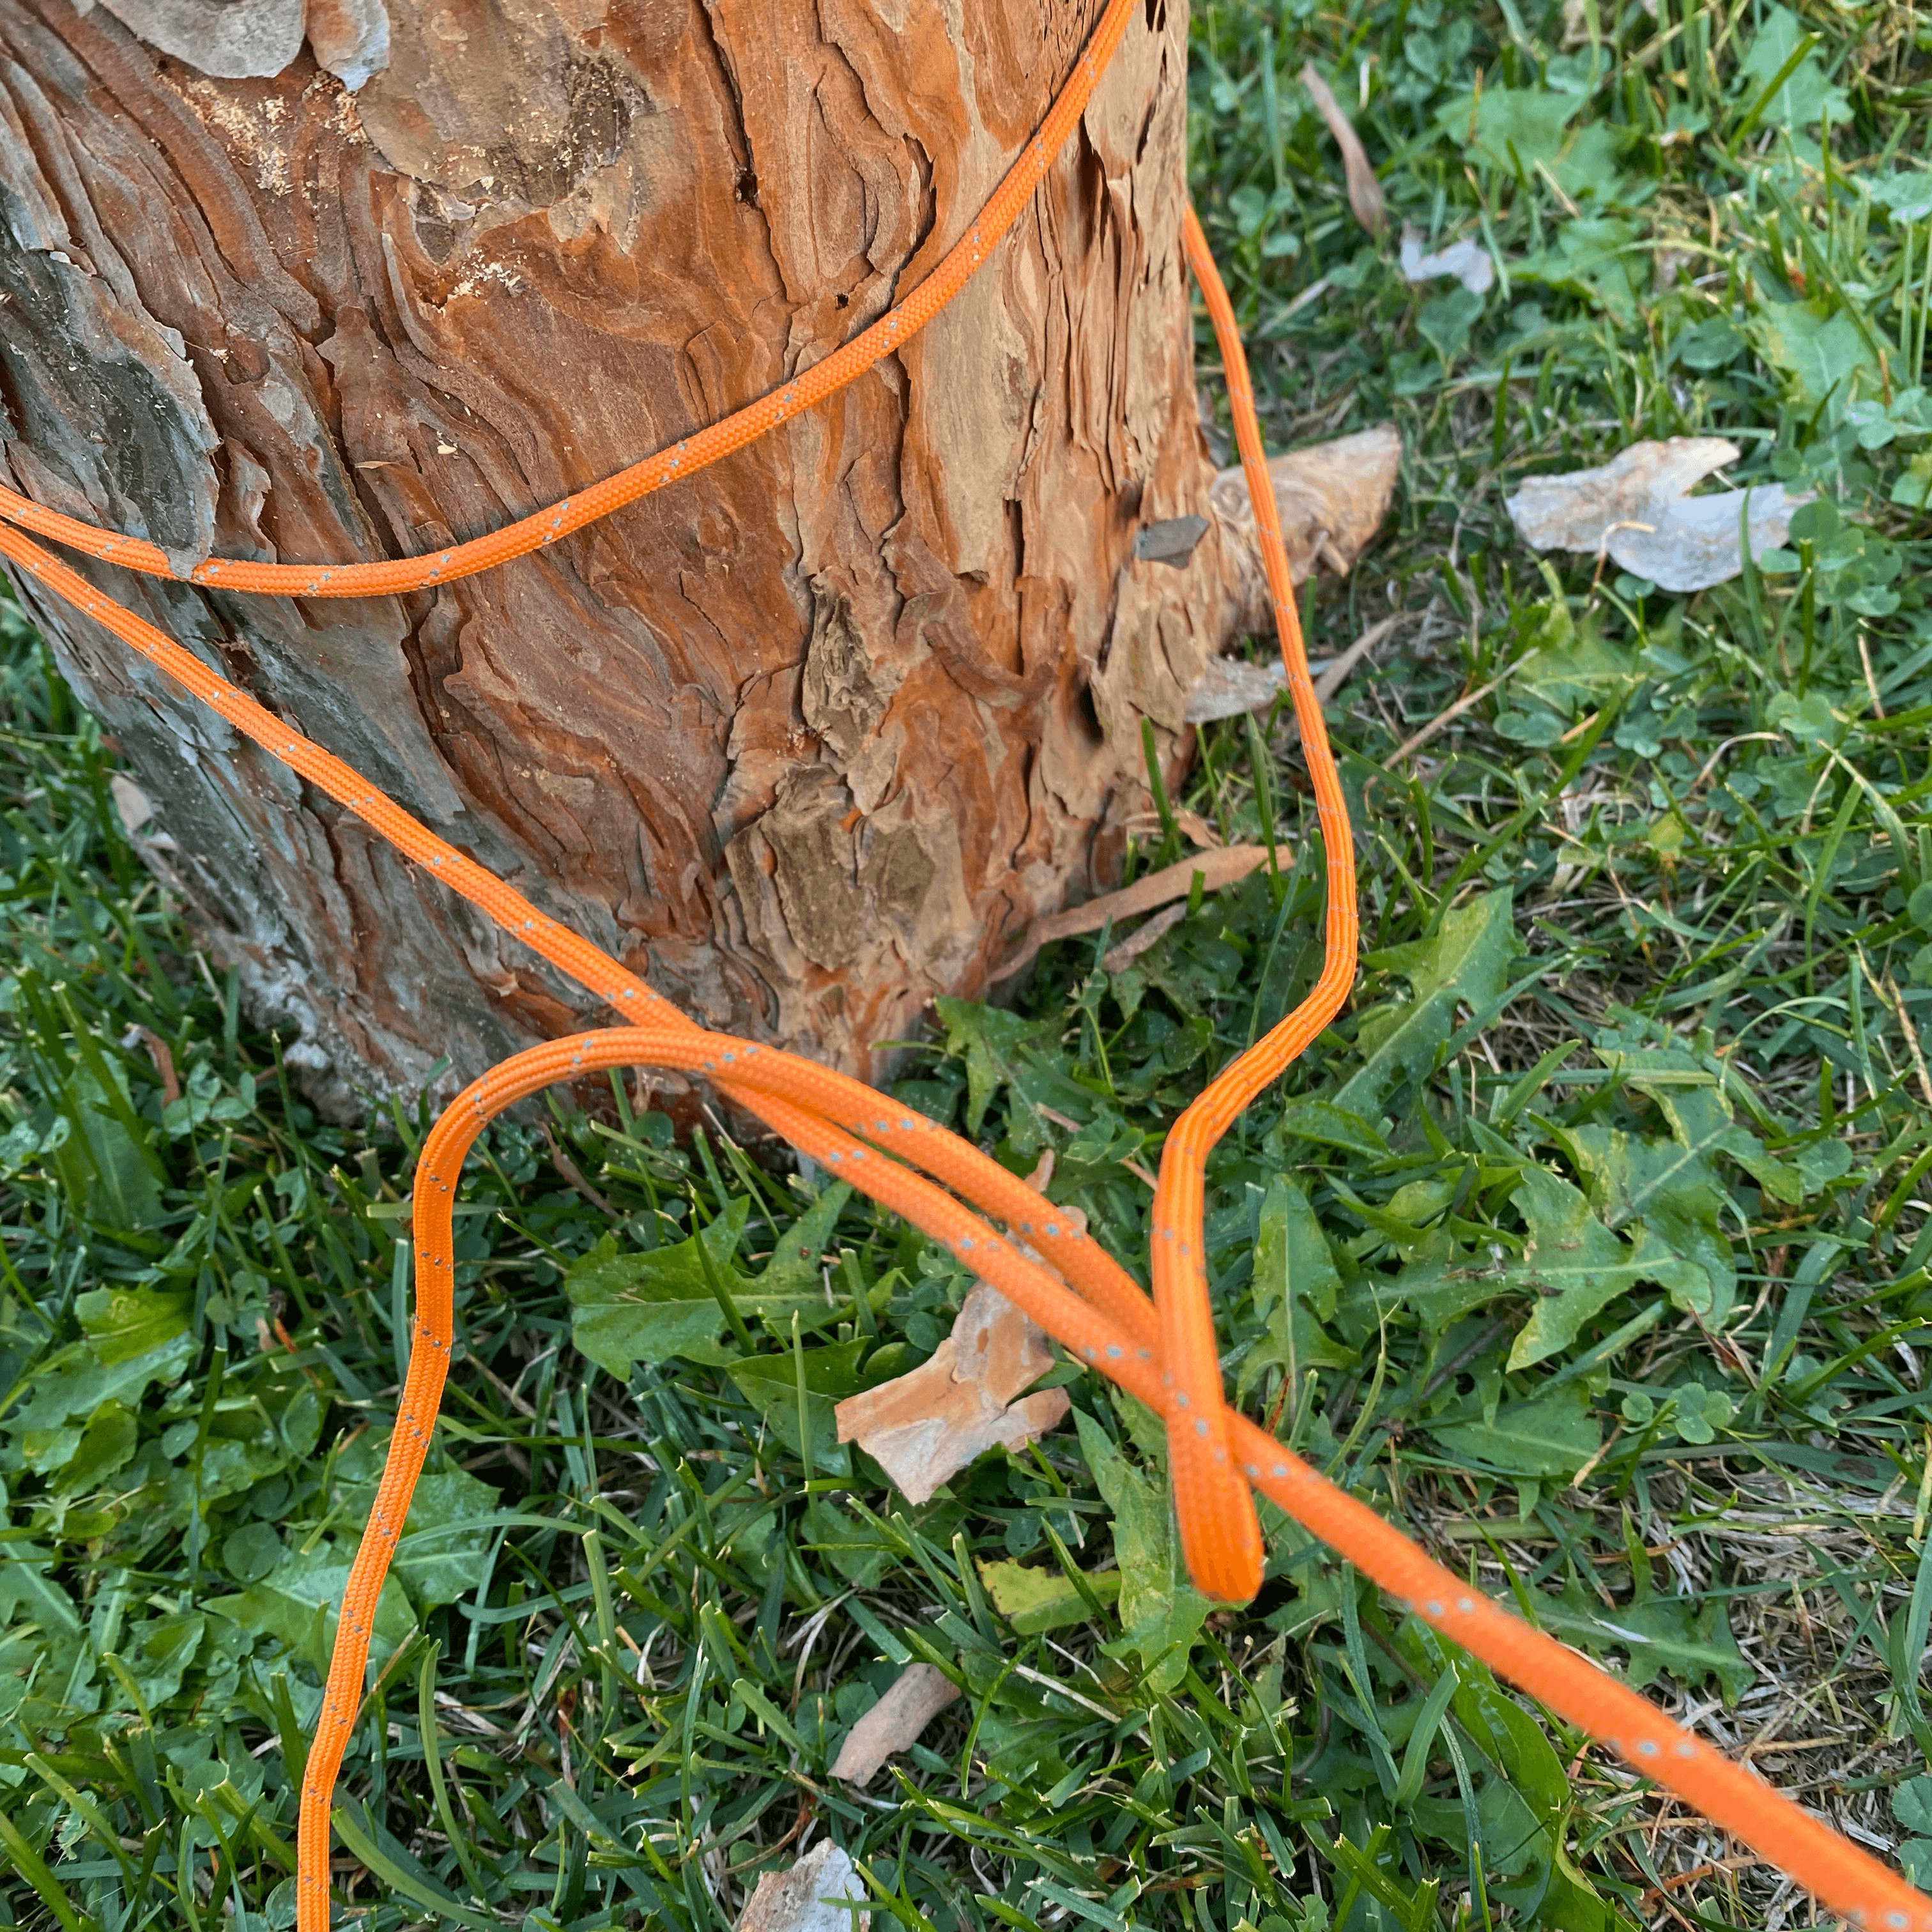
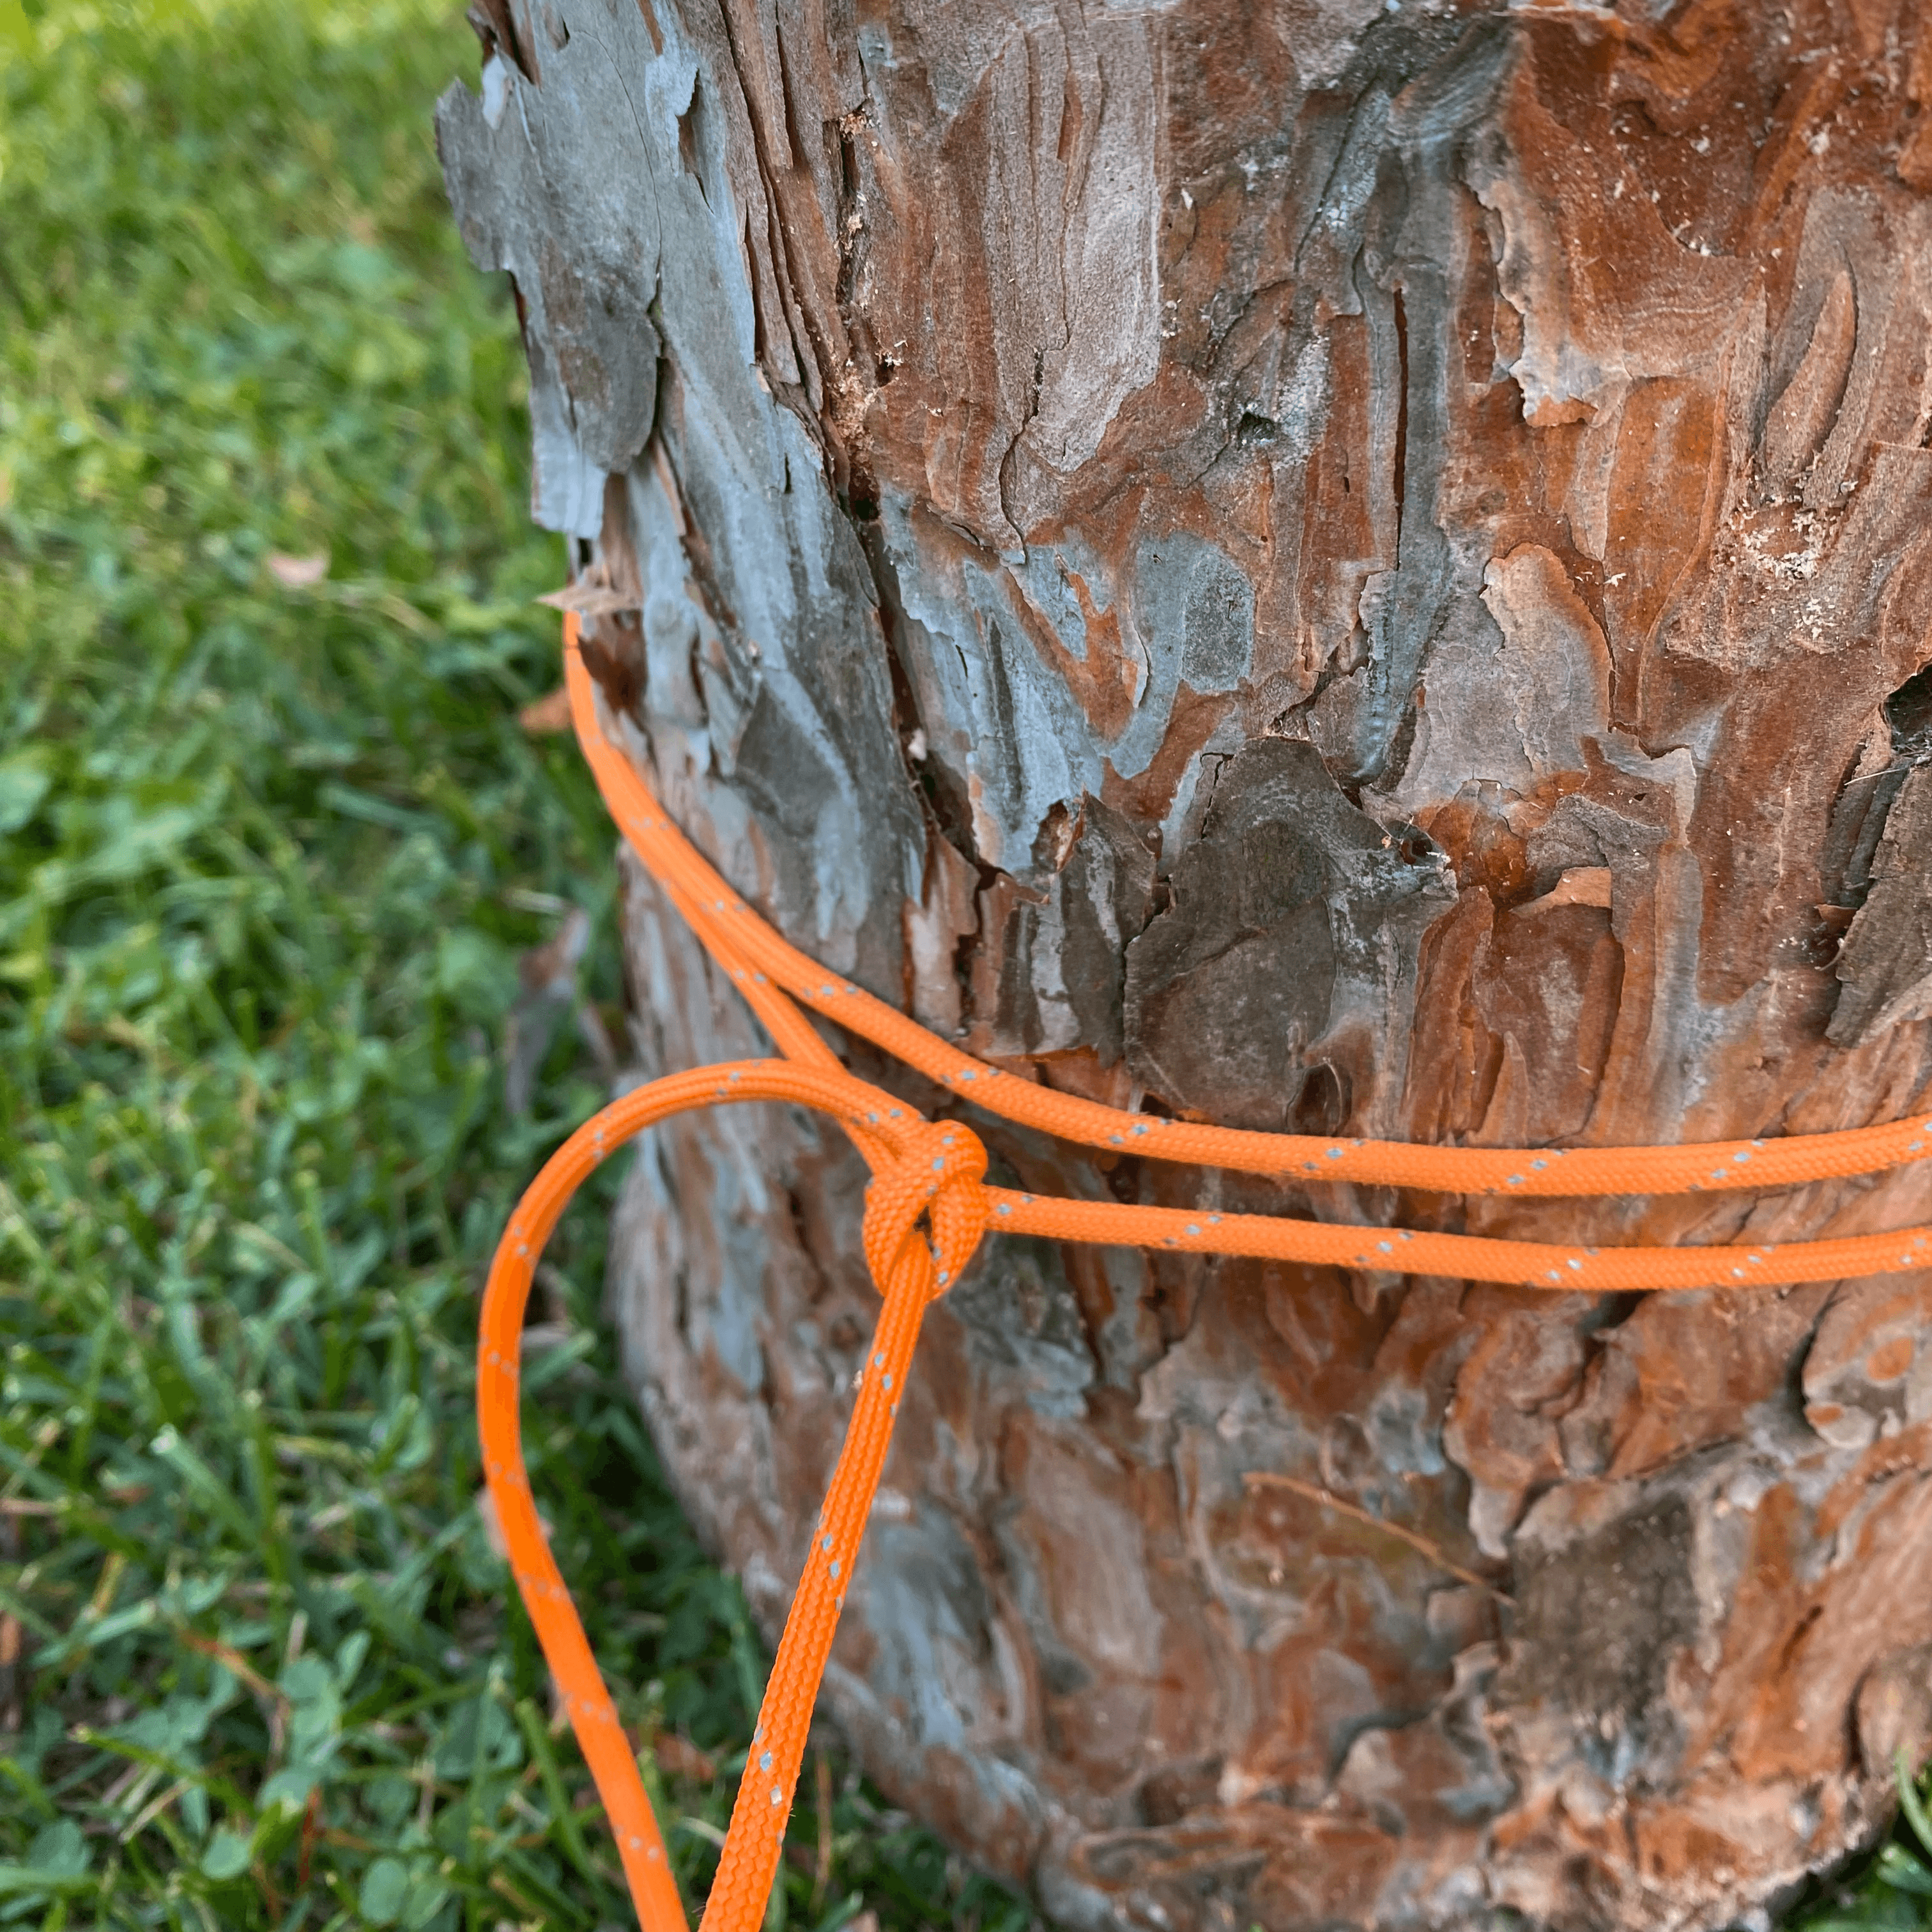
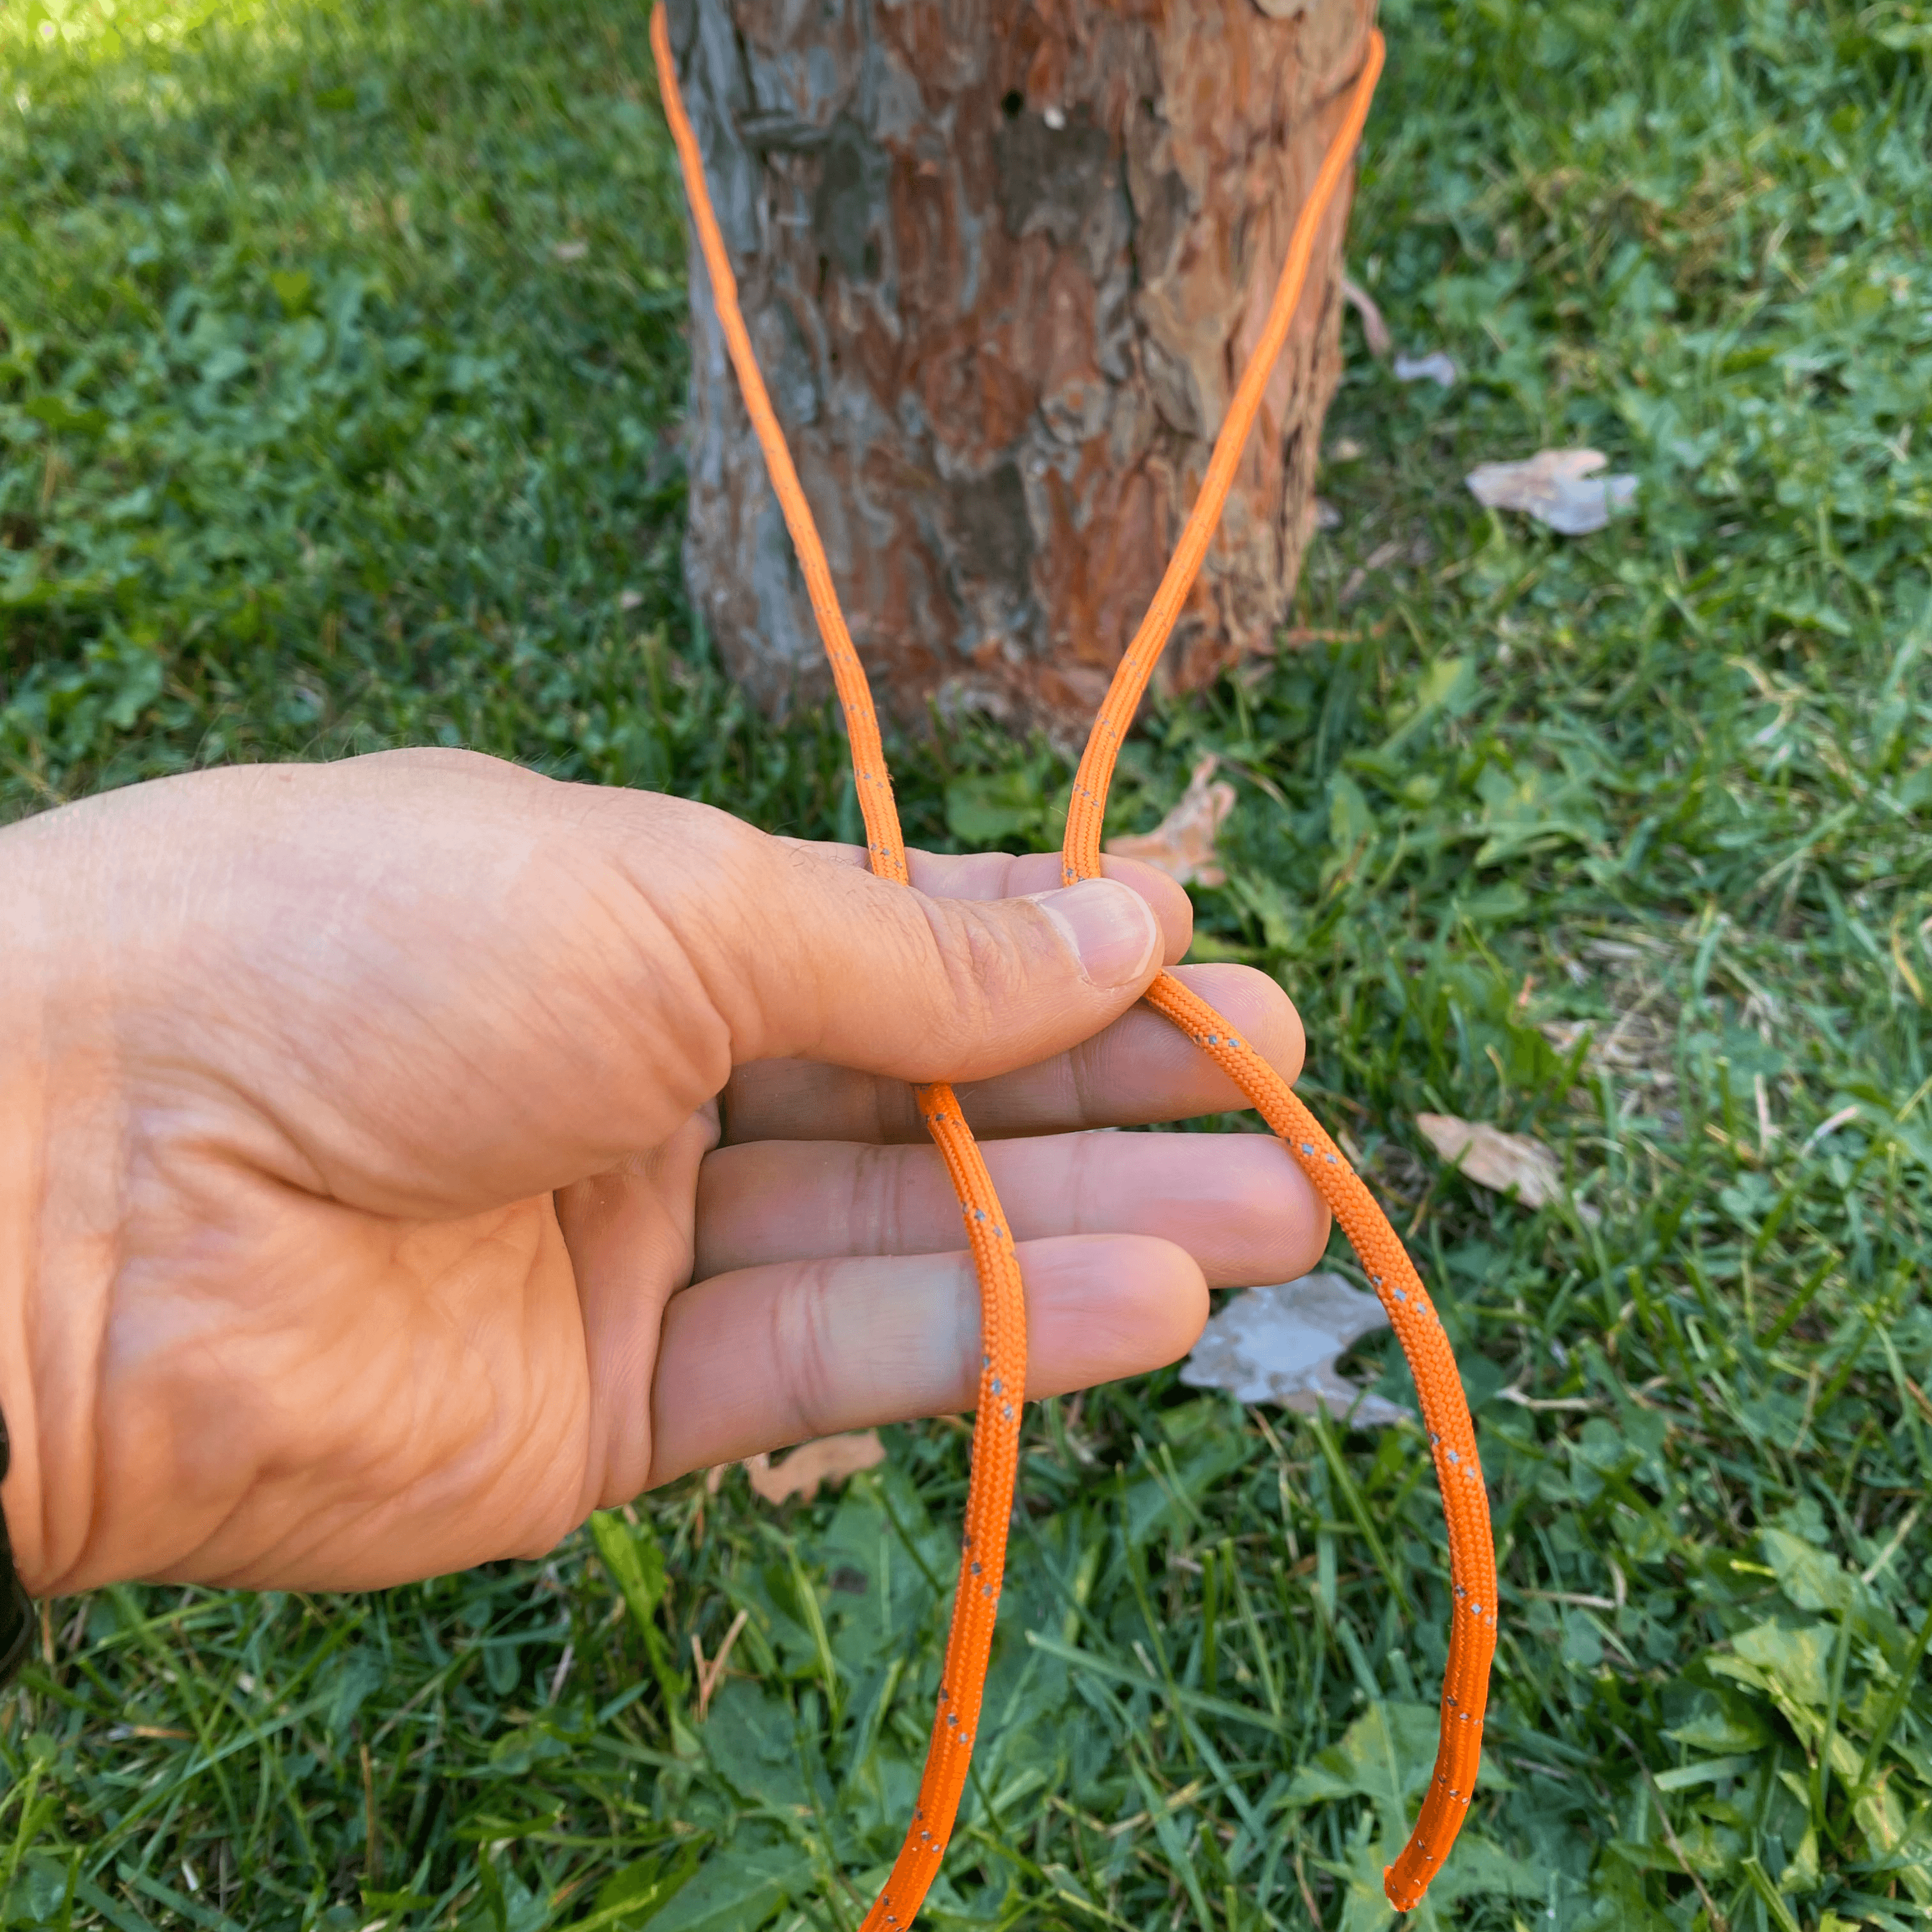
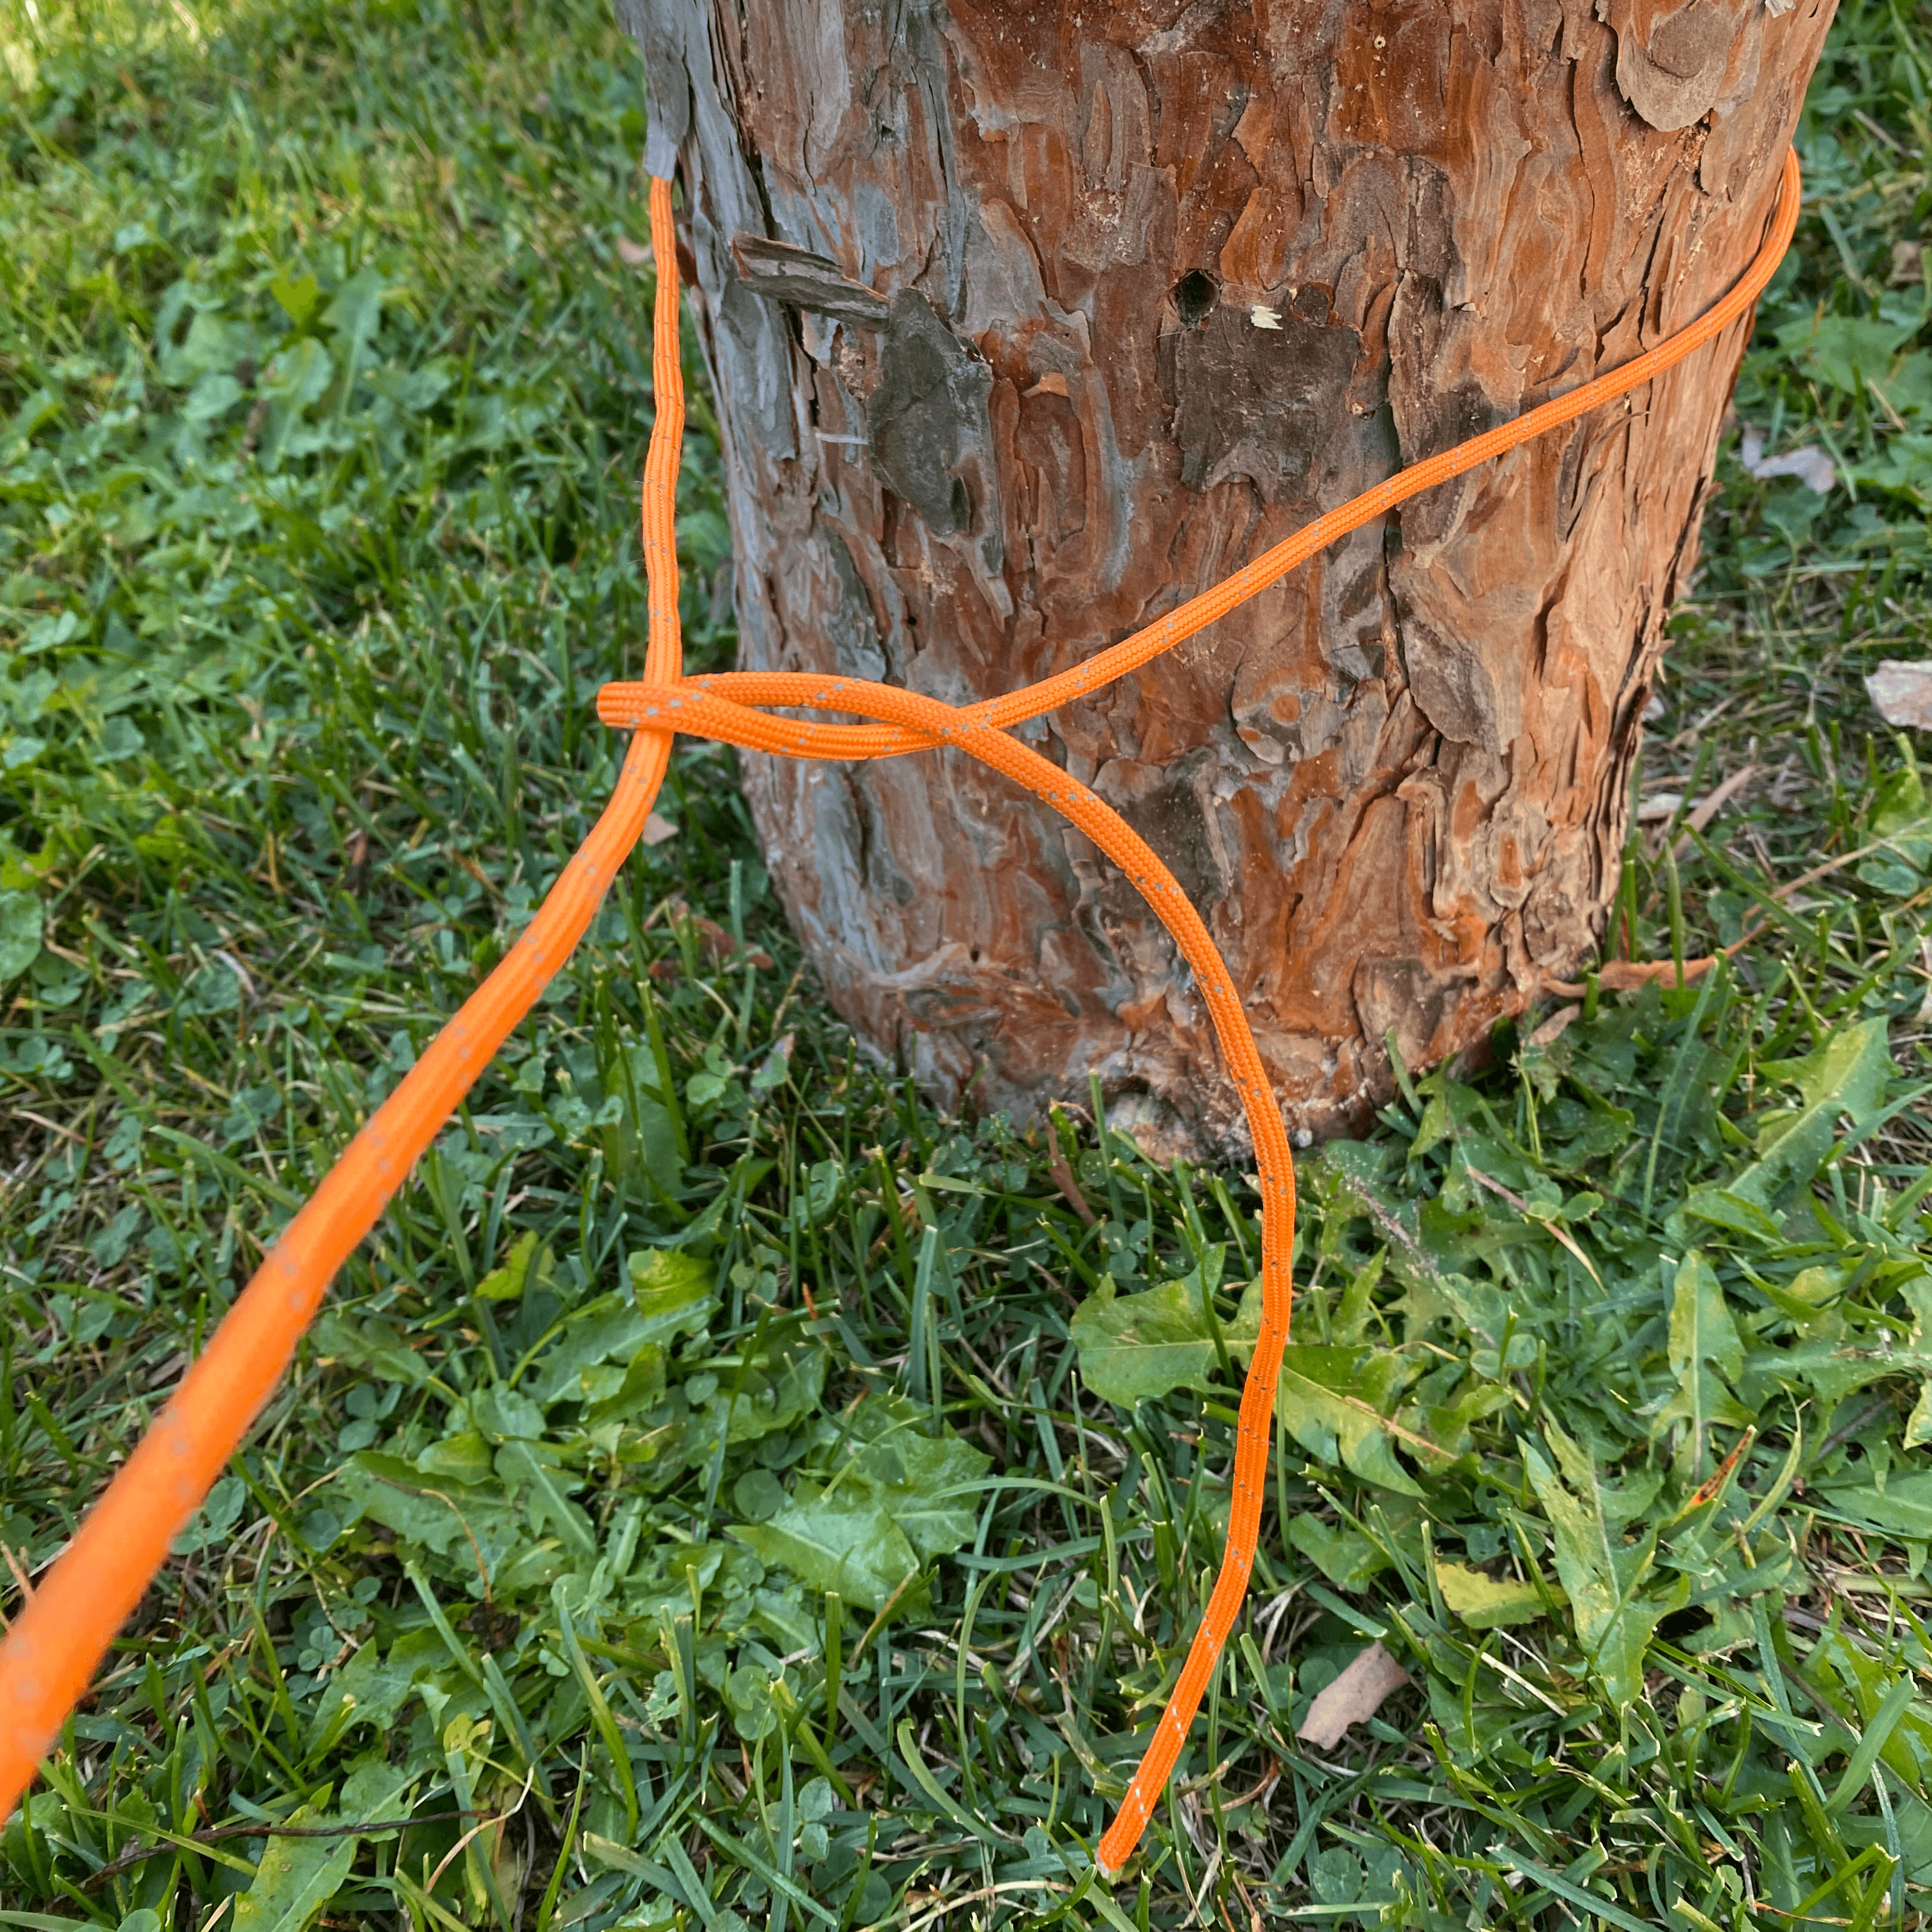
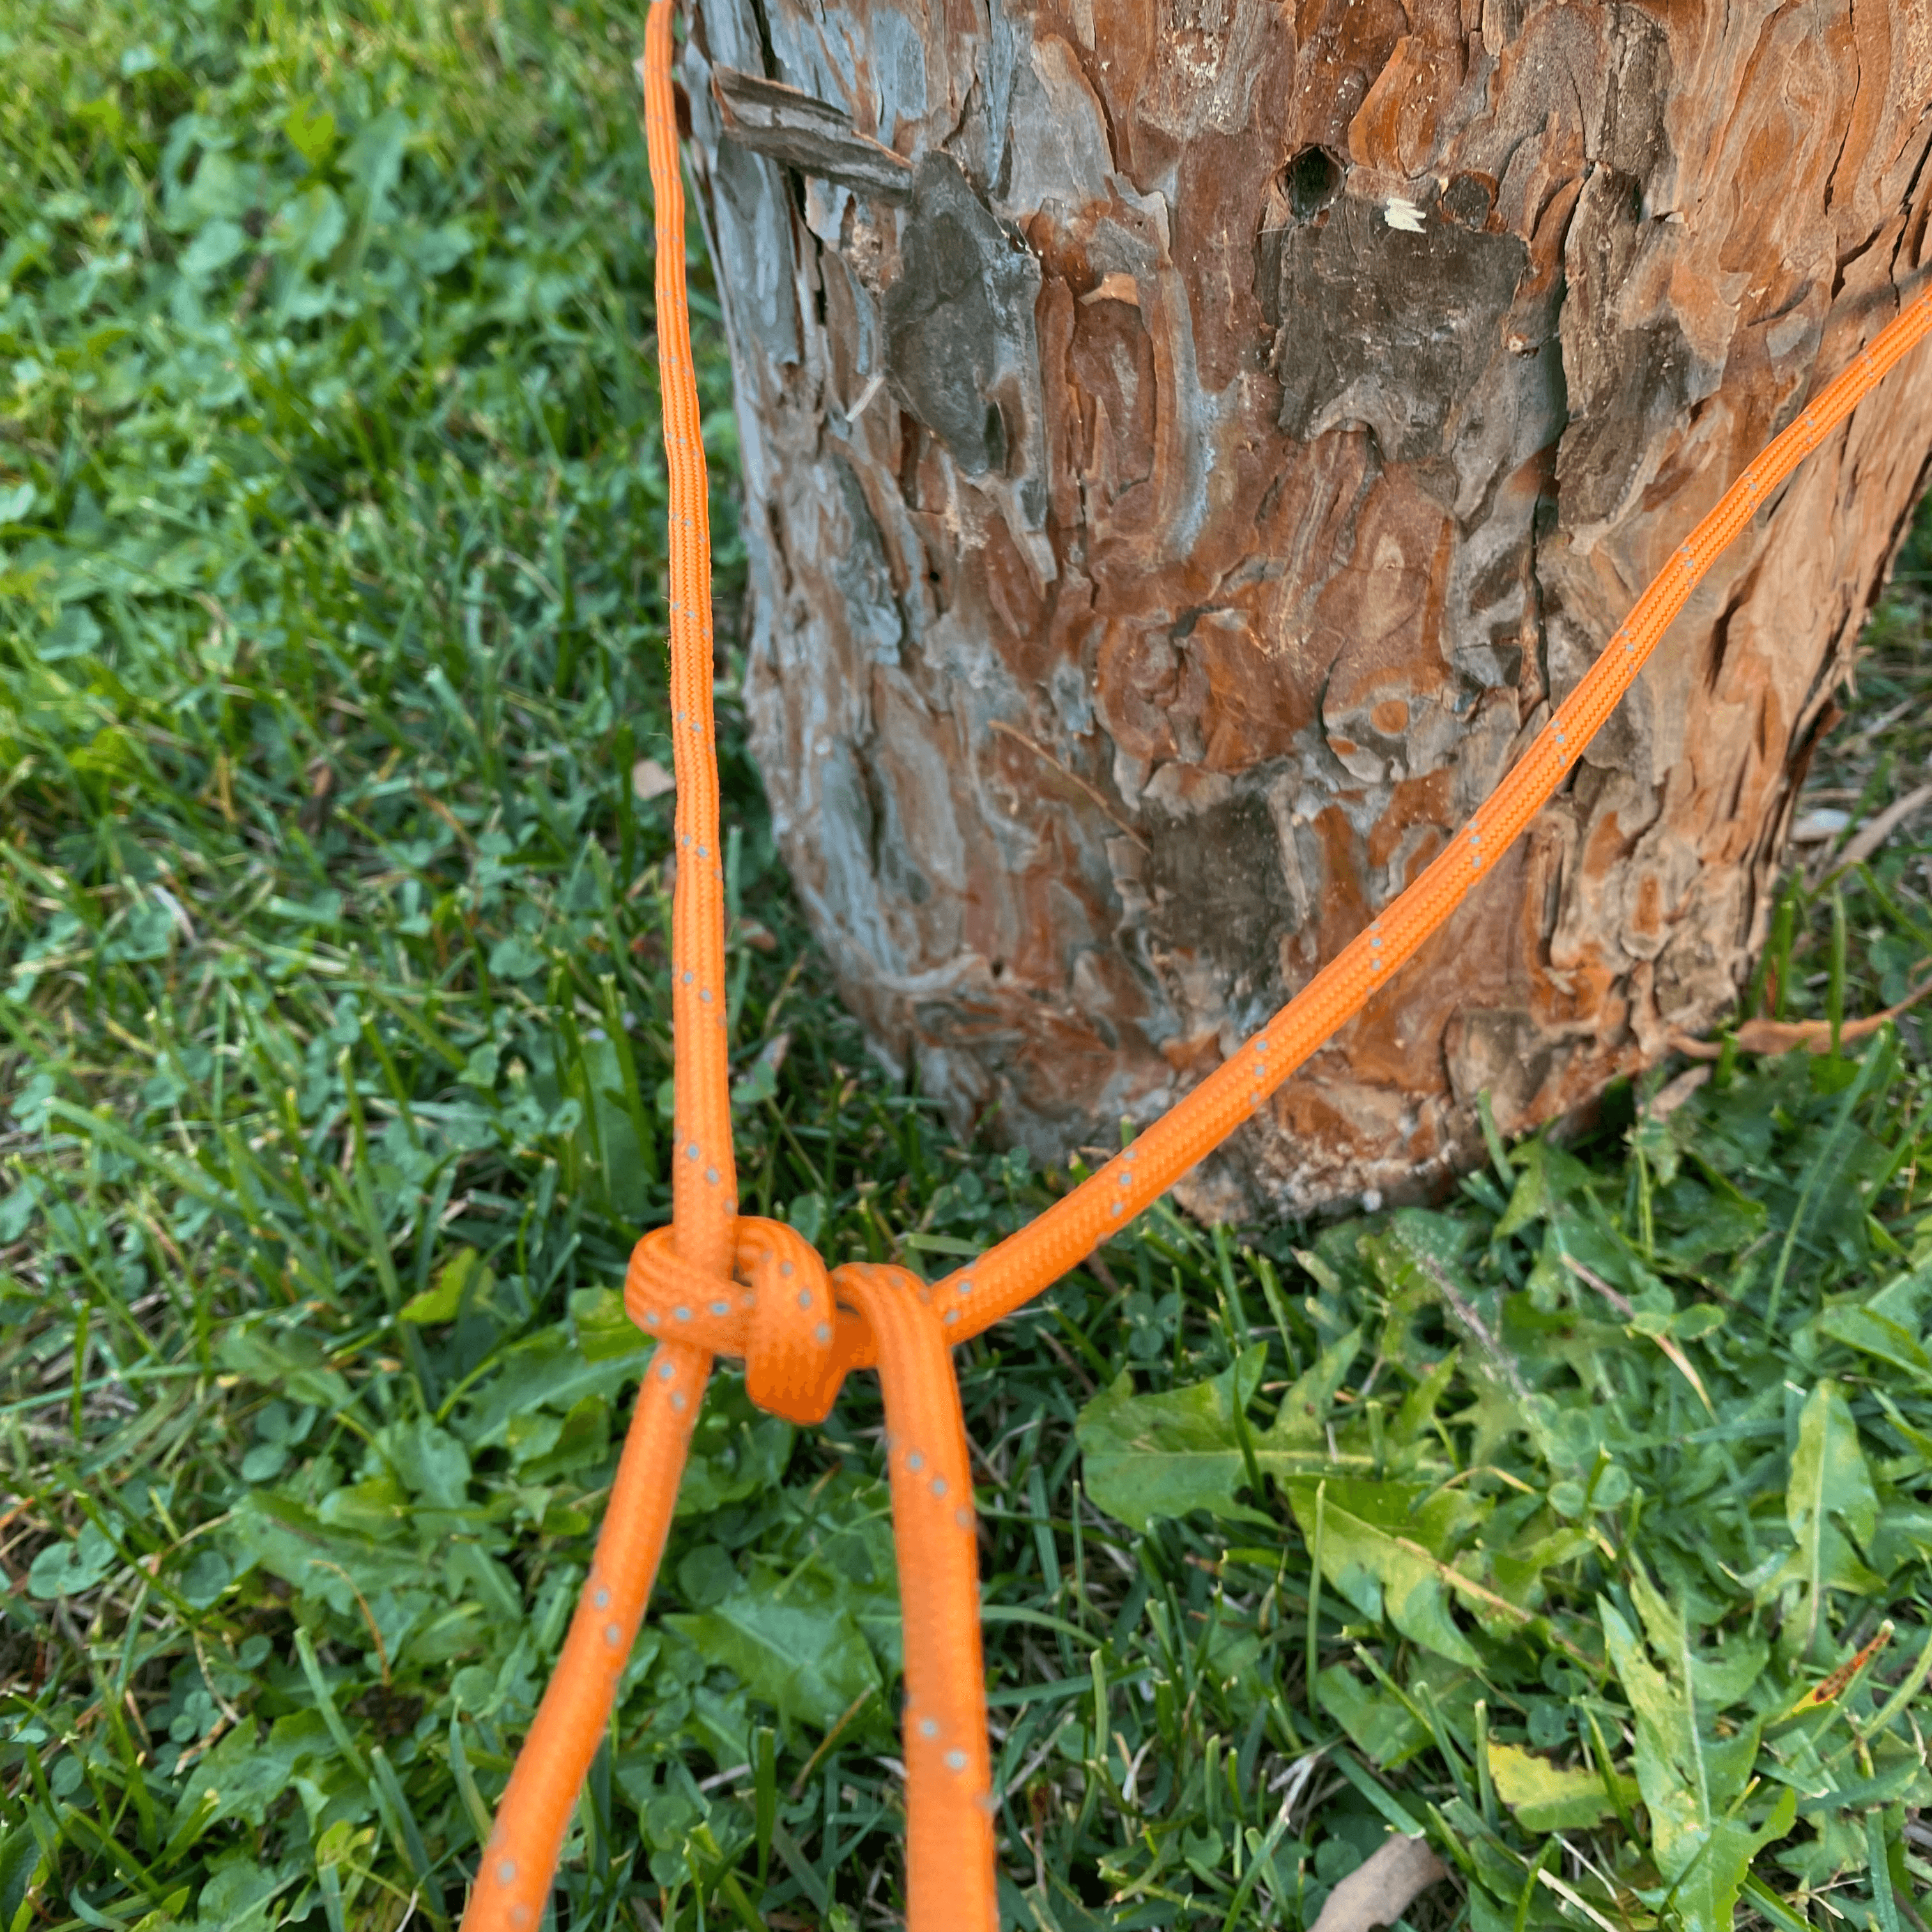
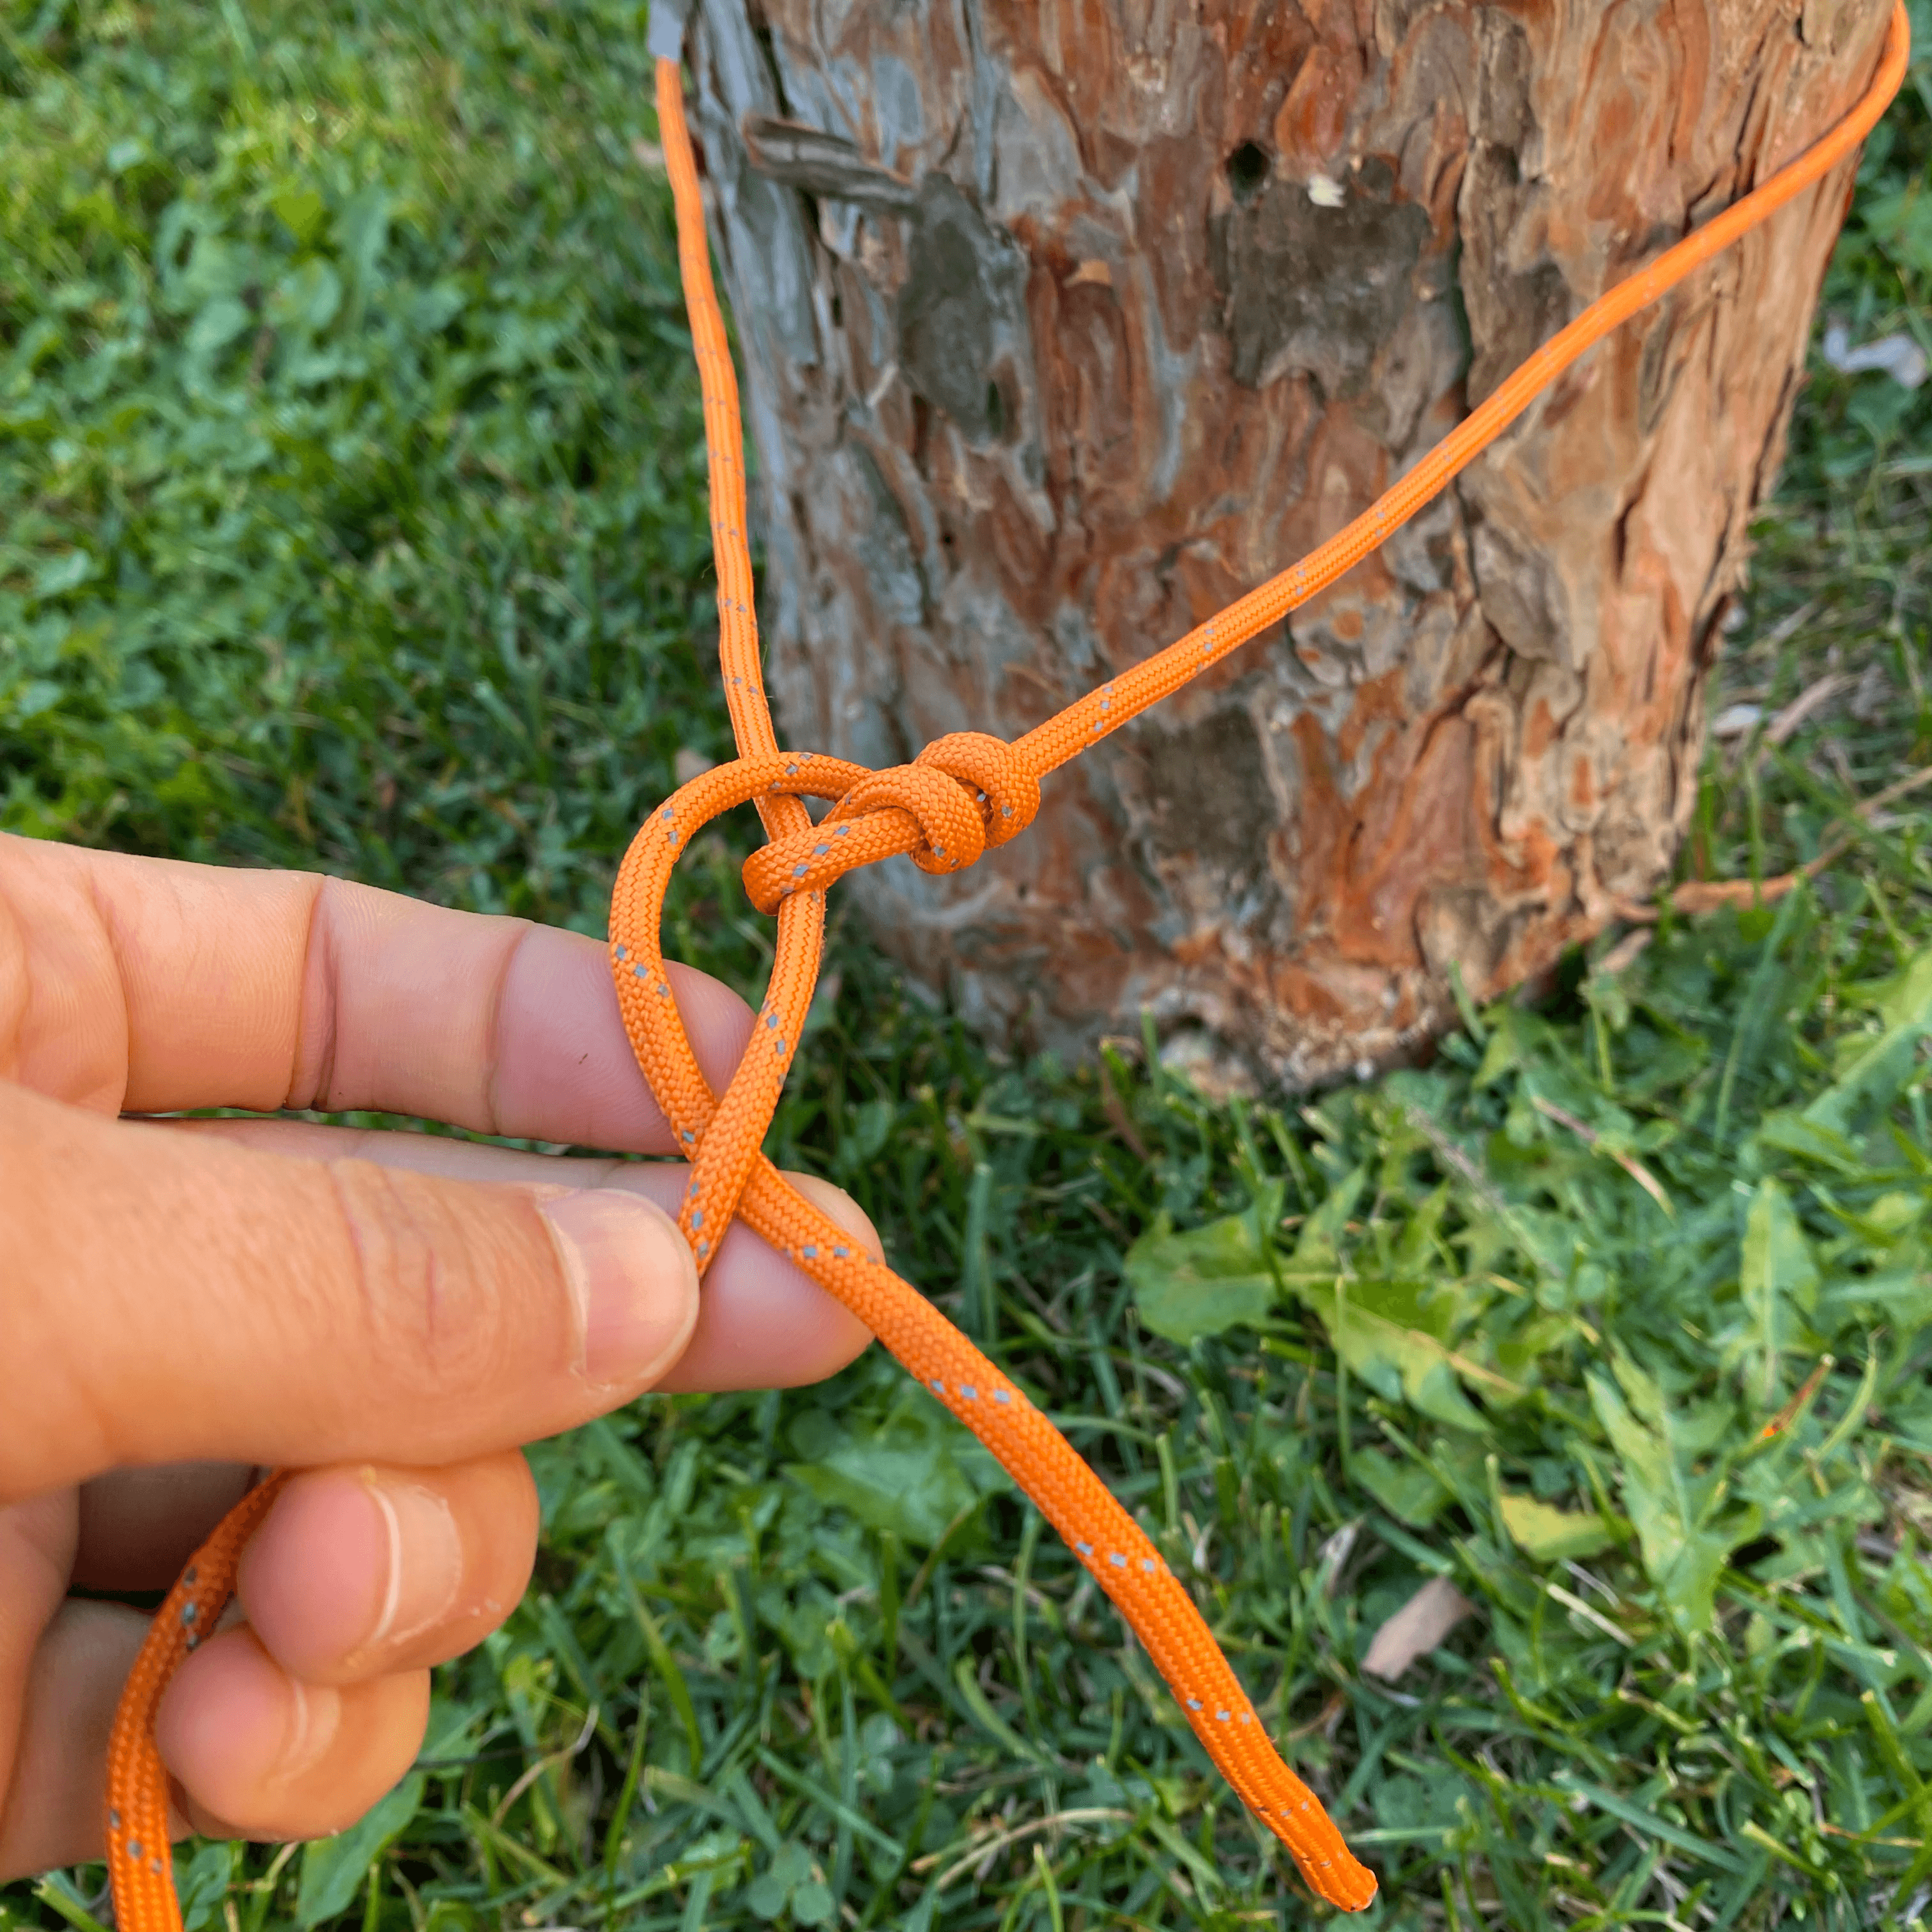
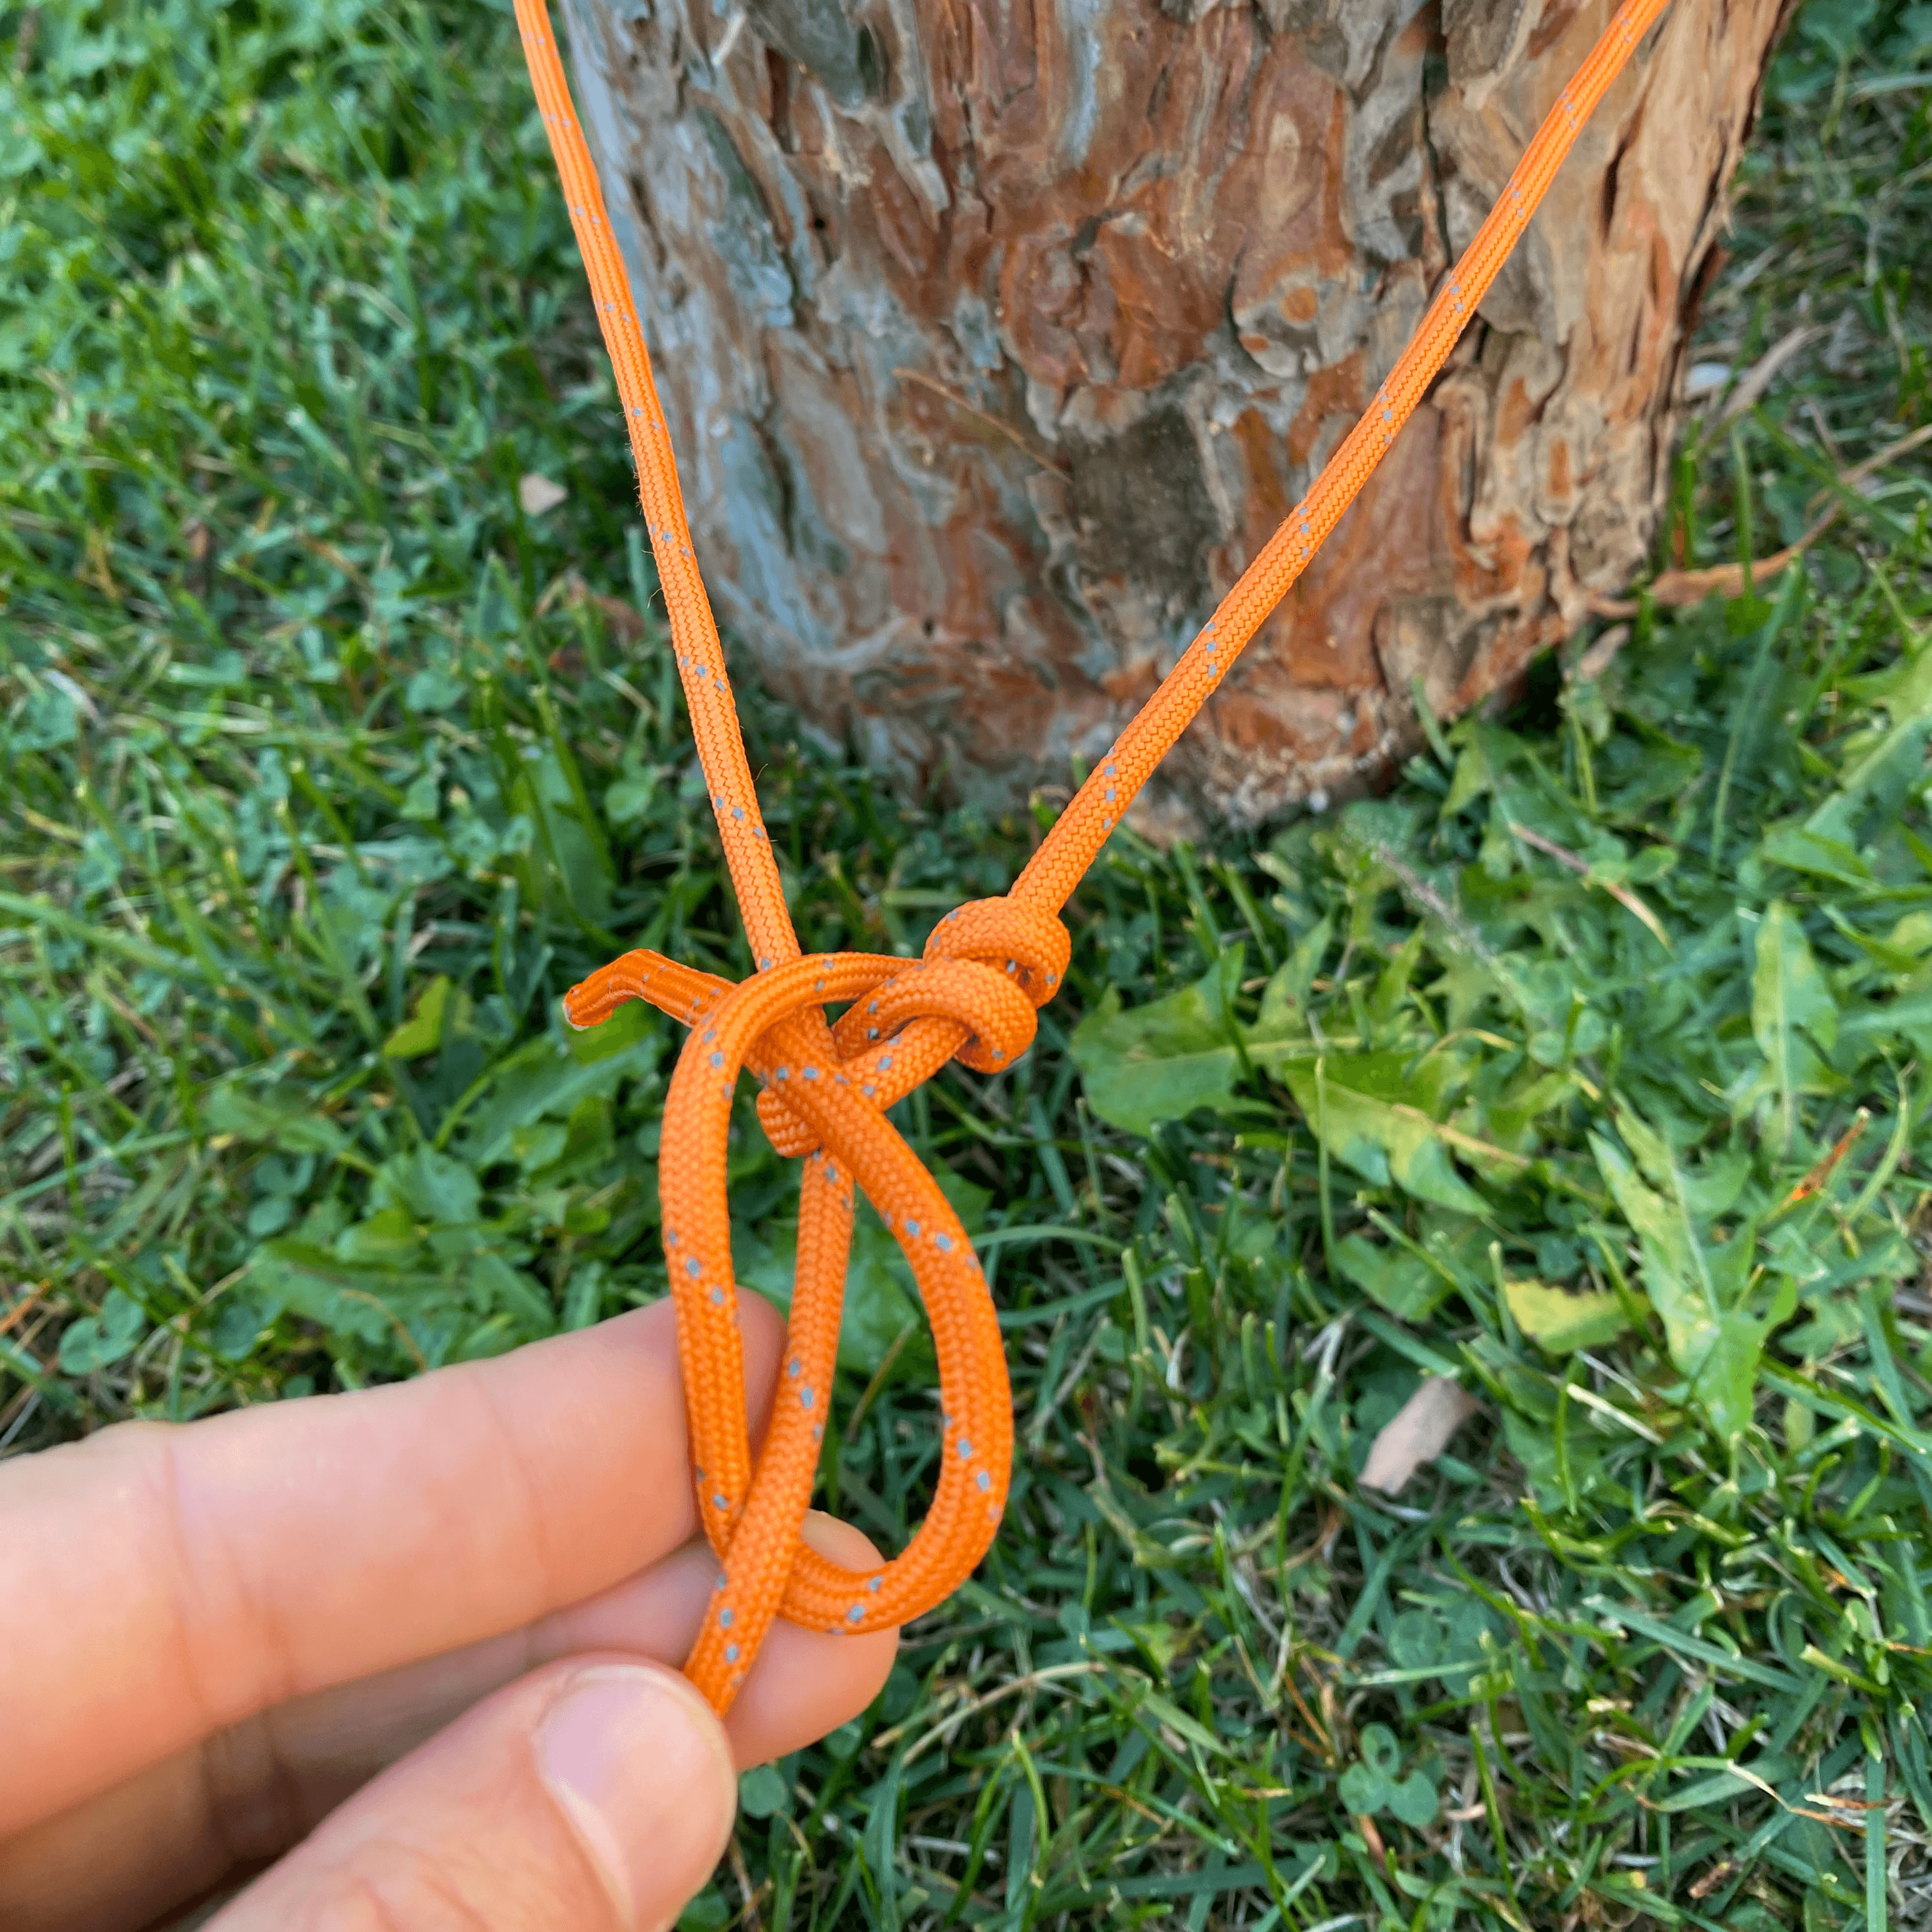
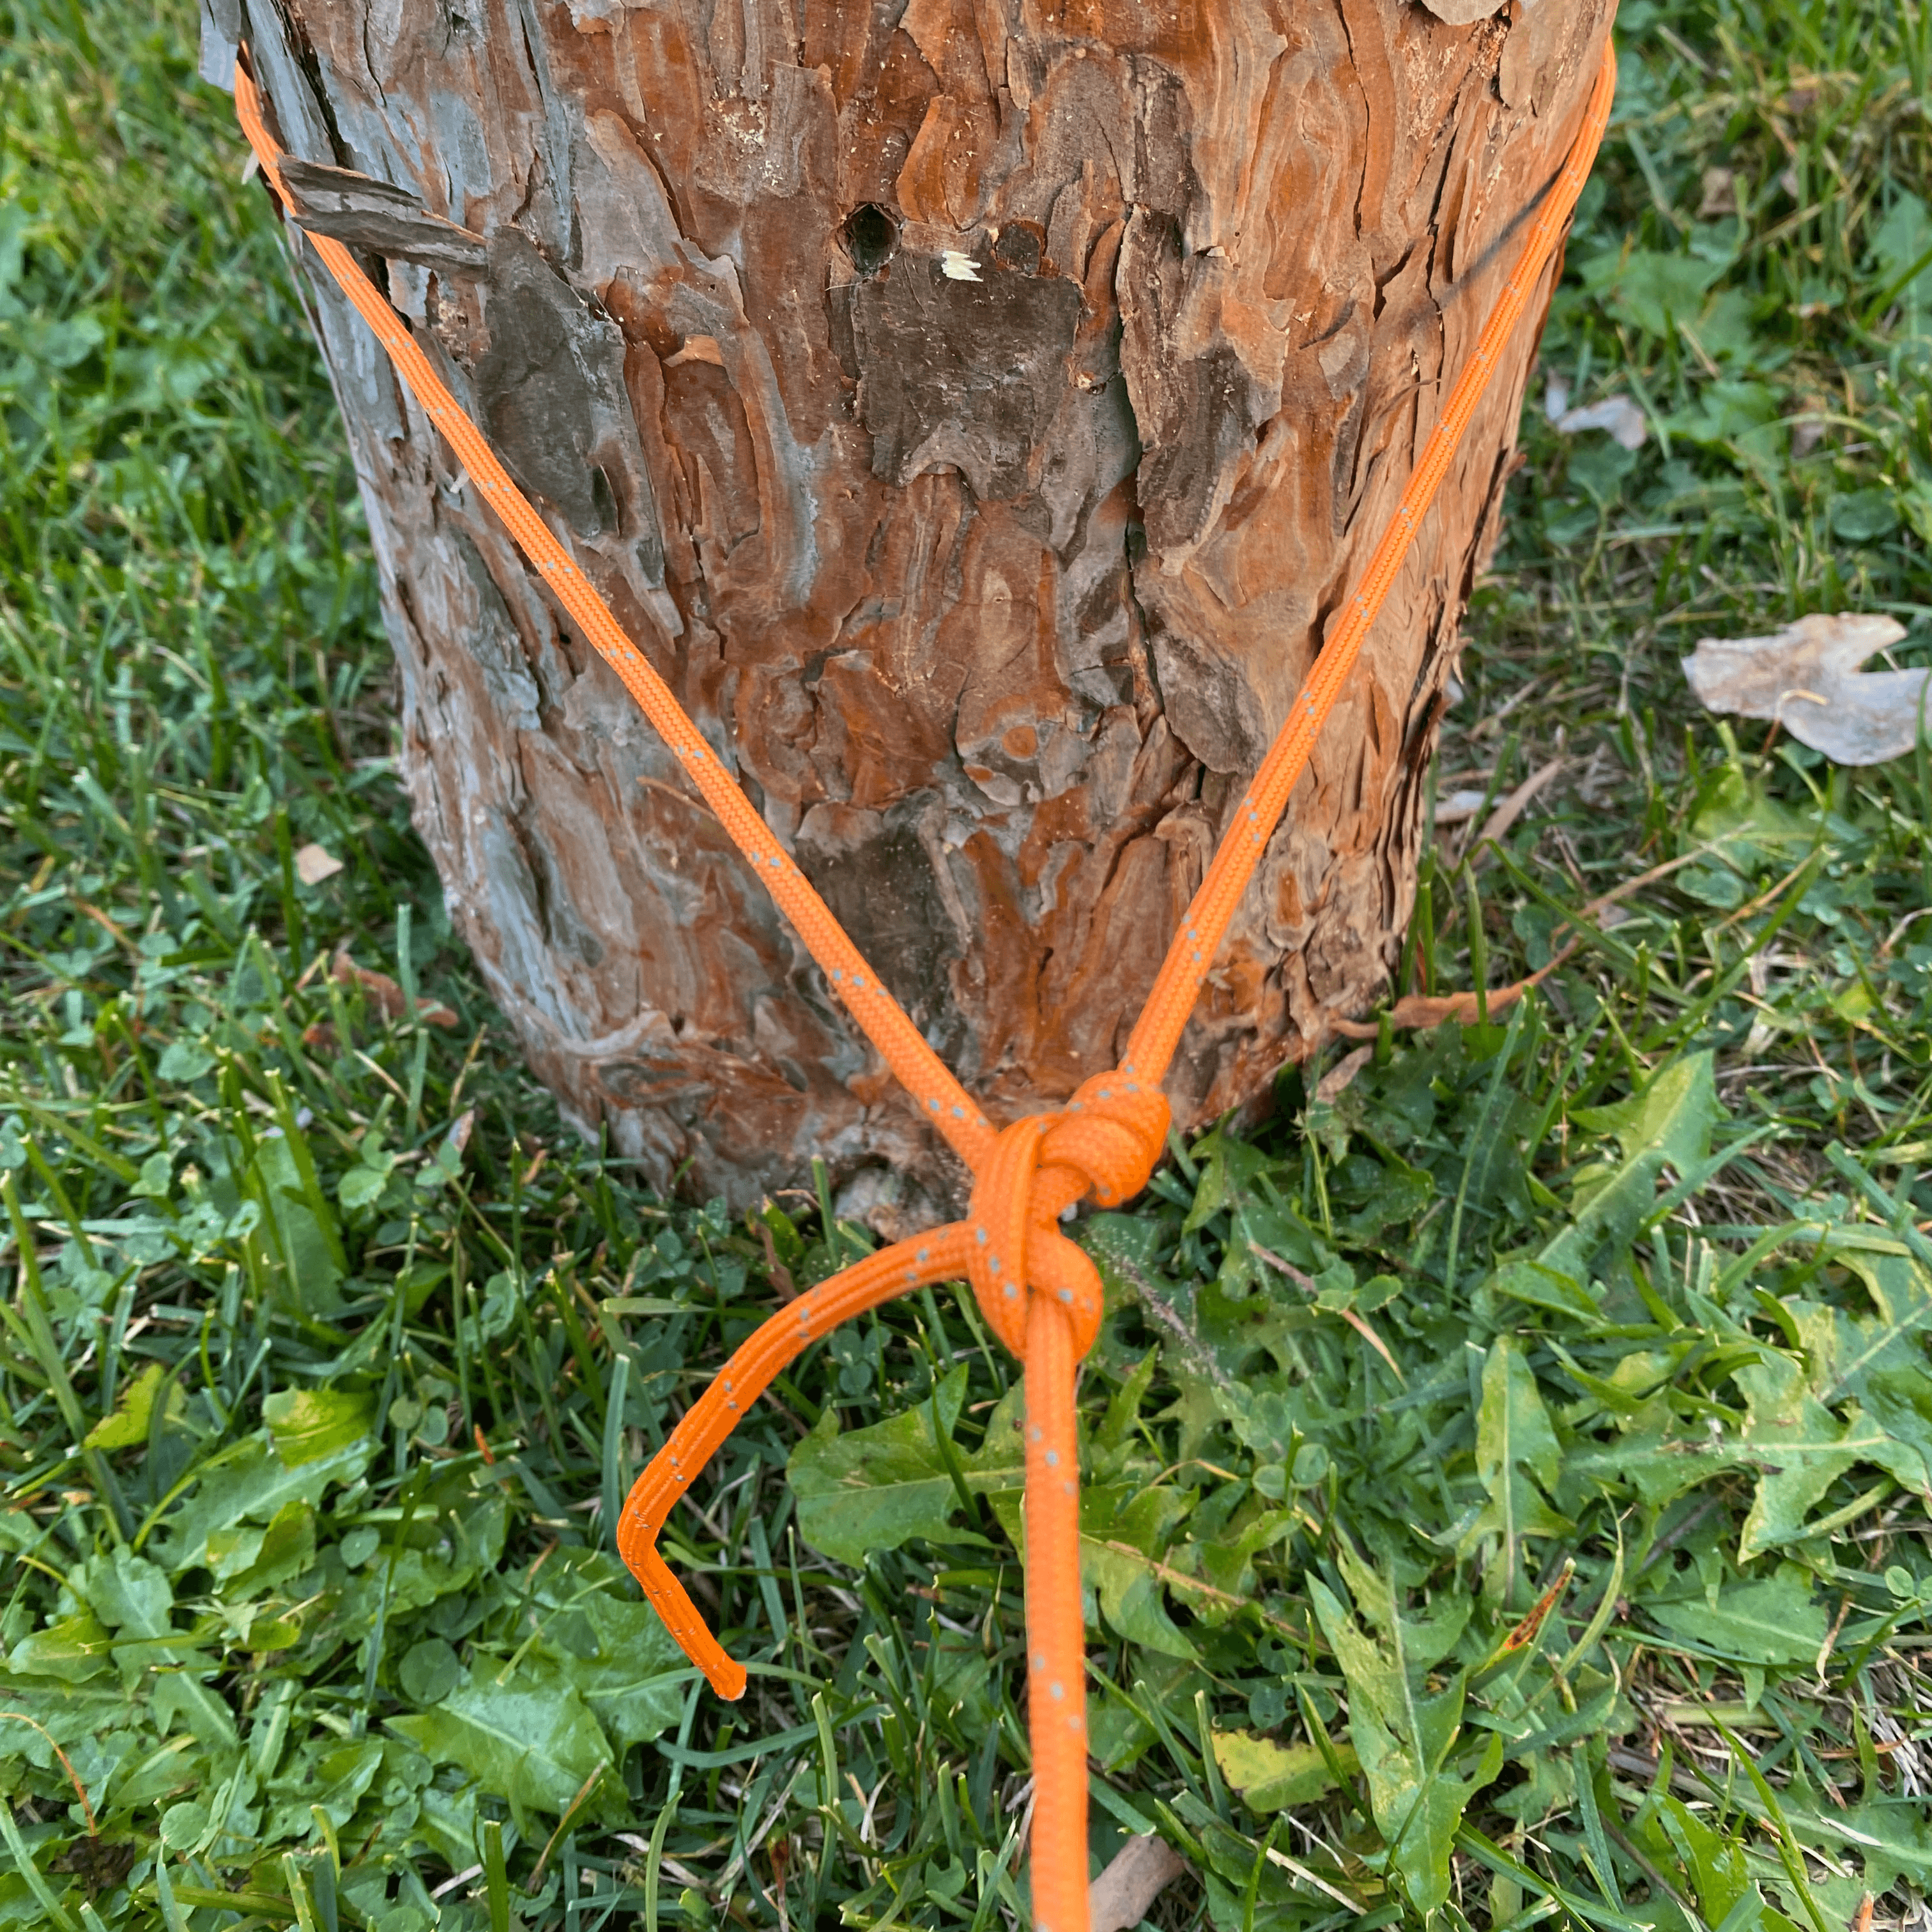
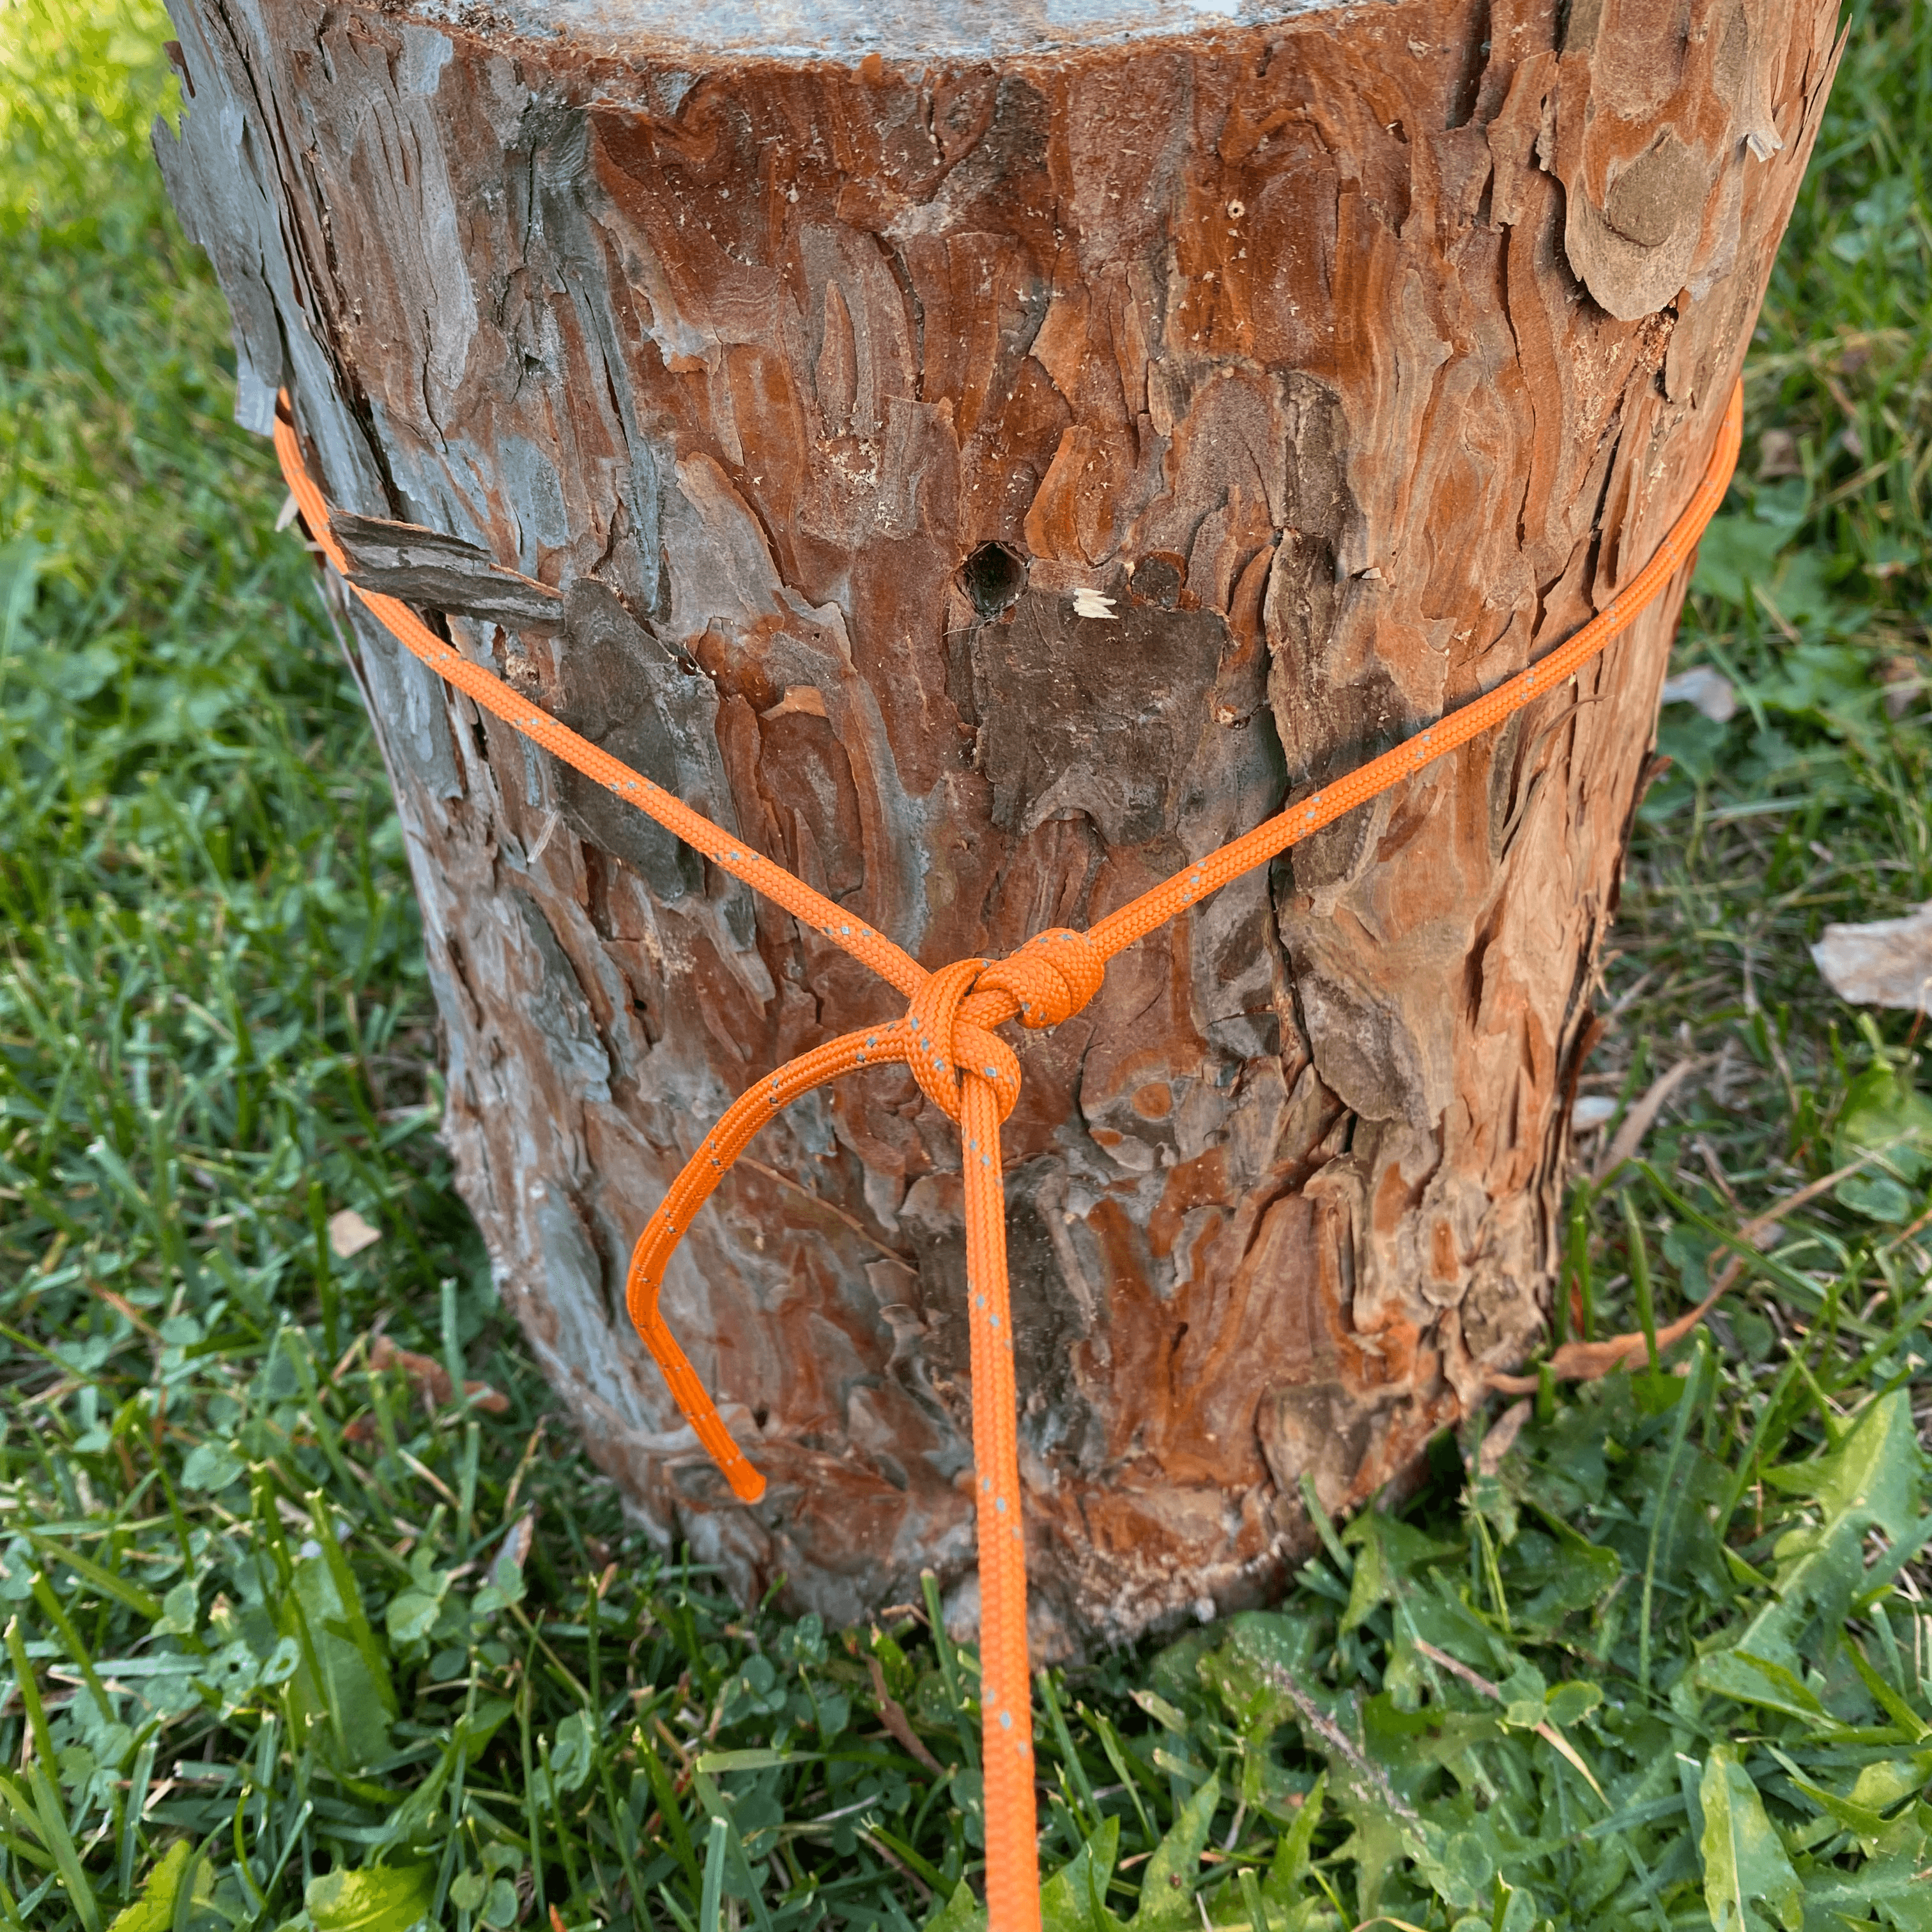
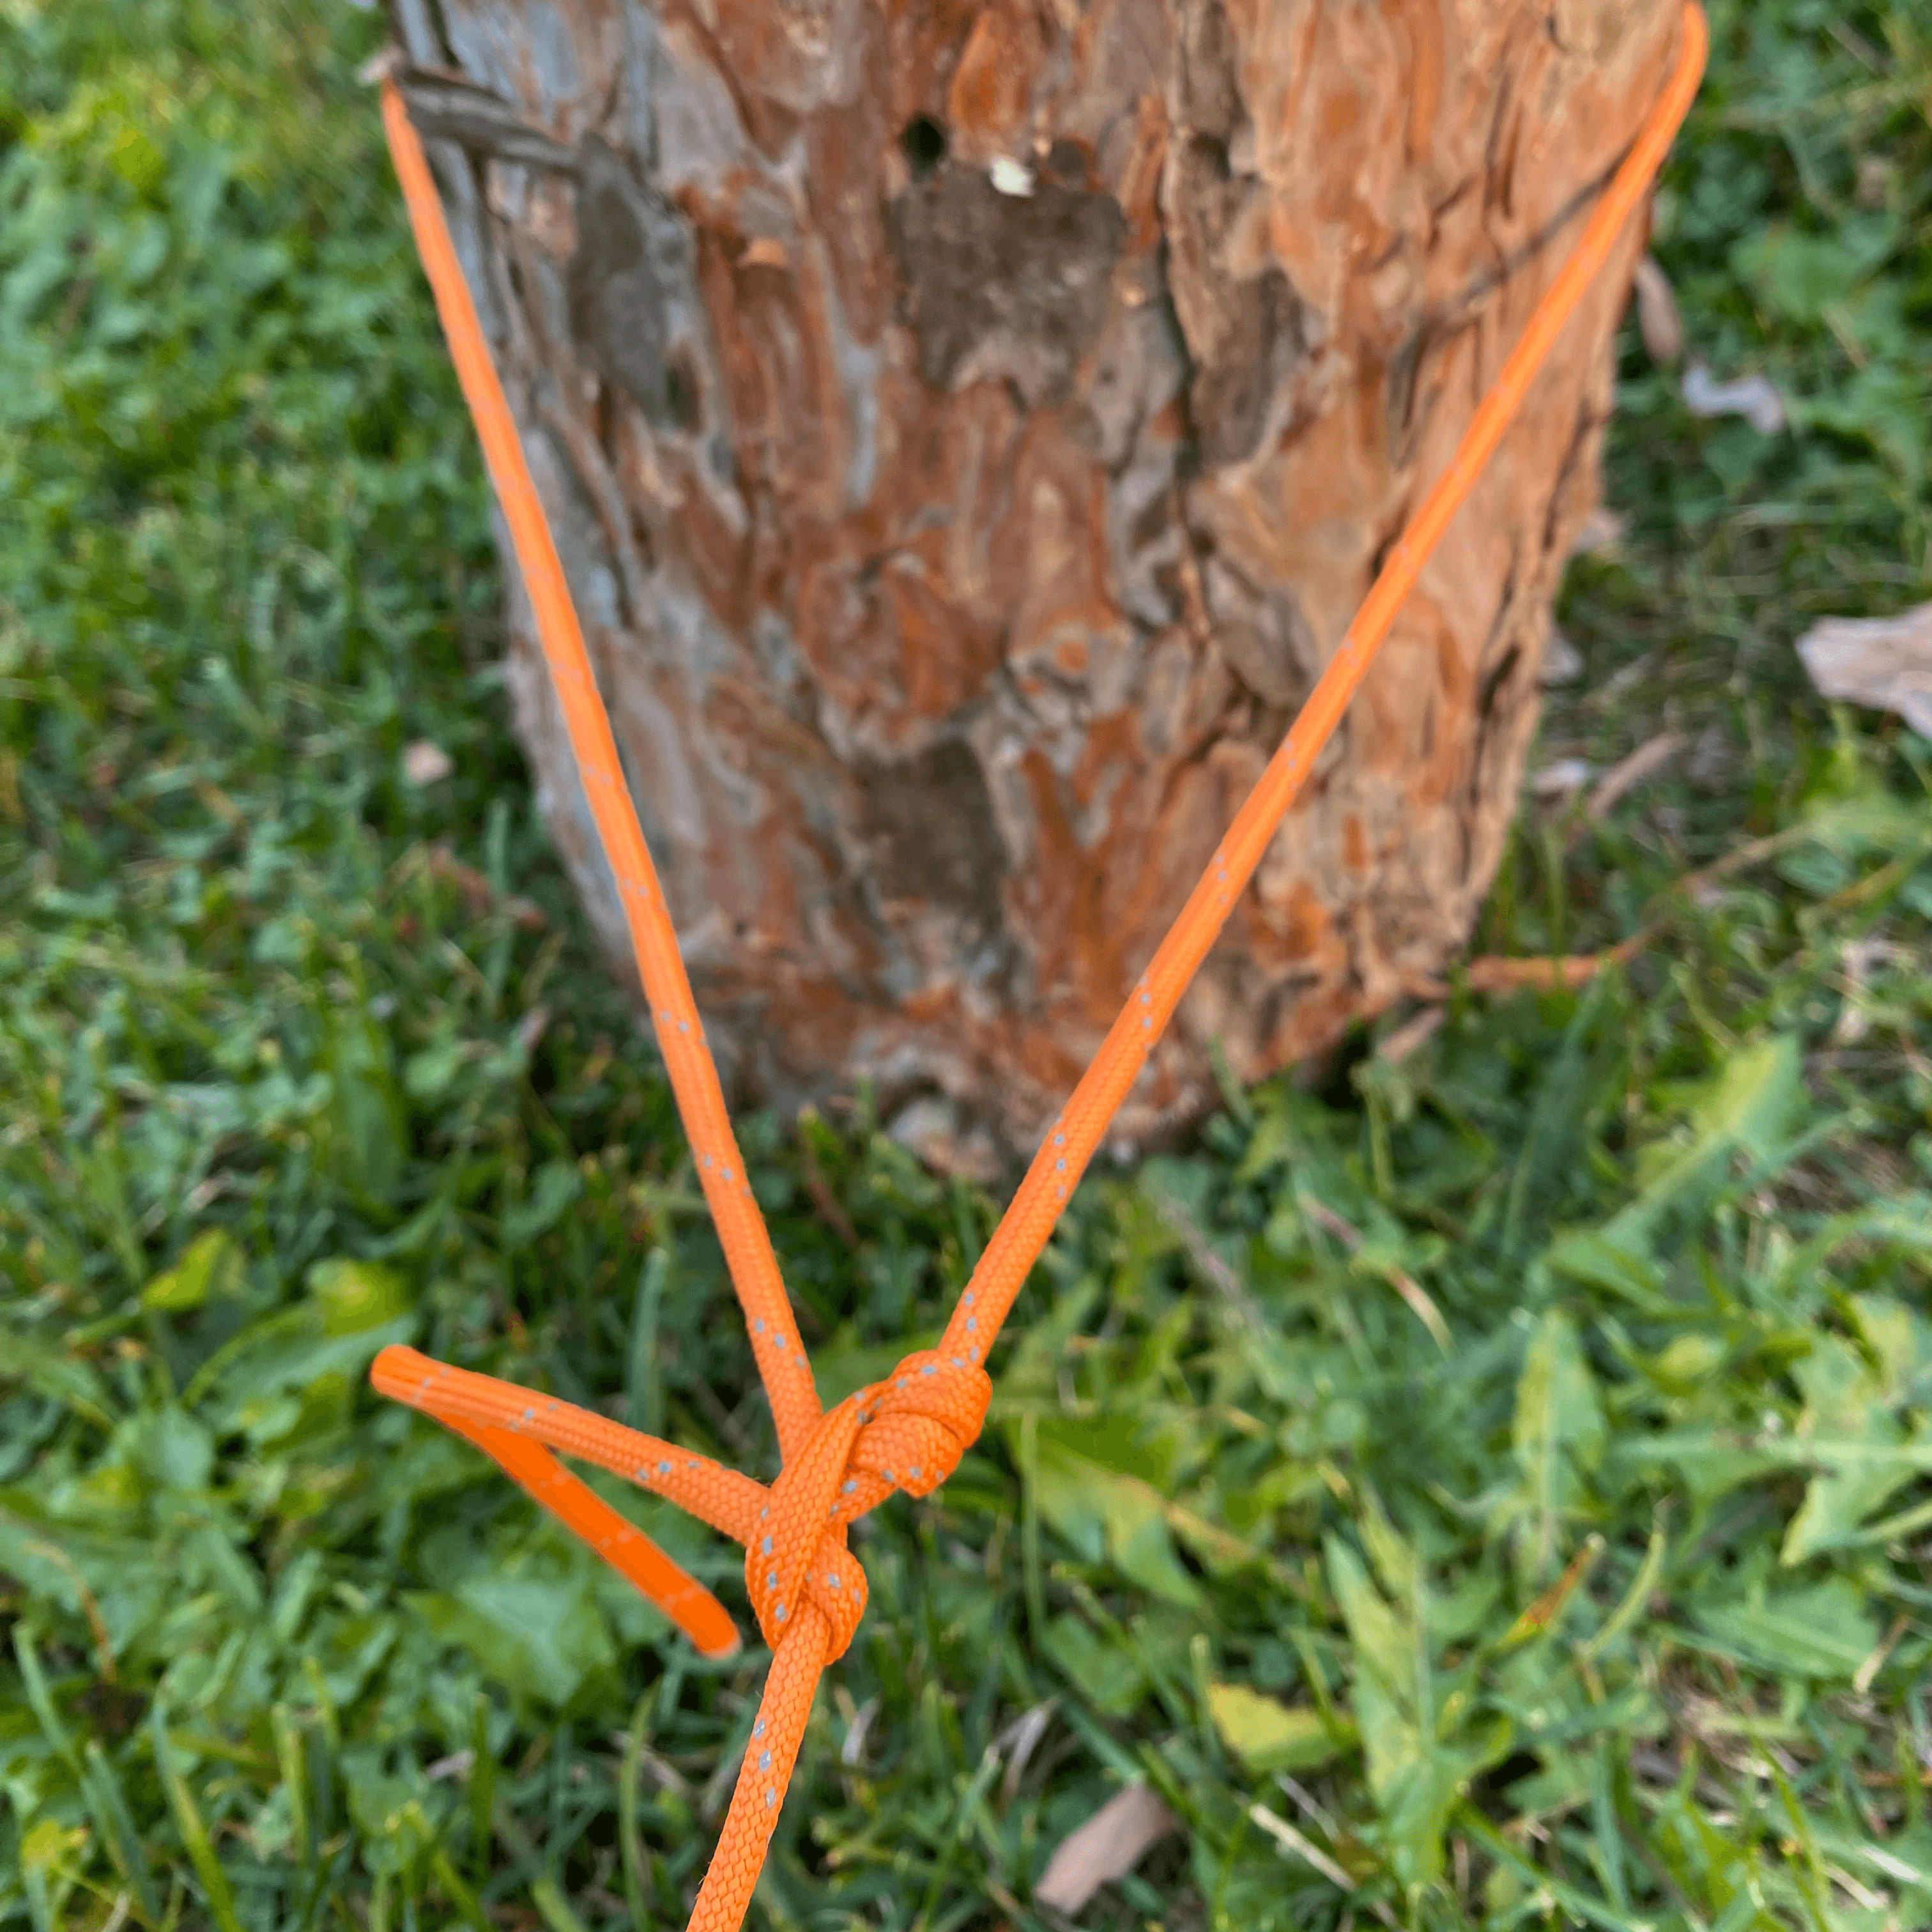
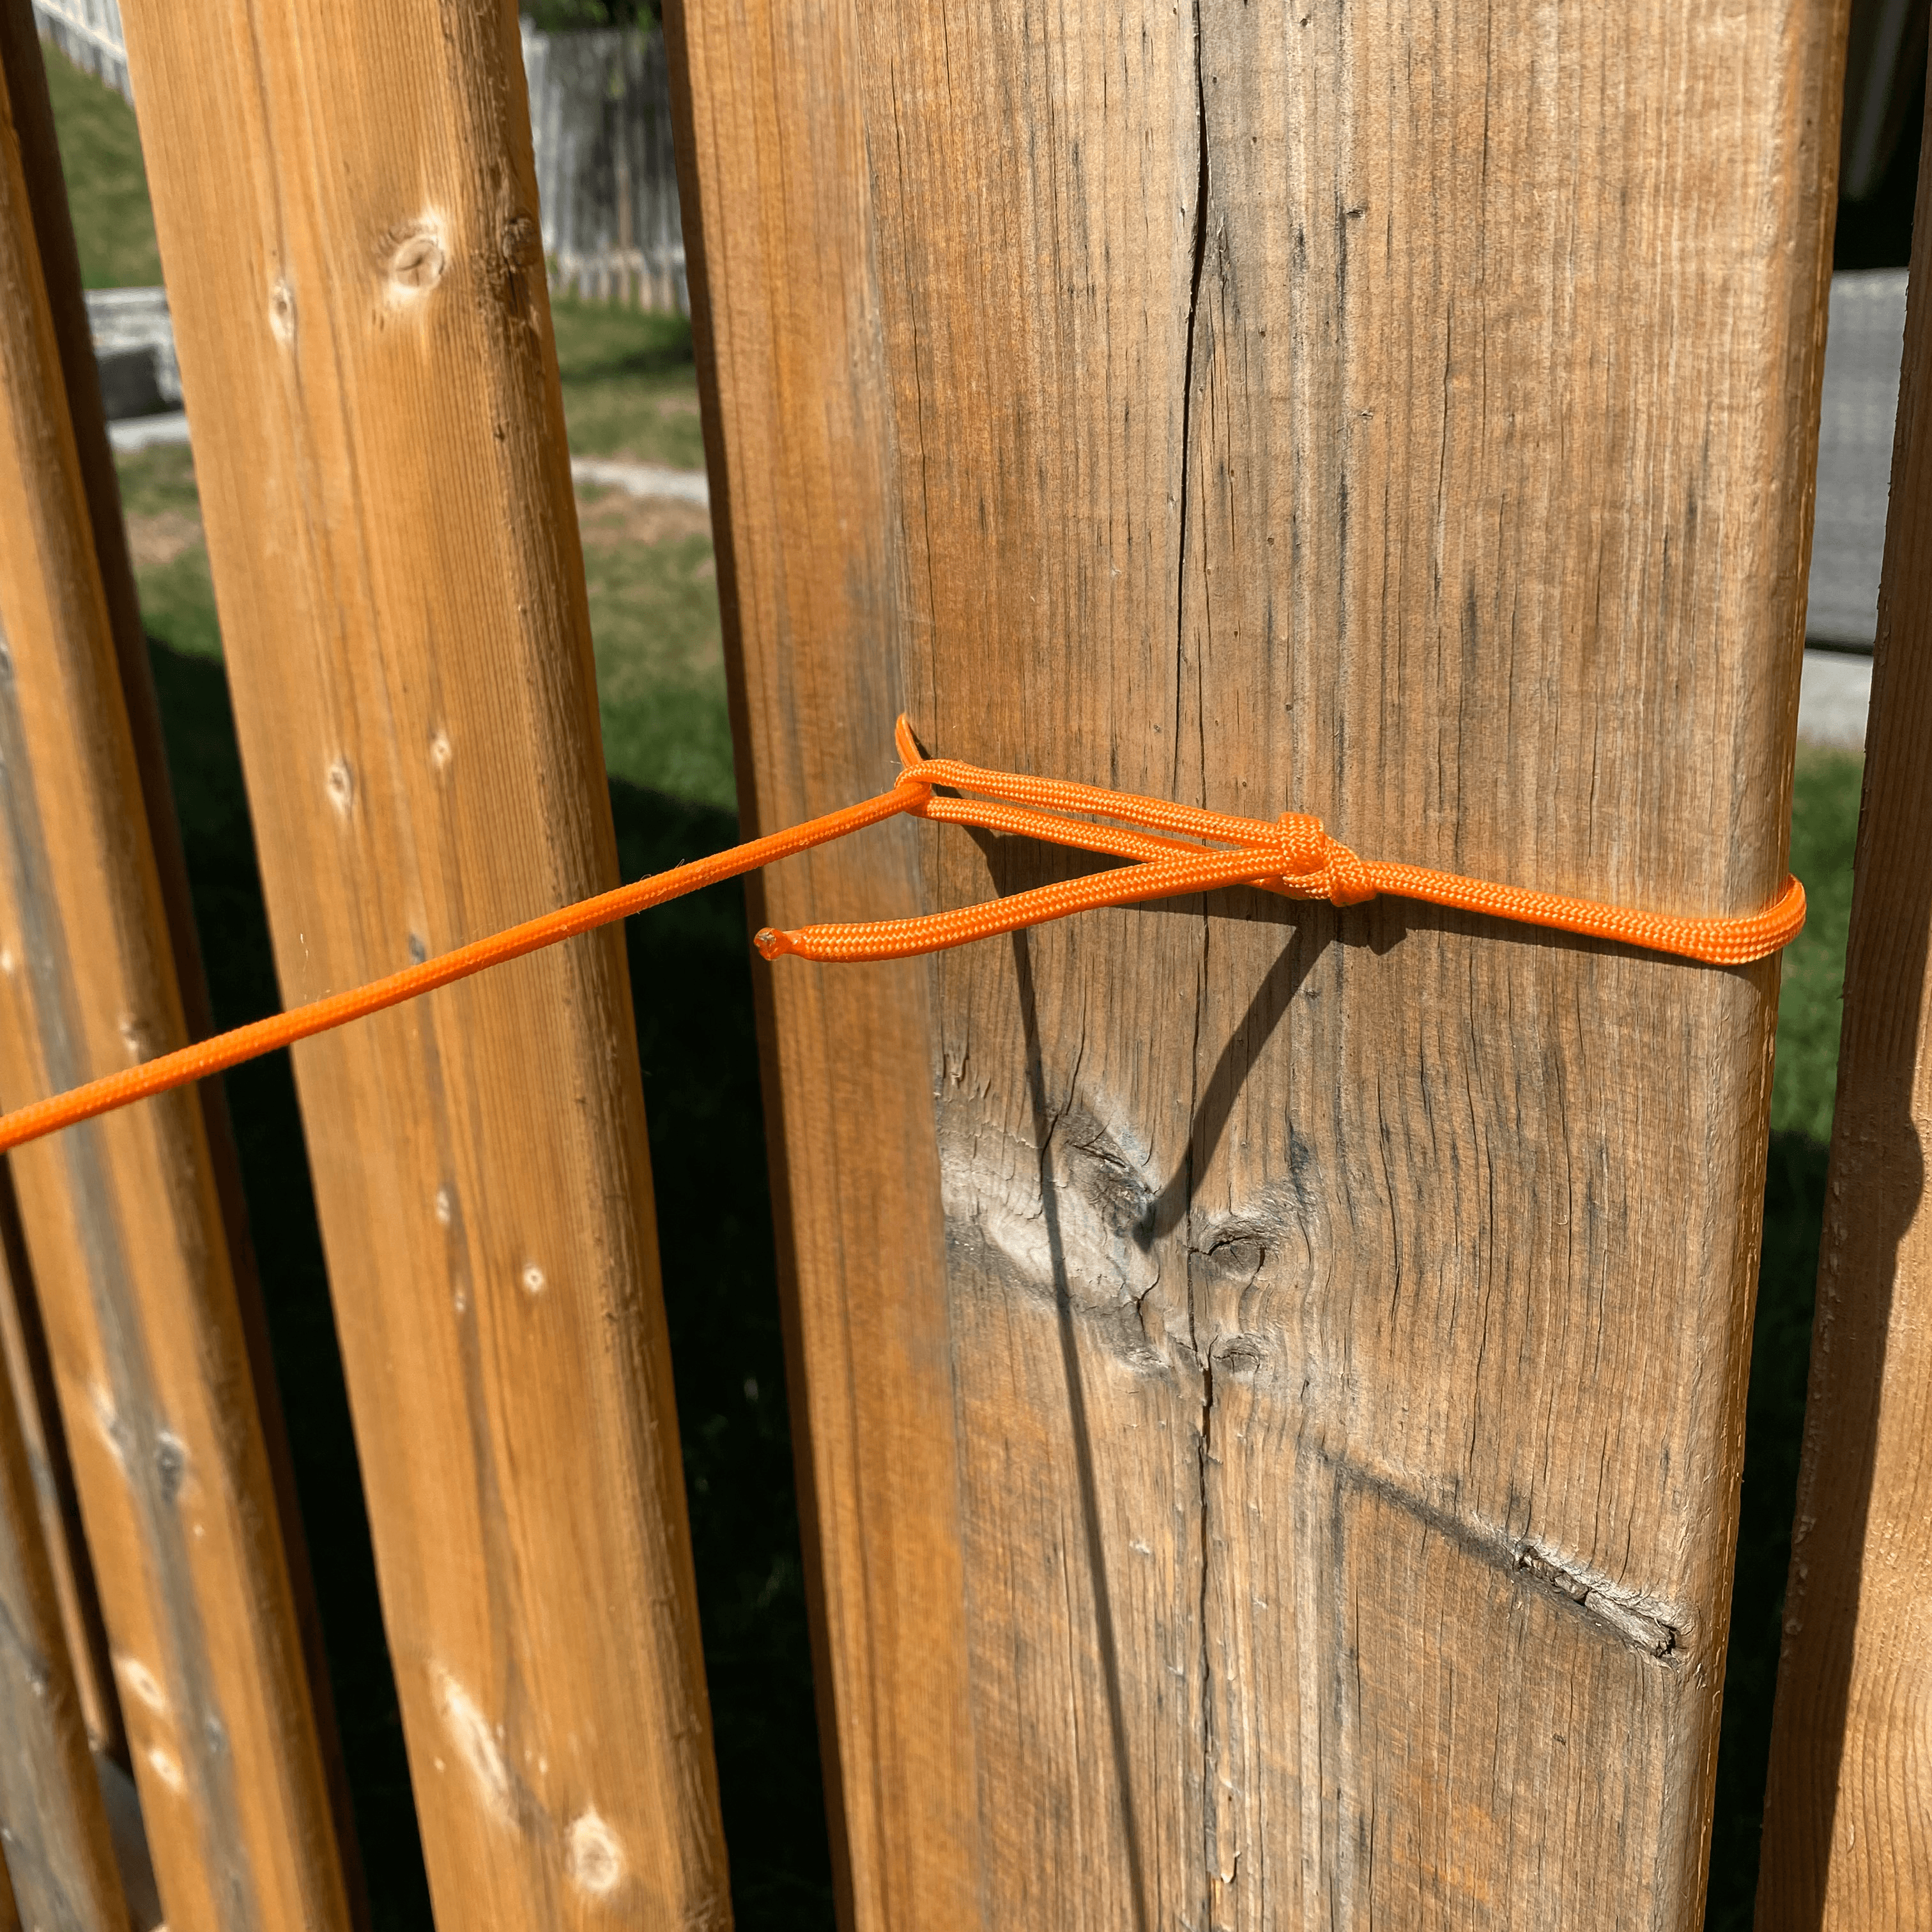
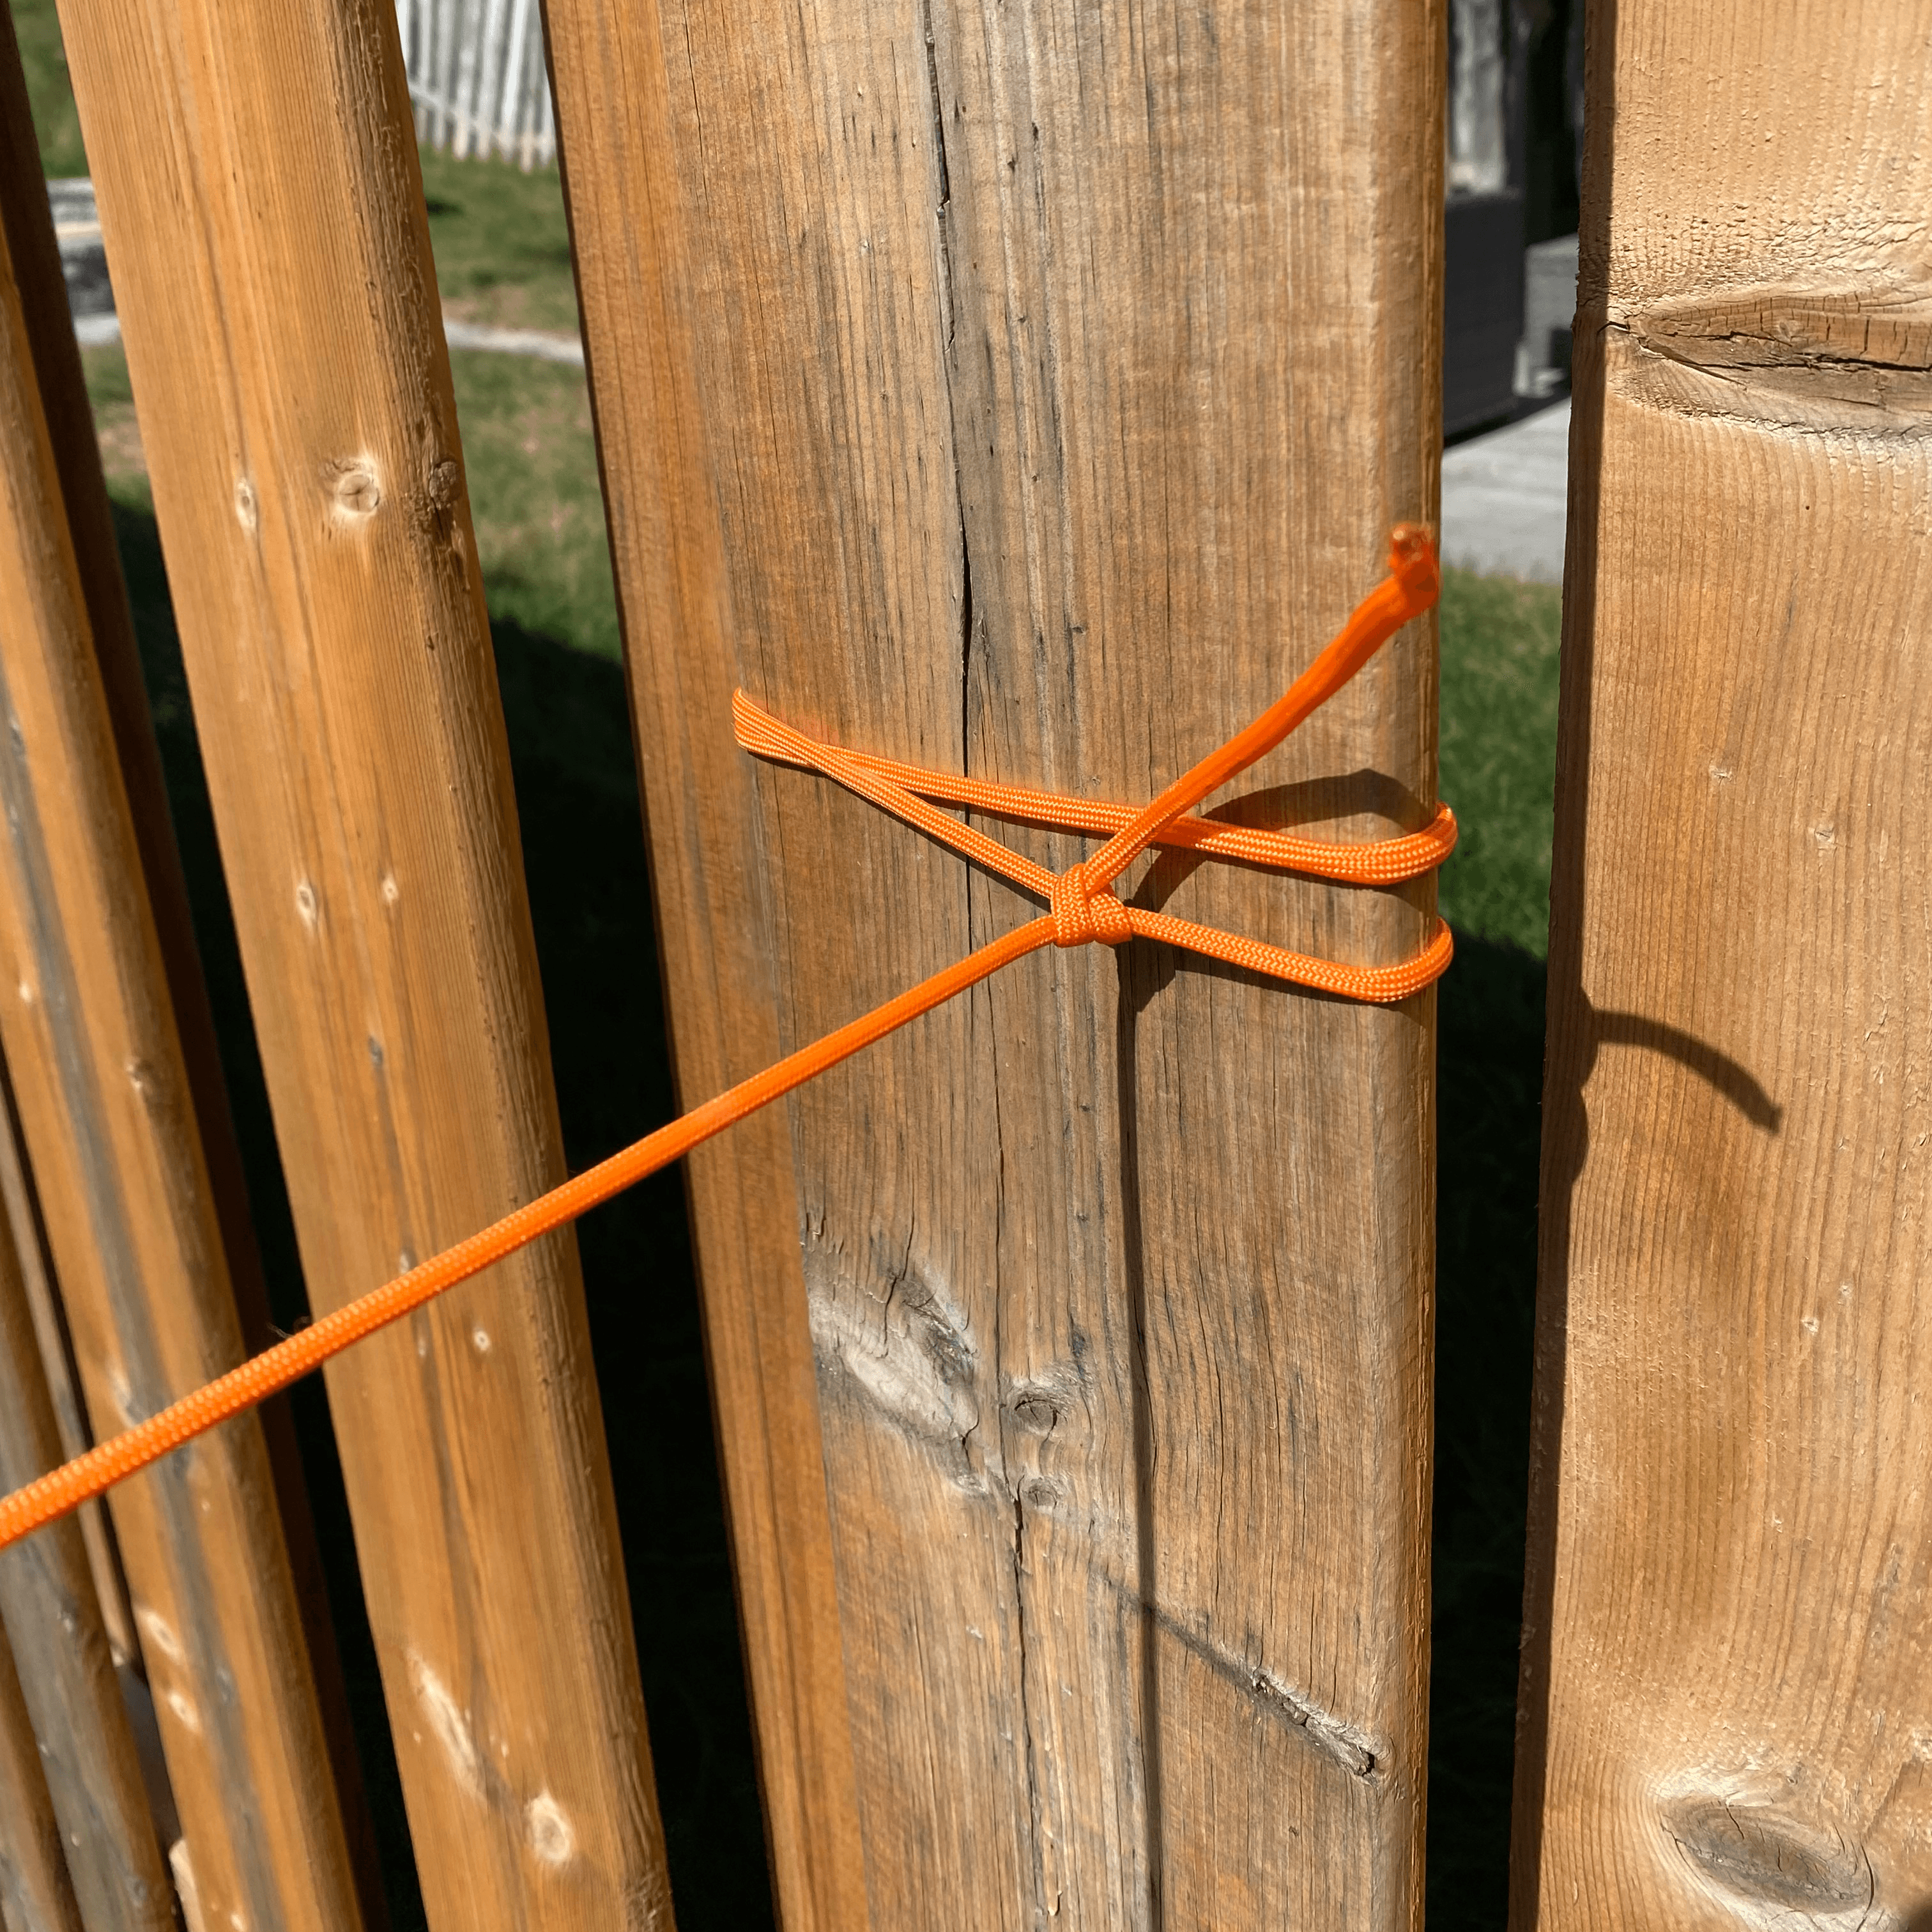
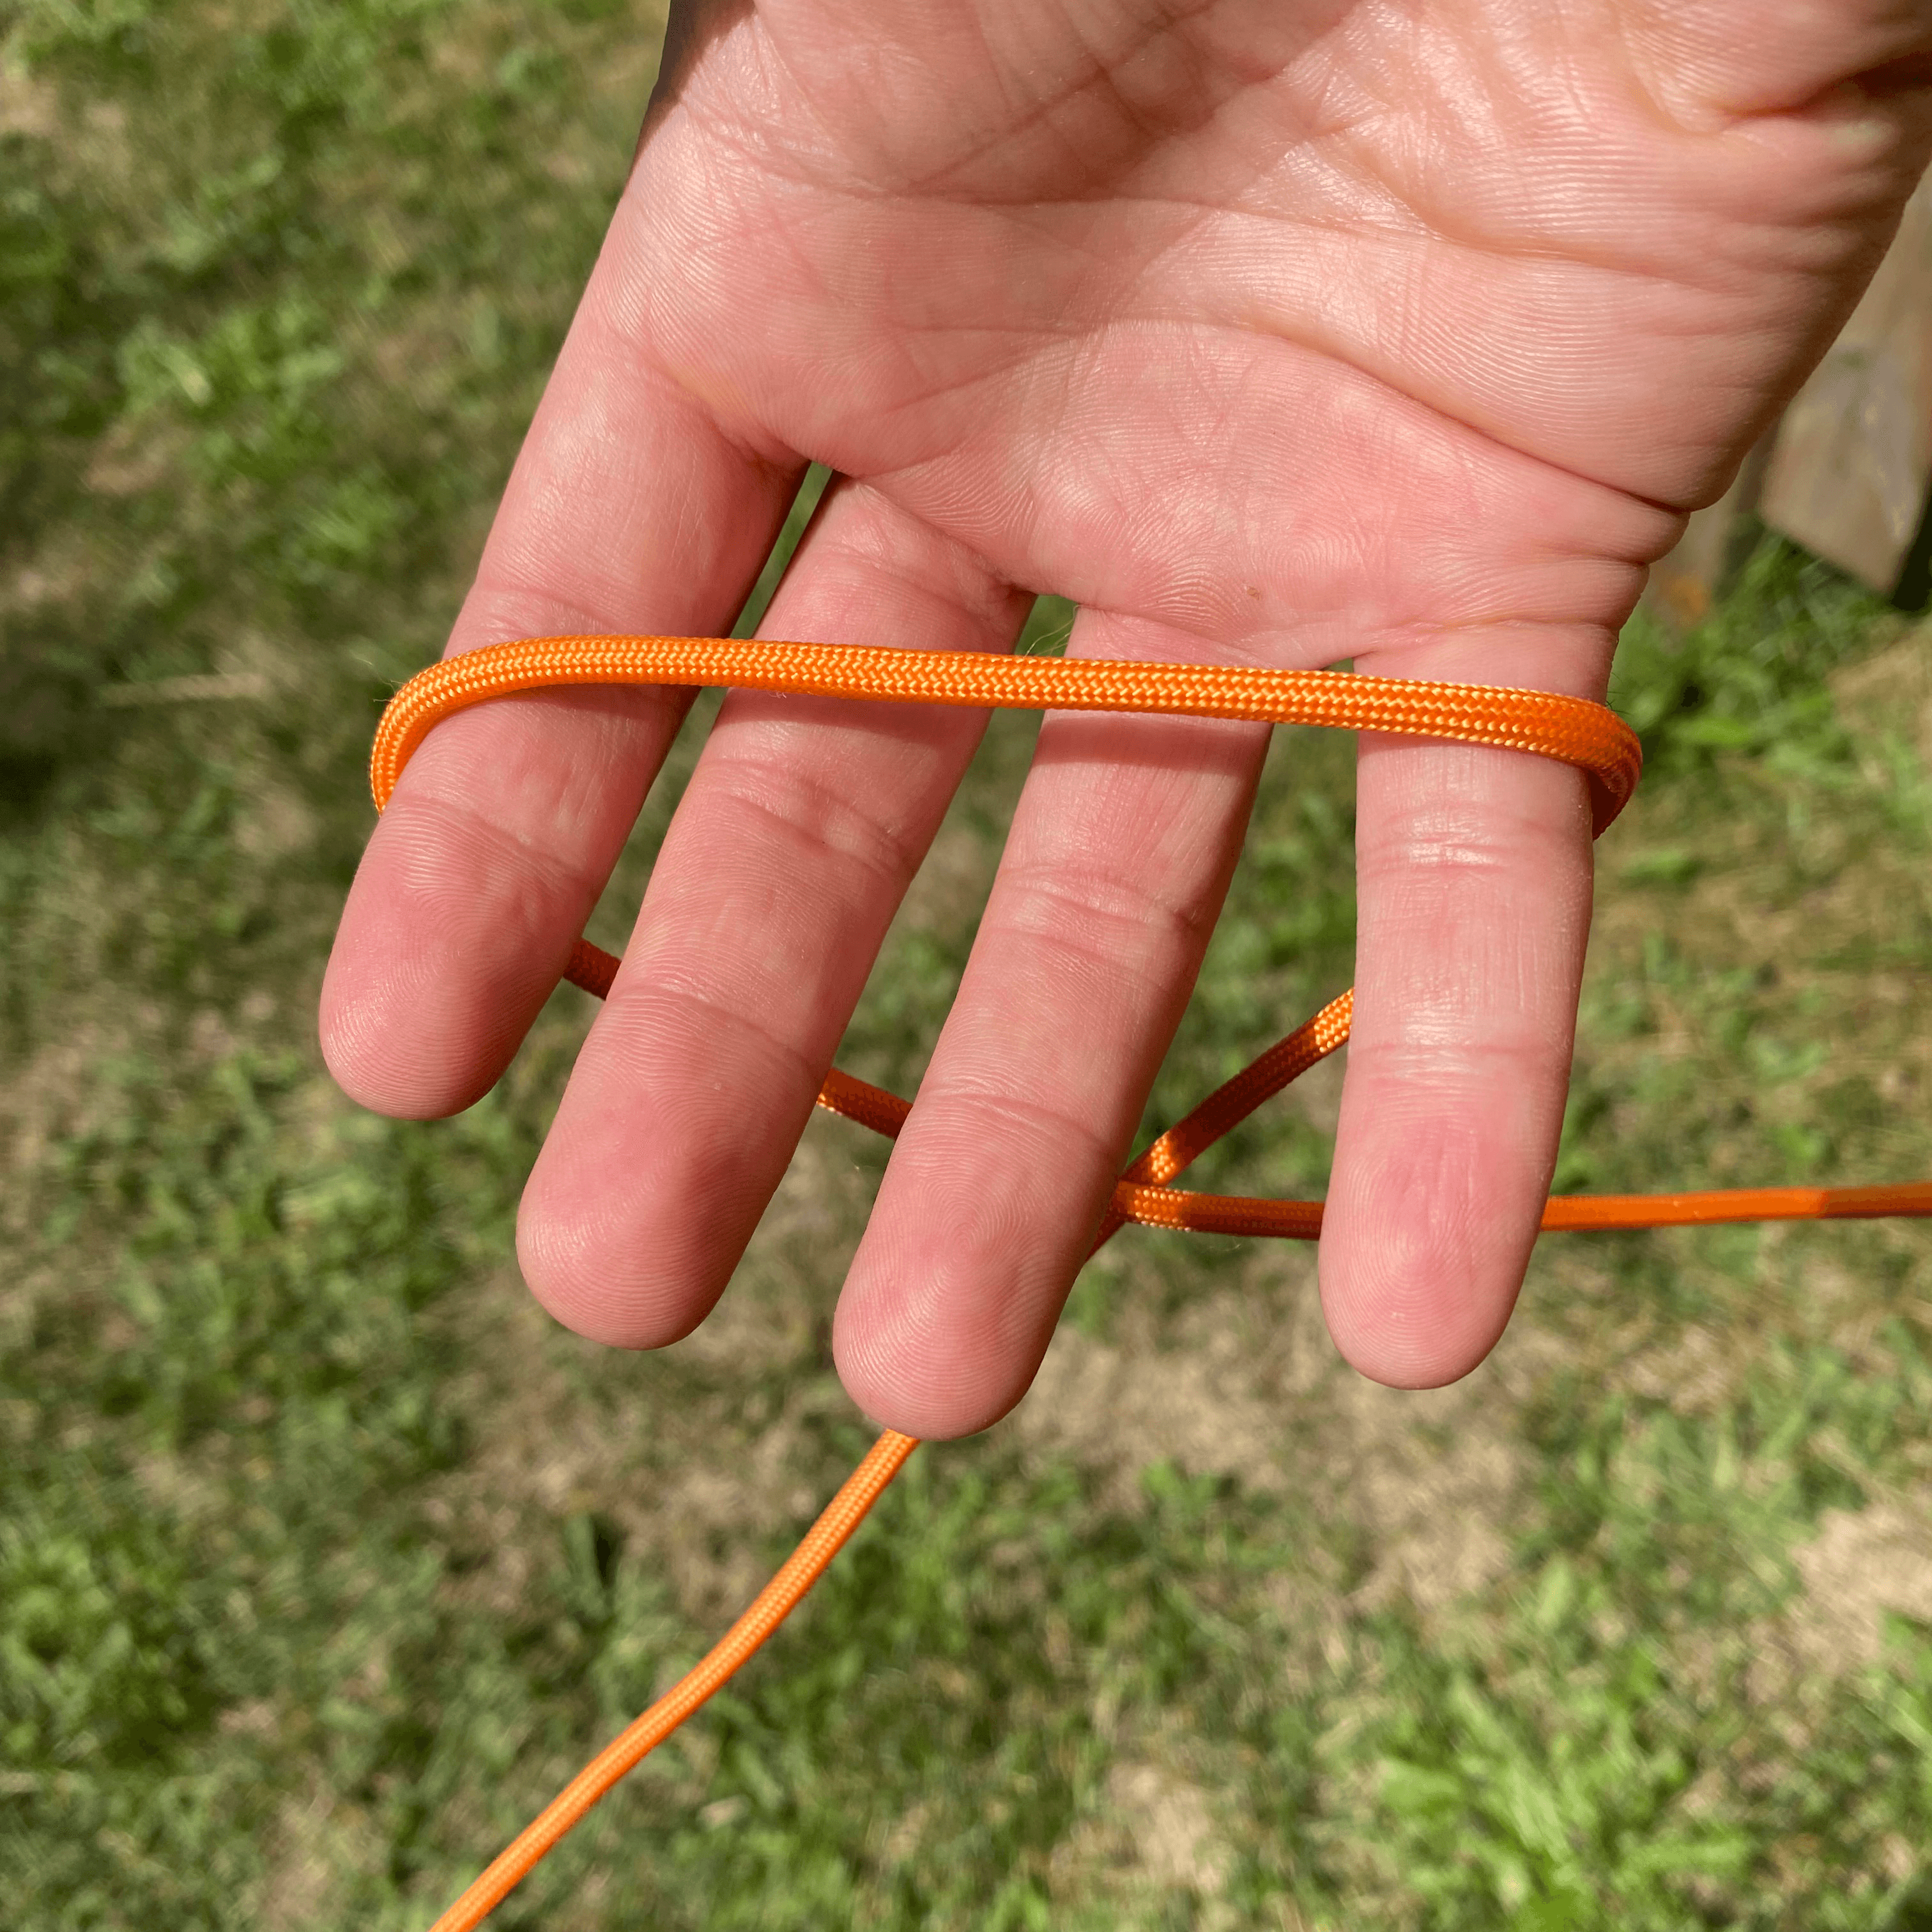
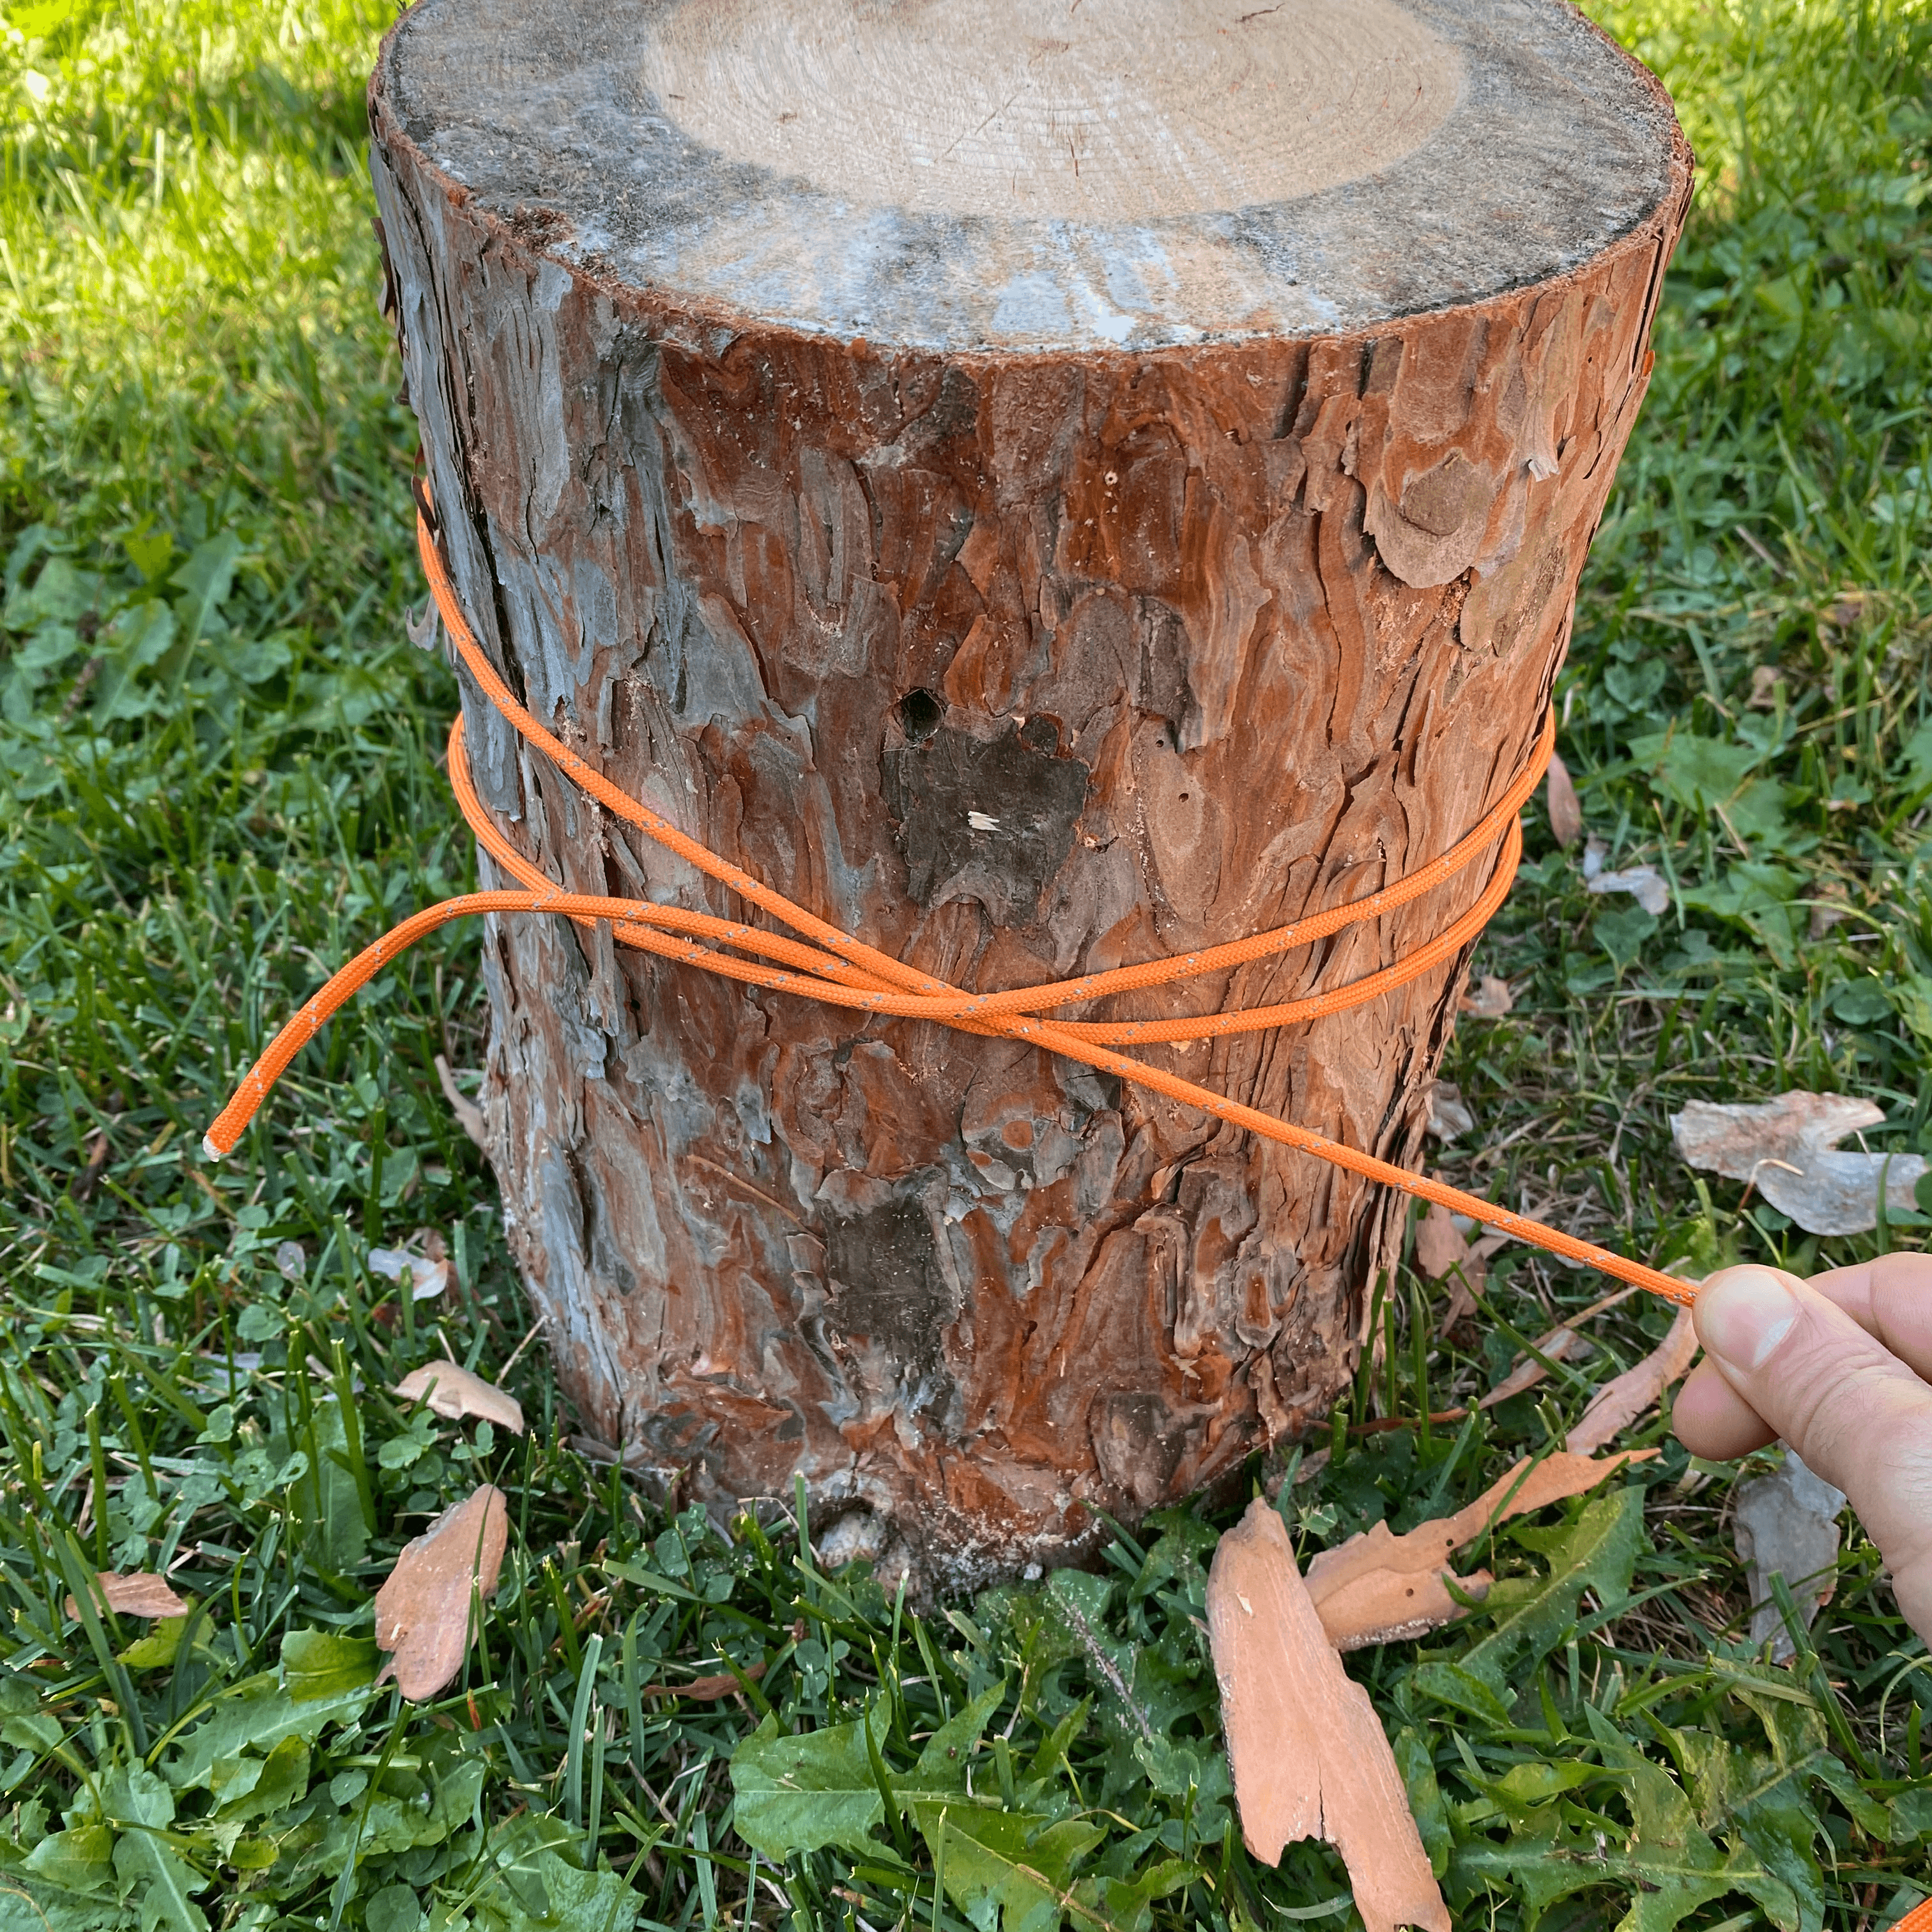
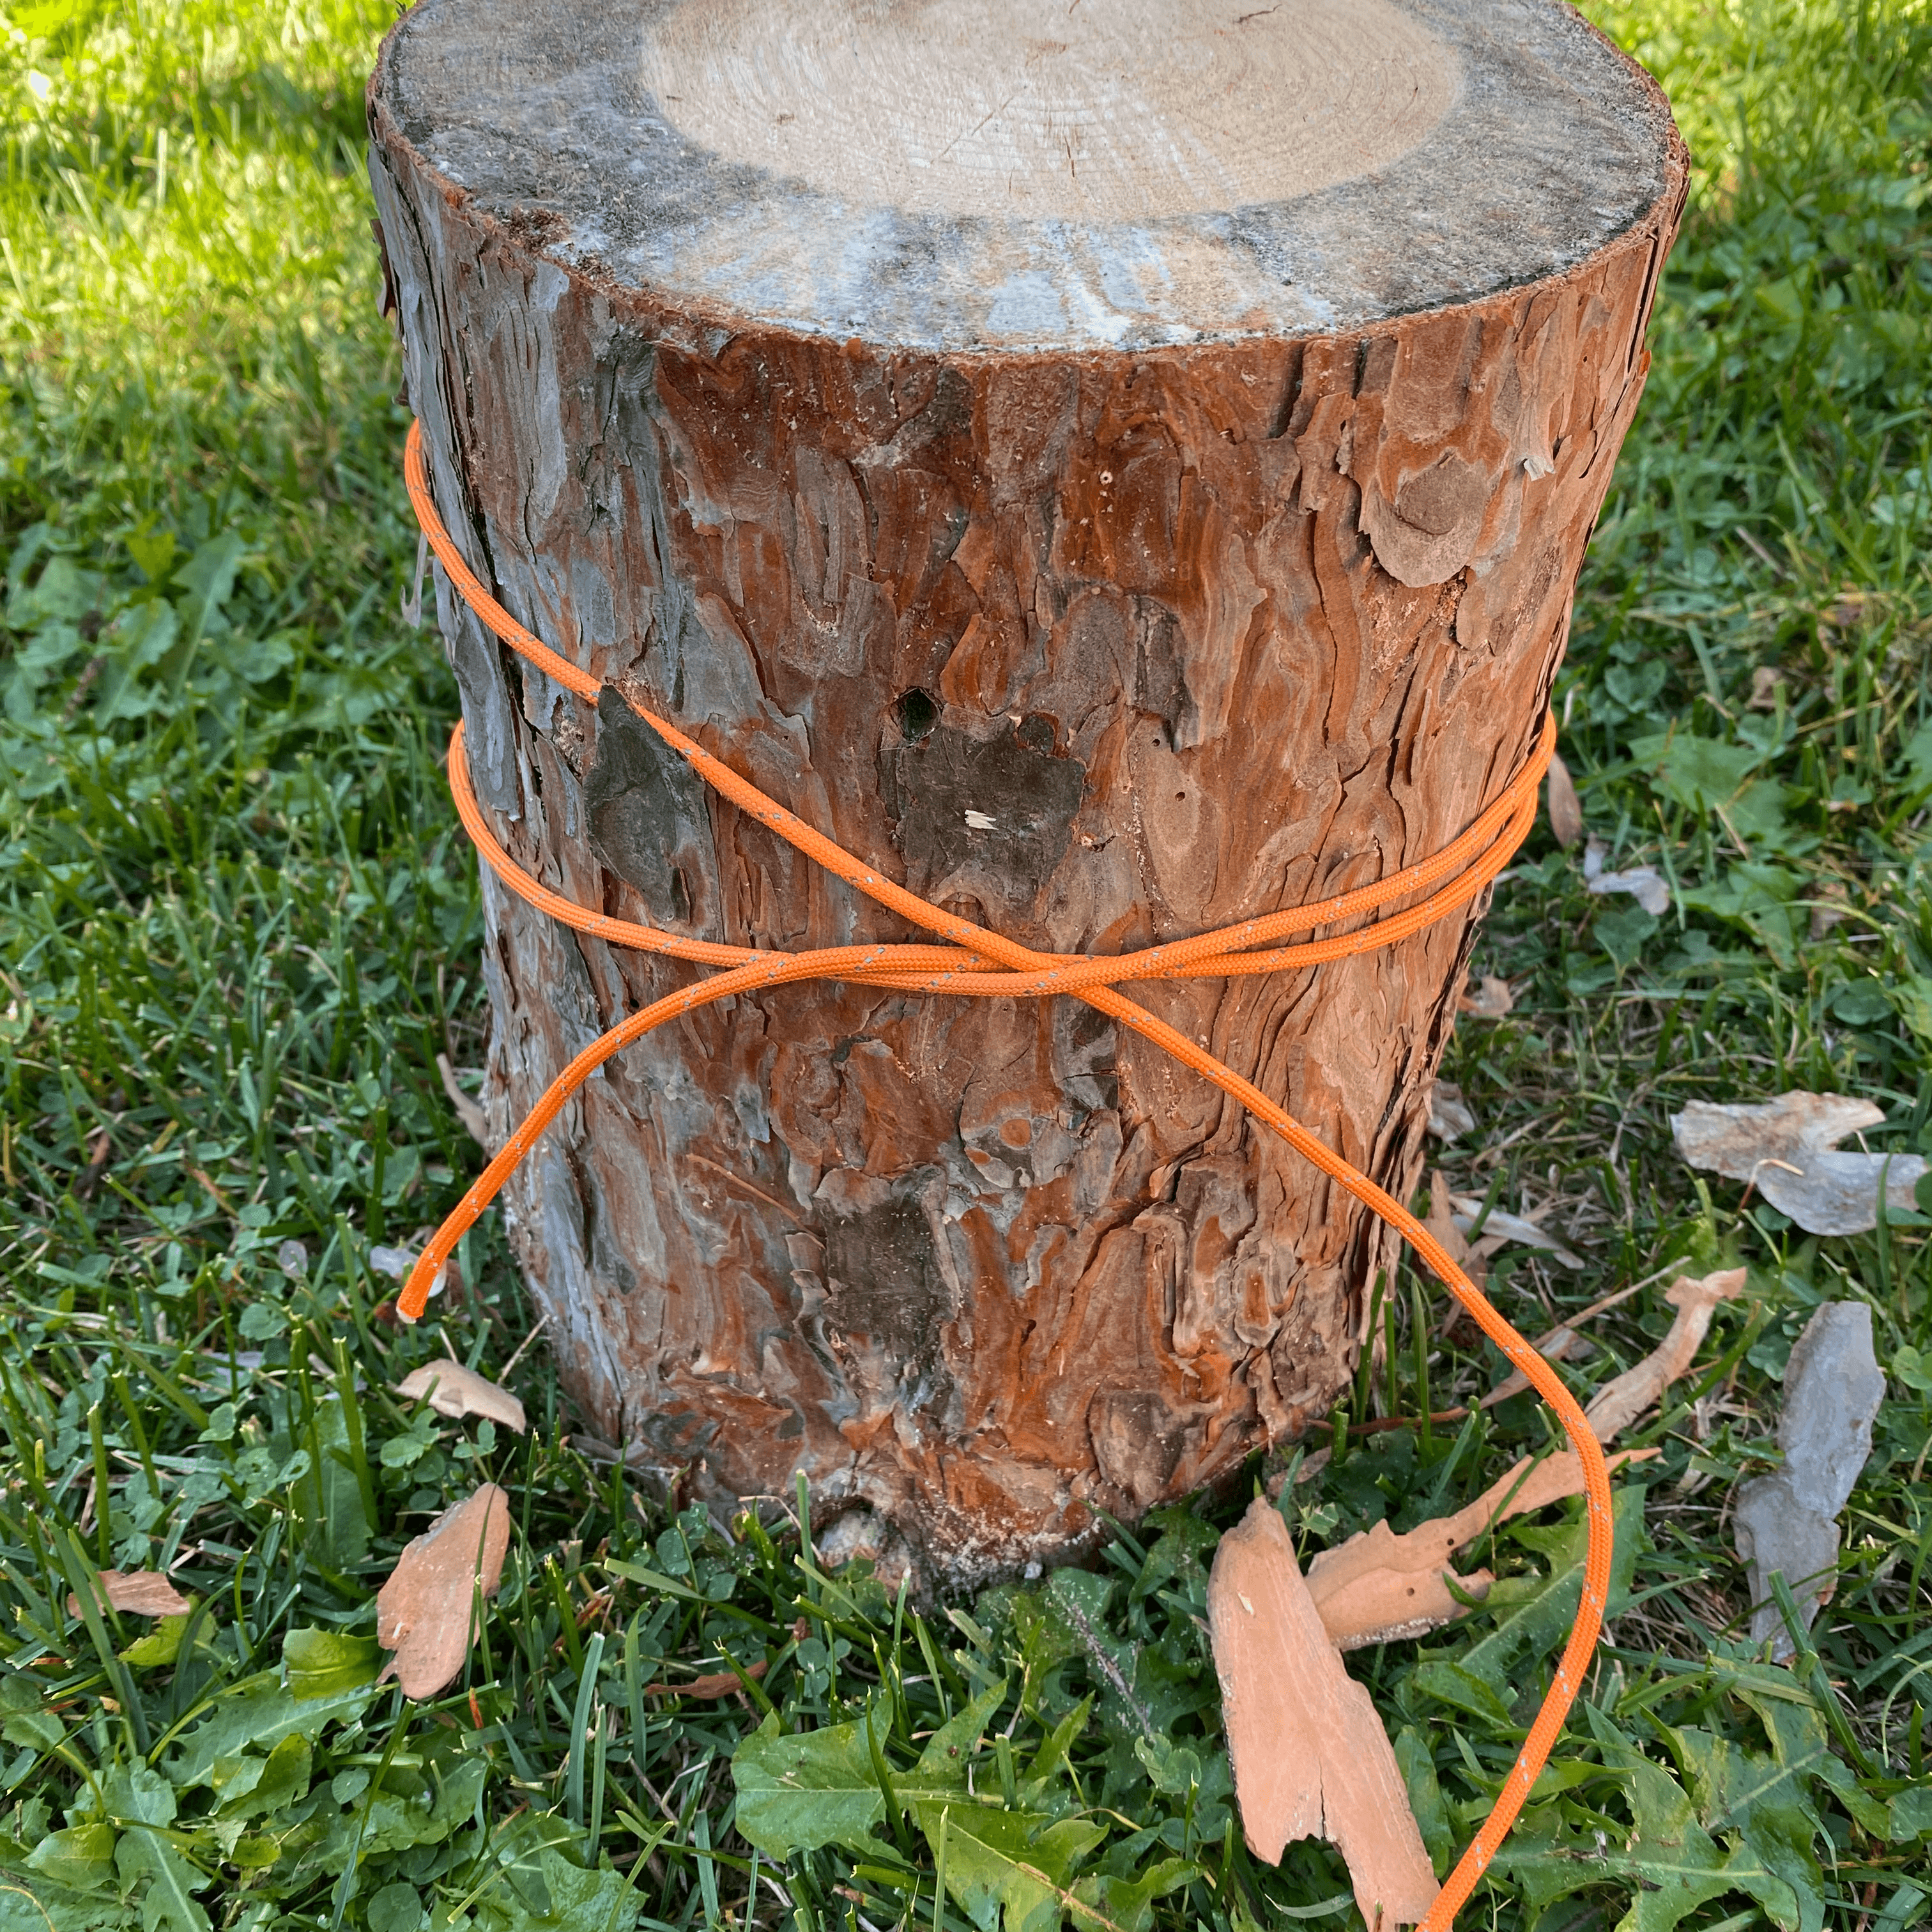
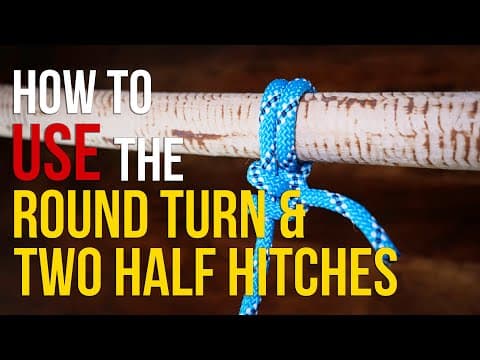
1) Round Turn + Two Half Hitches (Anchor Hitch)
Purpose: The most reliable general anchor knot for camping. Strong, secure, and unties easily.
Uses:
- Tie tarp lines to trees or stakes.
- Secure bear bag rope to a trunk.
- Anchor rope to posts.
How to Tie:
- Wrap rope around anchor once or twice (a round turn).
- Wrap working end around standing line.
- Cross over, tuck under, pull tight = first half hitch.
- Repeat once more = second half hitch.
- Tighten hitches if not done so.
- Cinch loop to anchor.
- Leave a 2–3 in tail.
✅ Shape Check: Rope grips the anchor with one or two full turns; two neat half hitches sit on the standing line.
👉 Use this as your default anchor knot when you don’t need a loop.
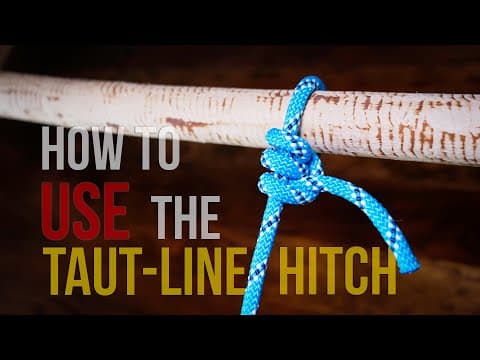
2) Taut-Line Hitch (Adjustable Hitch)
Purpose: A sliding hitch that adjusts rope tension.
Uses:
- Guy-lines for tents and tarps.
- Adjustable clotheslines.
How to Tie:
- Wrap rope around your anchor (stake, pole, or rock).
- Leave 6–8 in working end.
- Take the working end and wrap it over then under the standing line, on the anchor side of the loop.
- Repeat this once more in the same direction.
- You now have two wraps over–under toward the anchor.
- Take the working end and wrap it under then over the standing line, this time on the free side (away from the anchor).
- This is the “locking” wrap.
- Pull snug, leaving a 2–3 in tail.
- Slide the hitch to adjust tension.
✅ Shape Check:
- Two wraps sit between the anchor and the knot (over–under toward anchor).
- One wrap sits on the free side of the knot (under–over away from anchor).
- The working end exits alongside the standing line, pointing toward the incoming loop from the anchor.
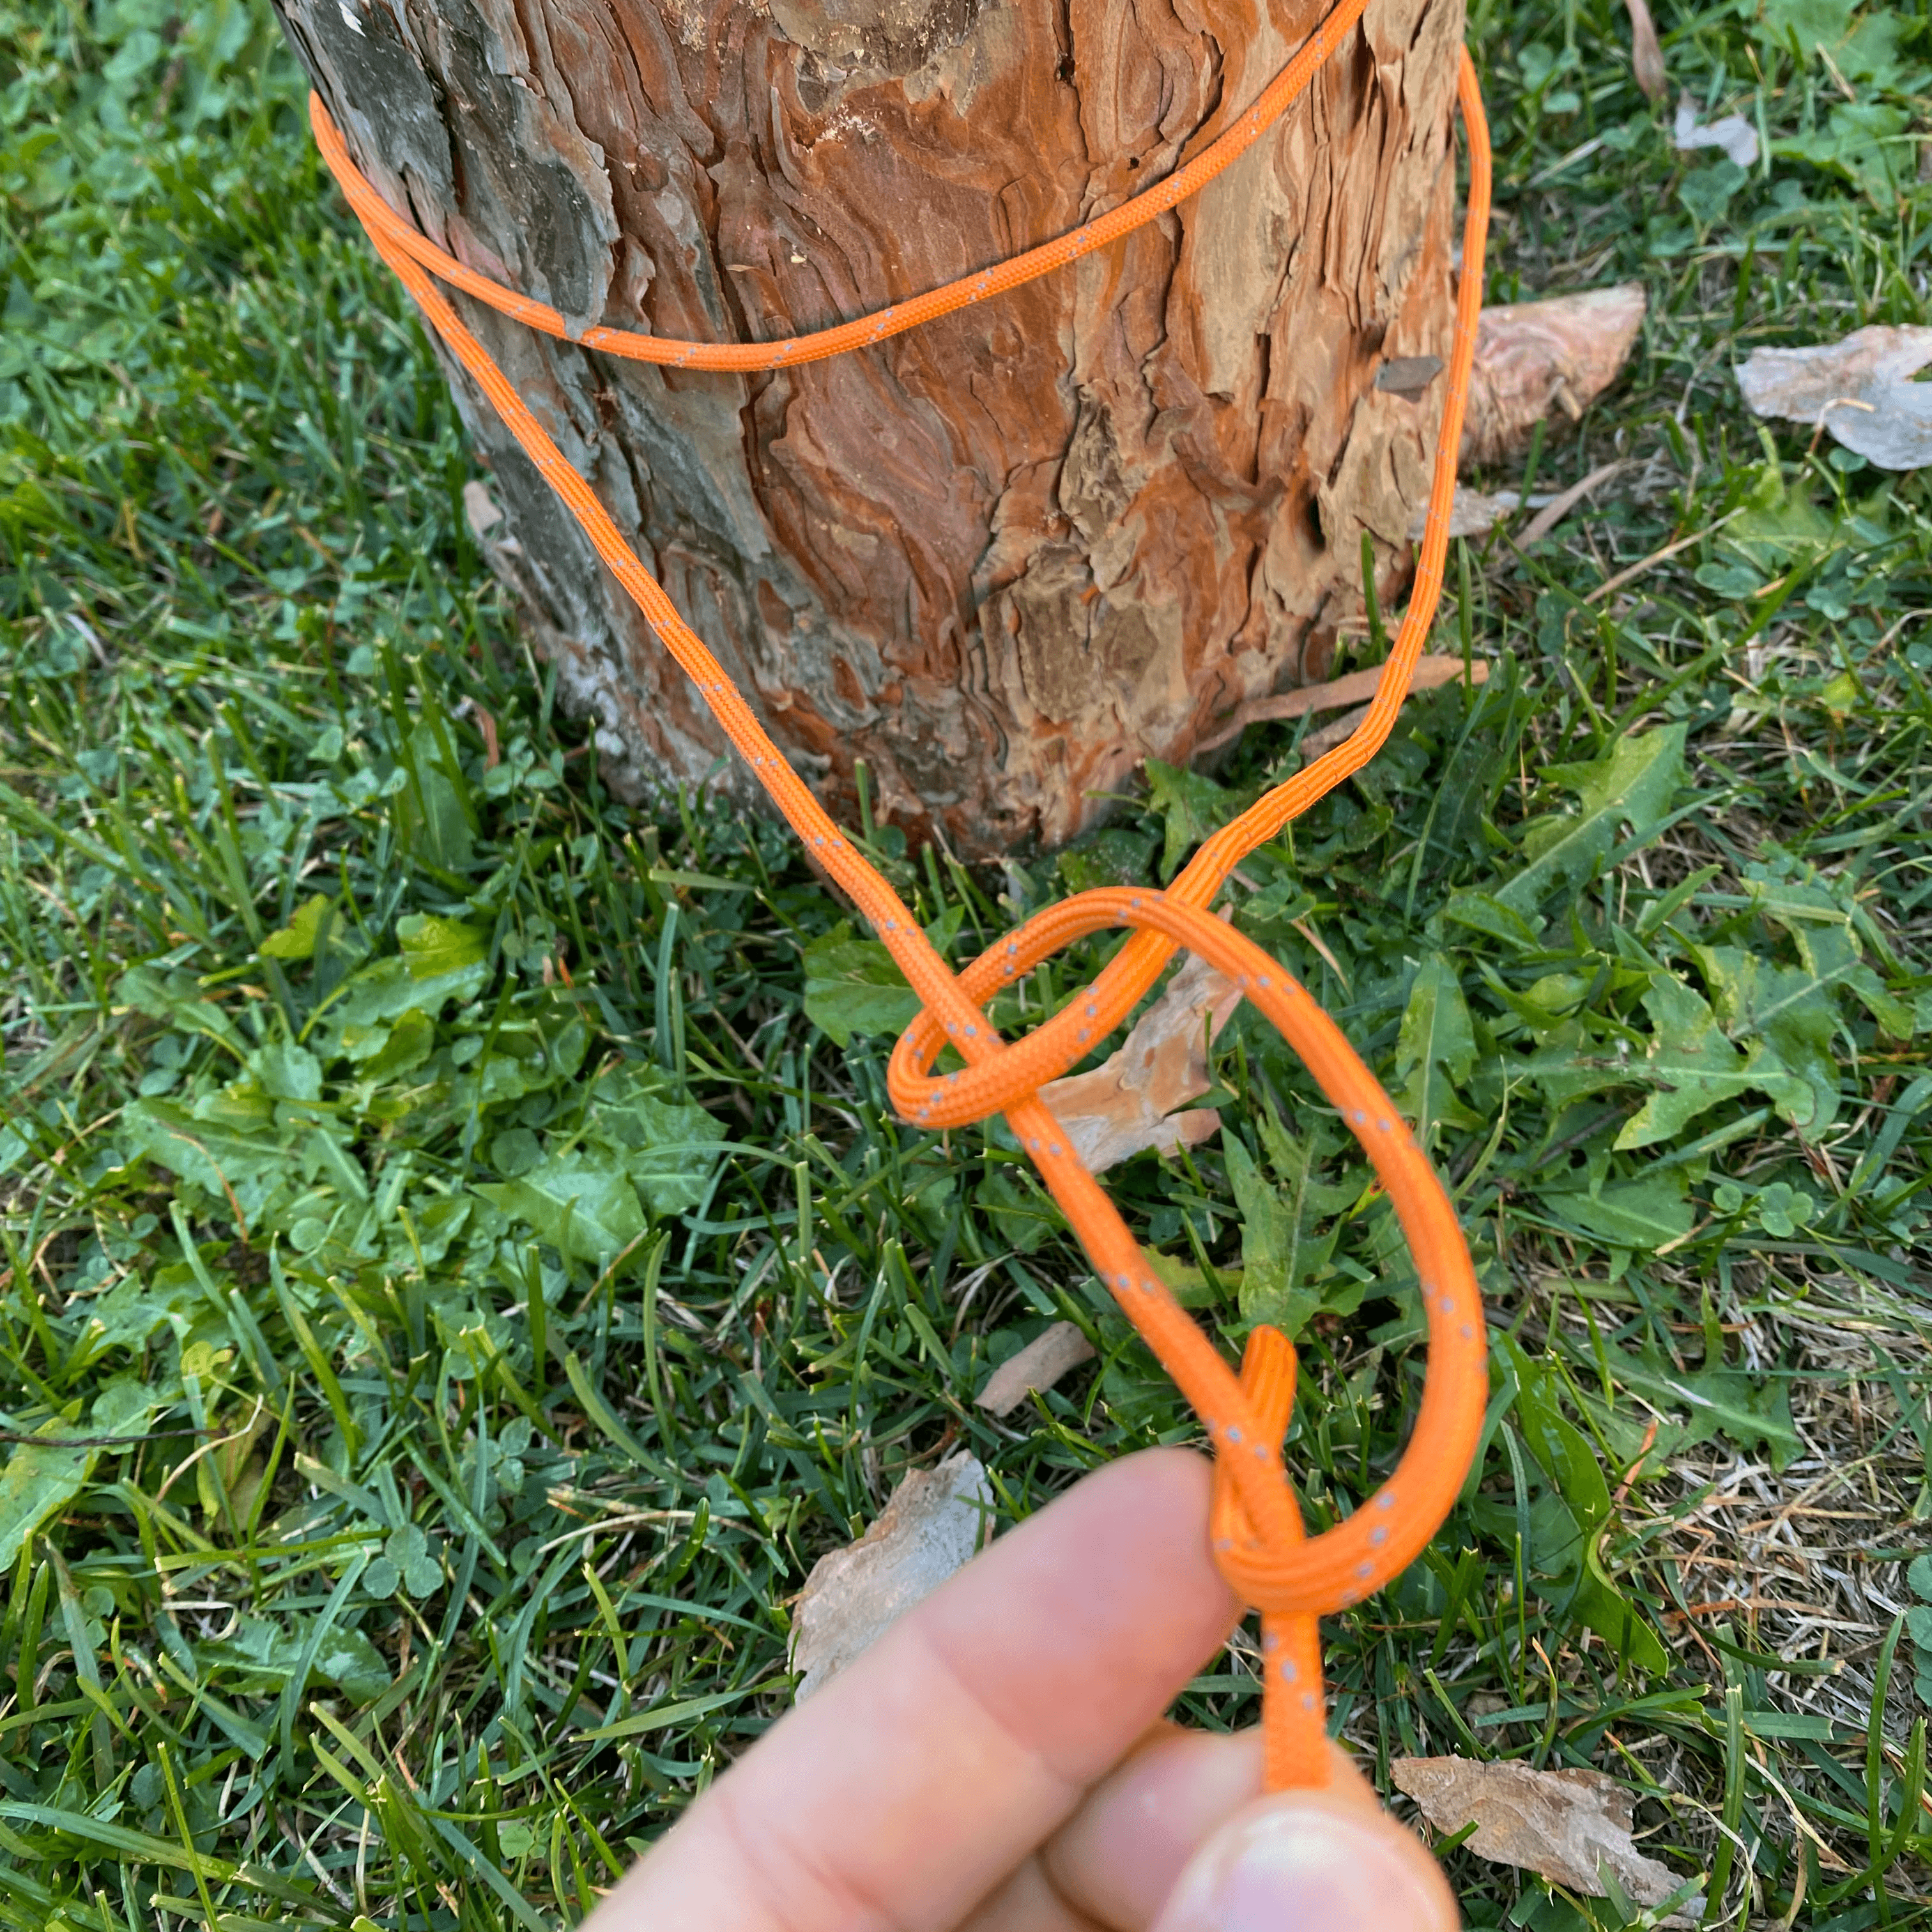
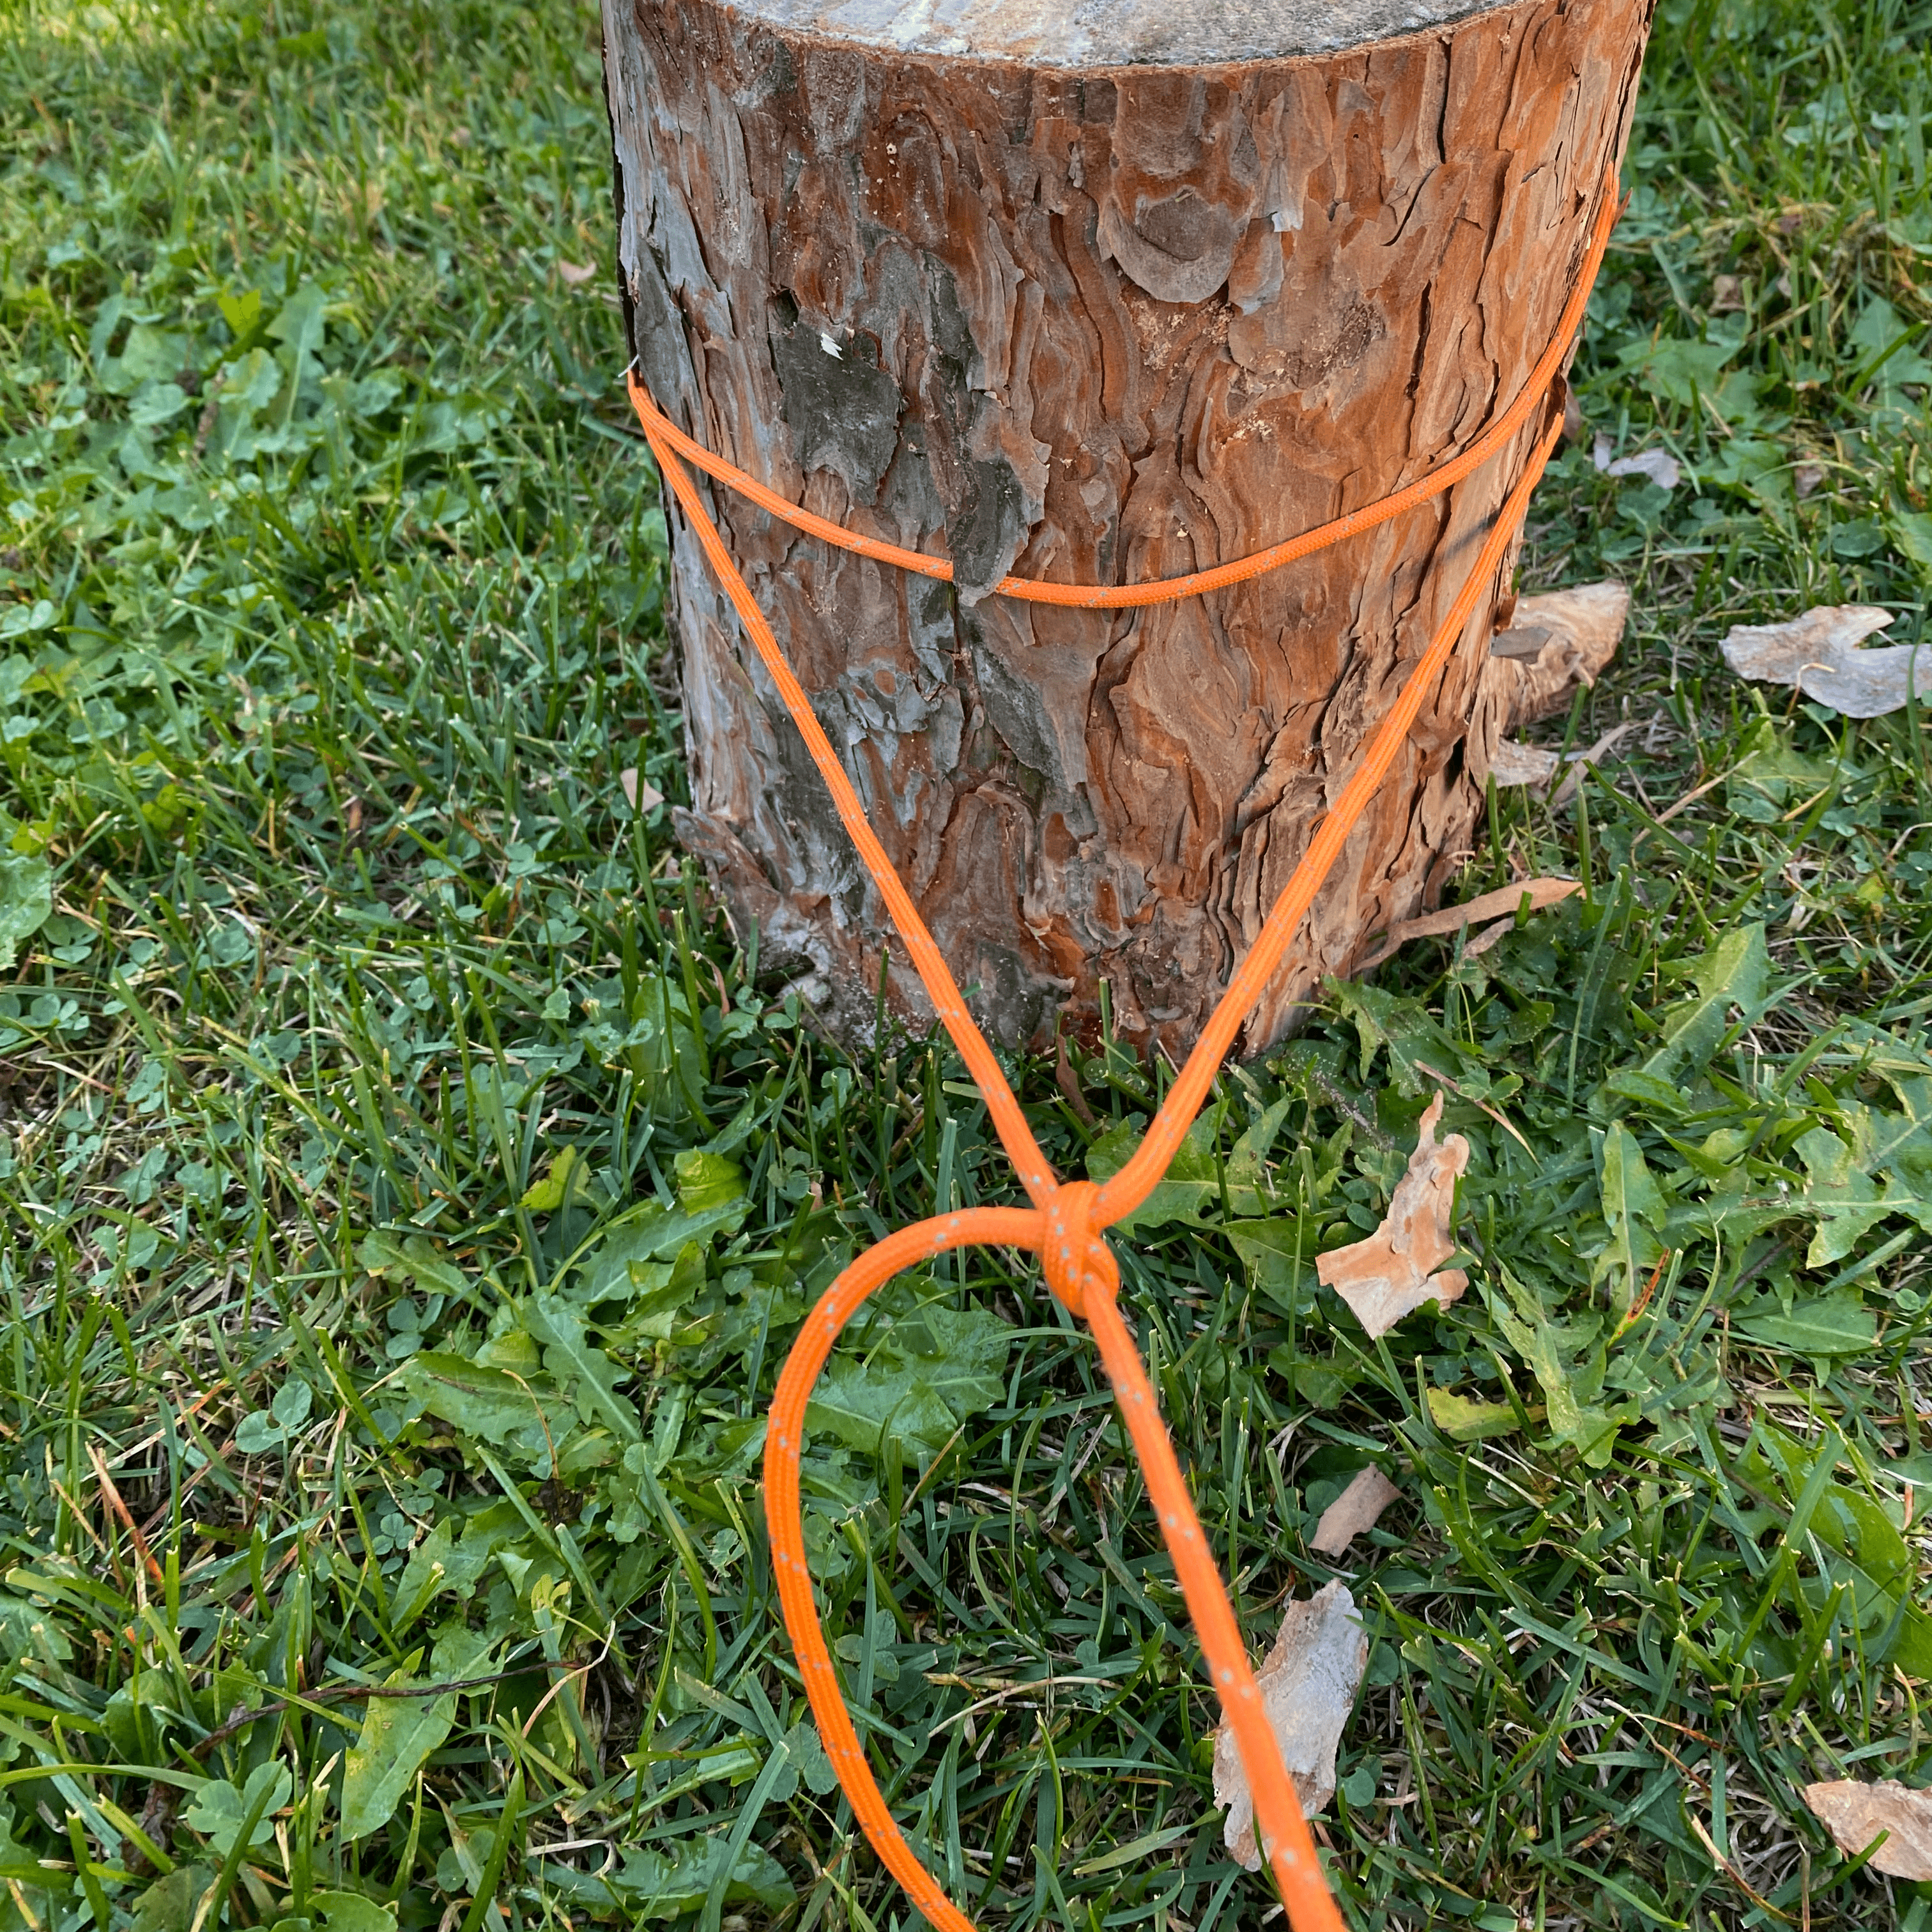
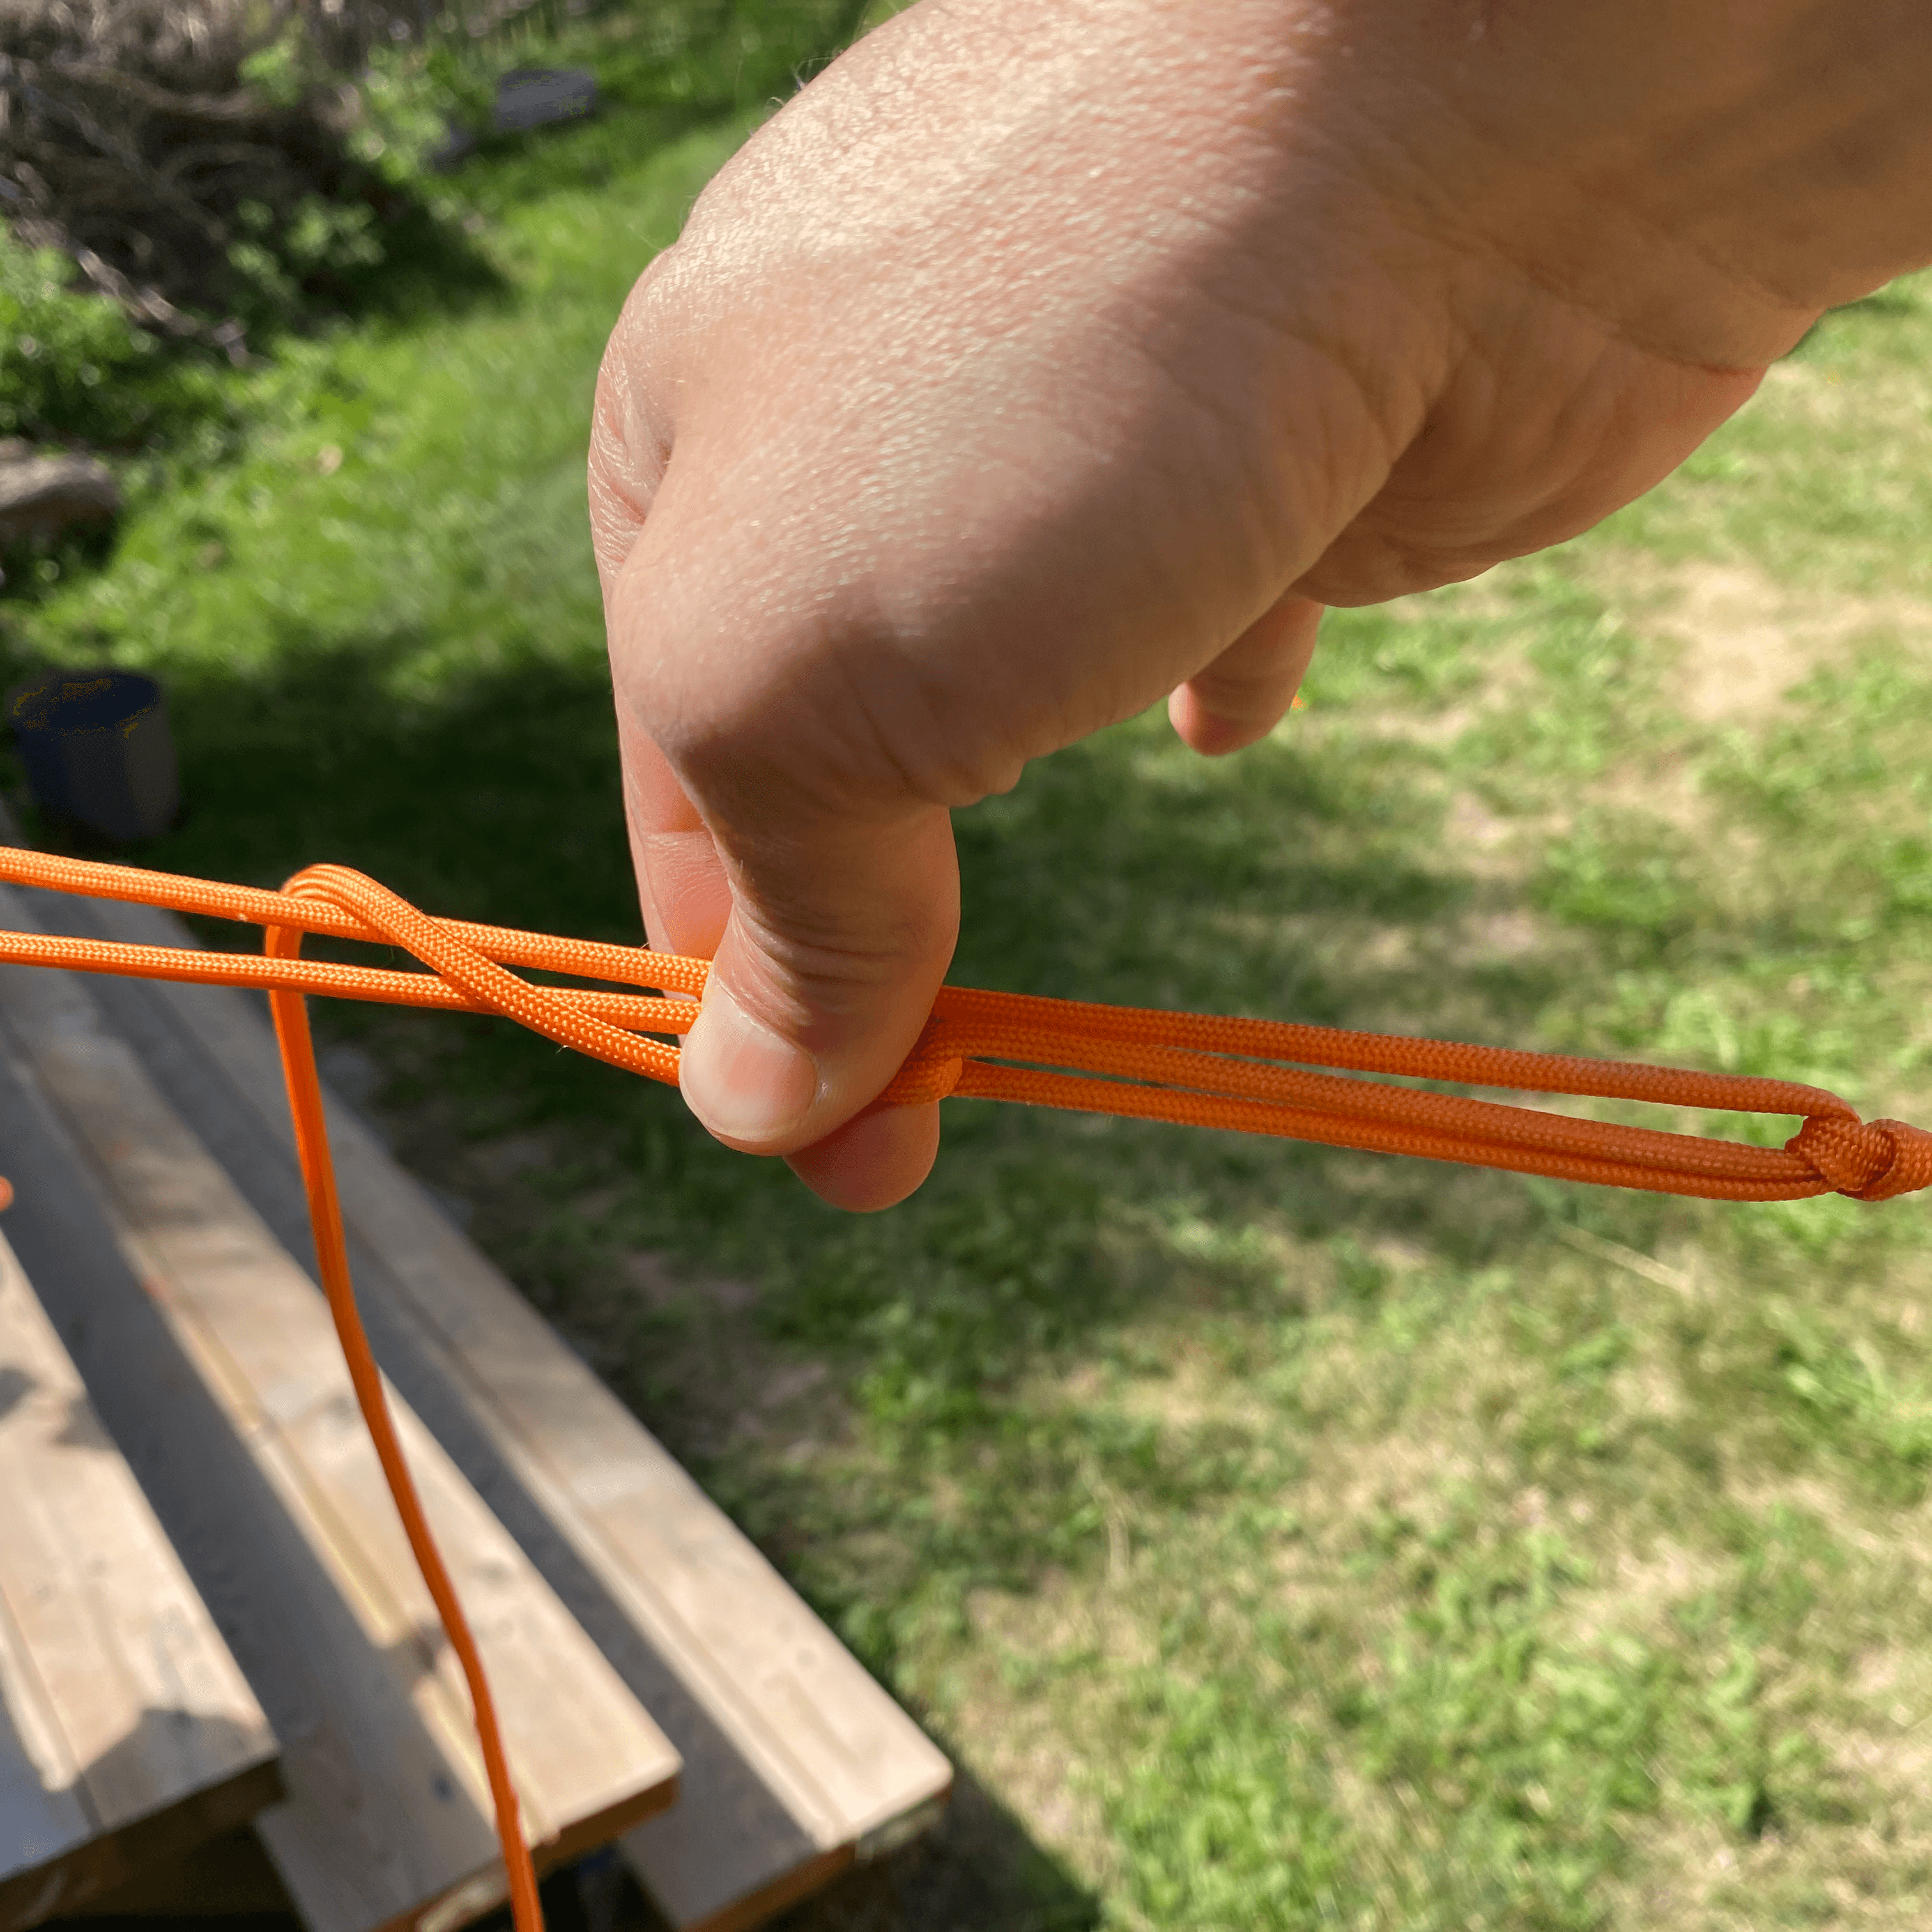
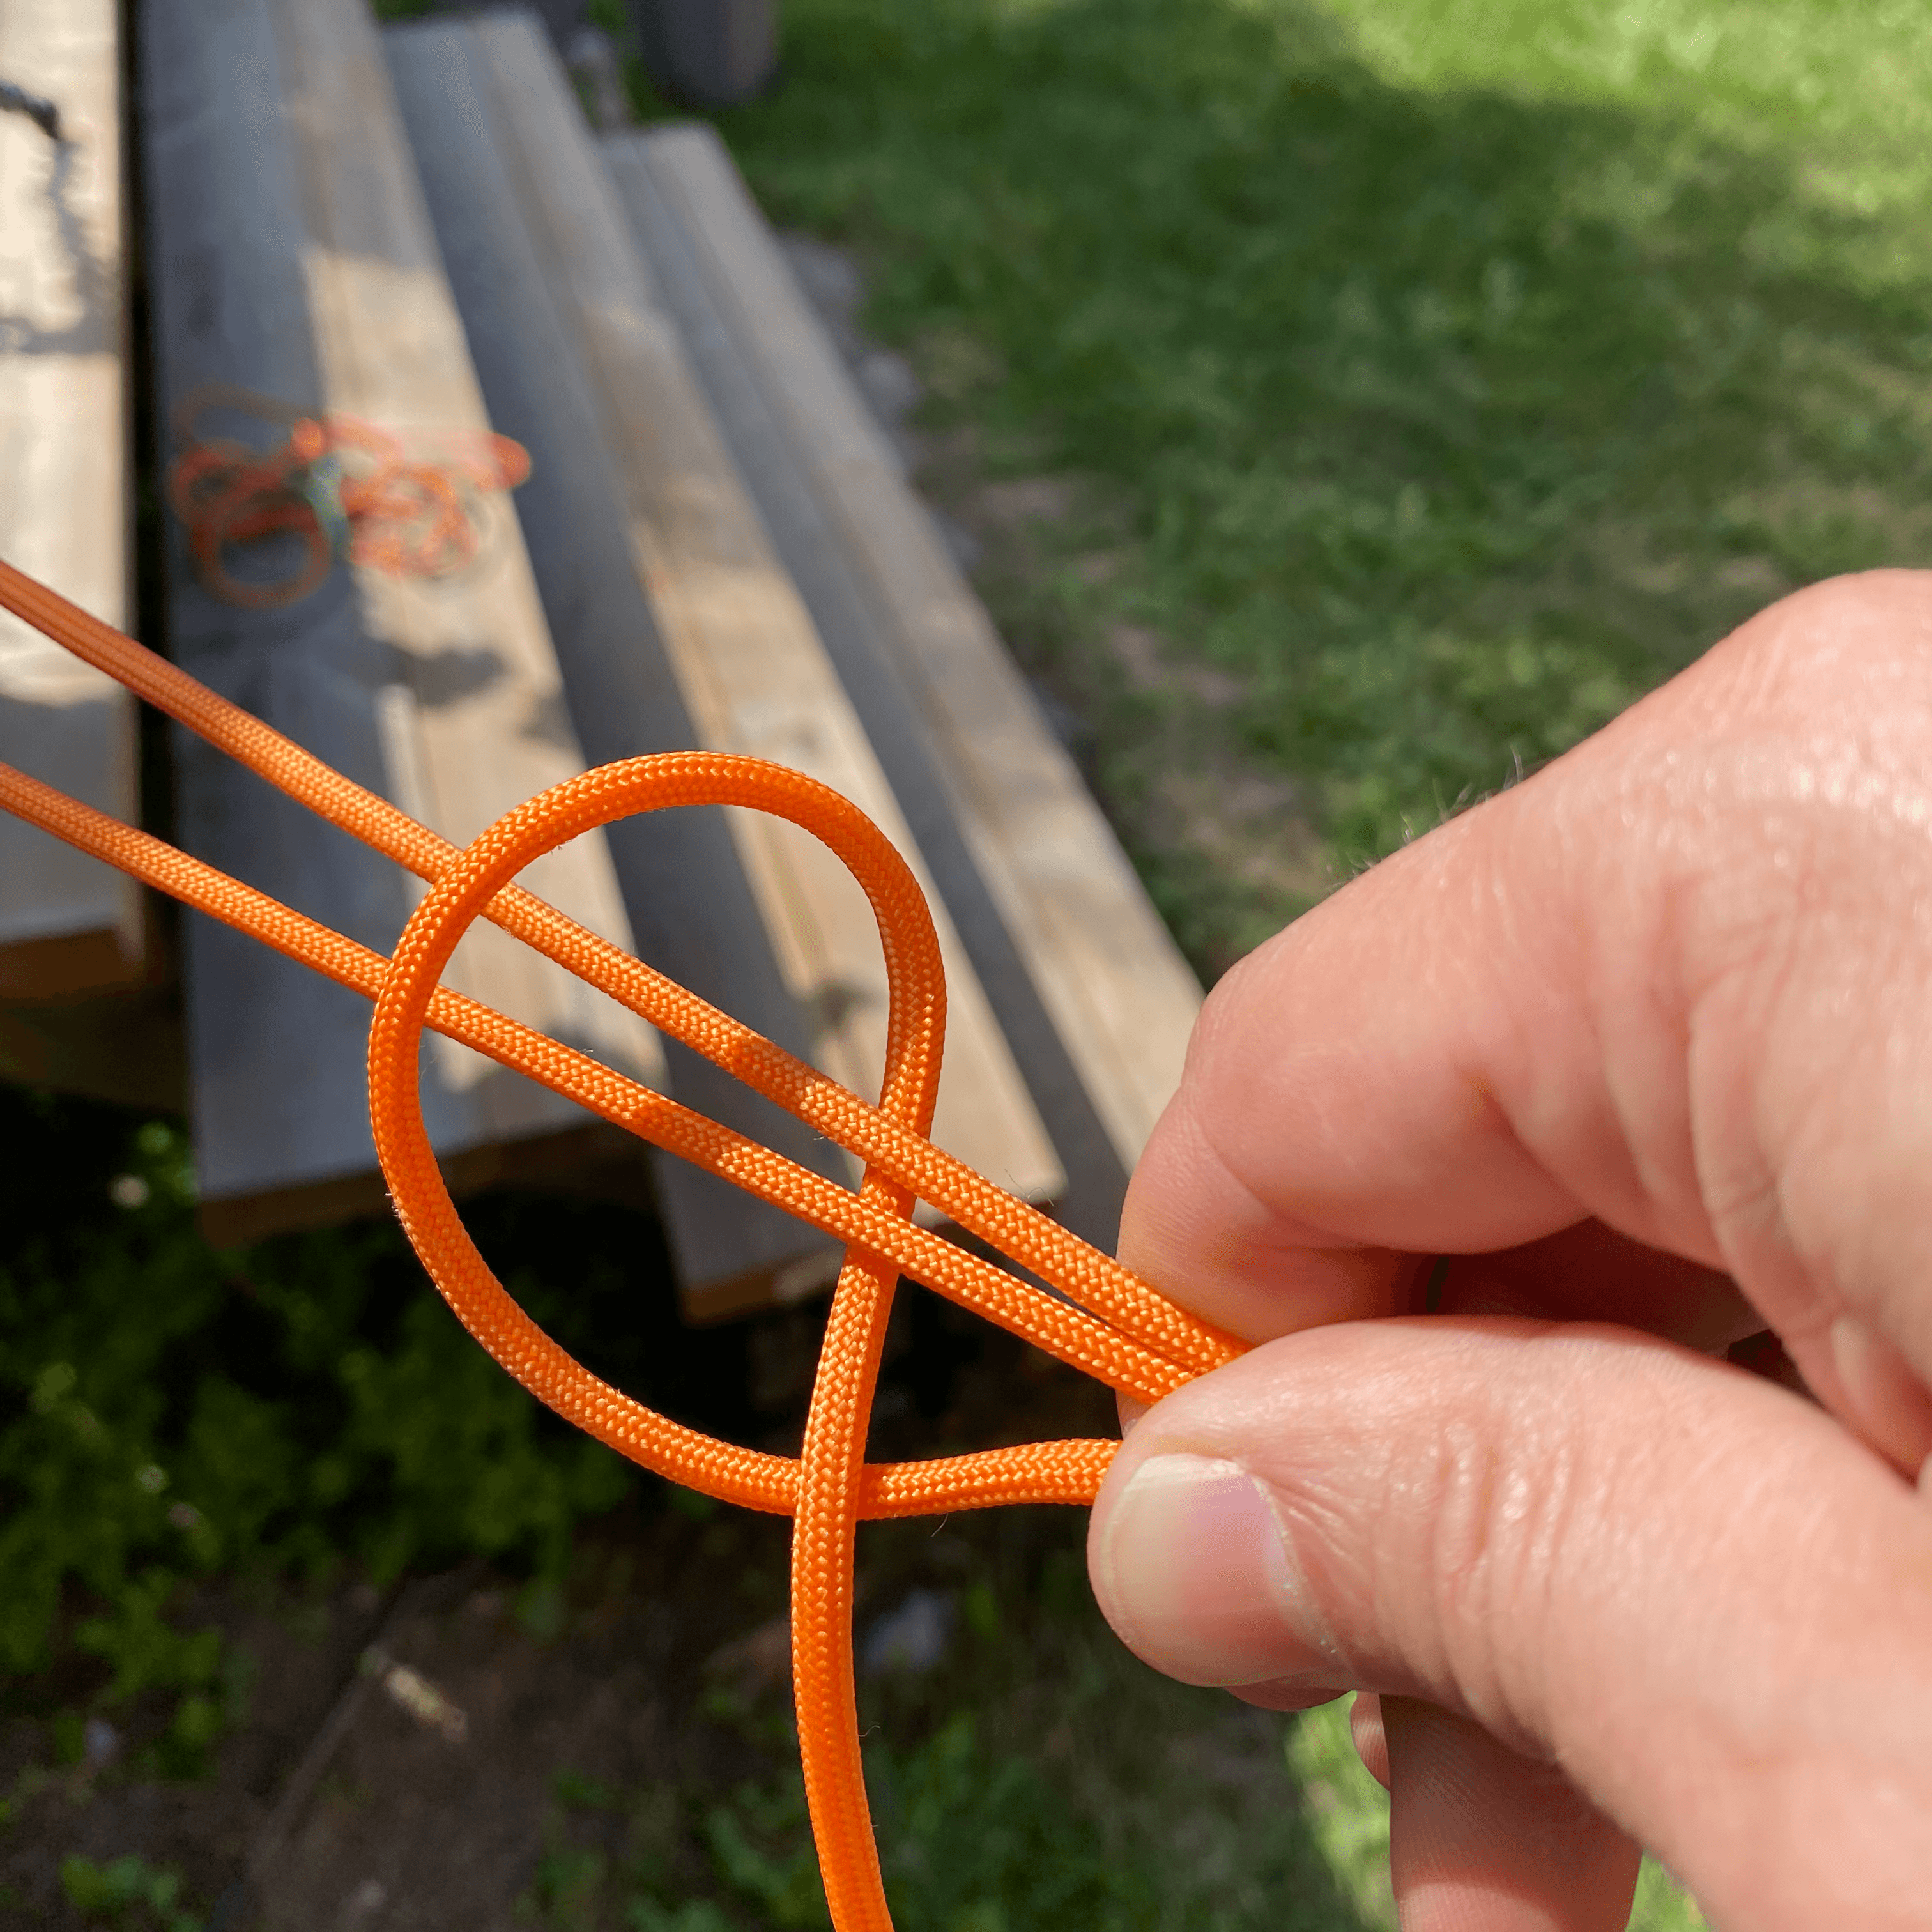
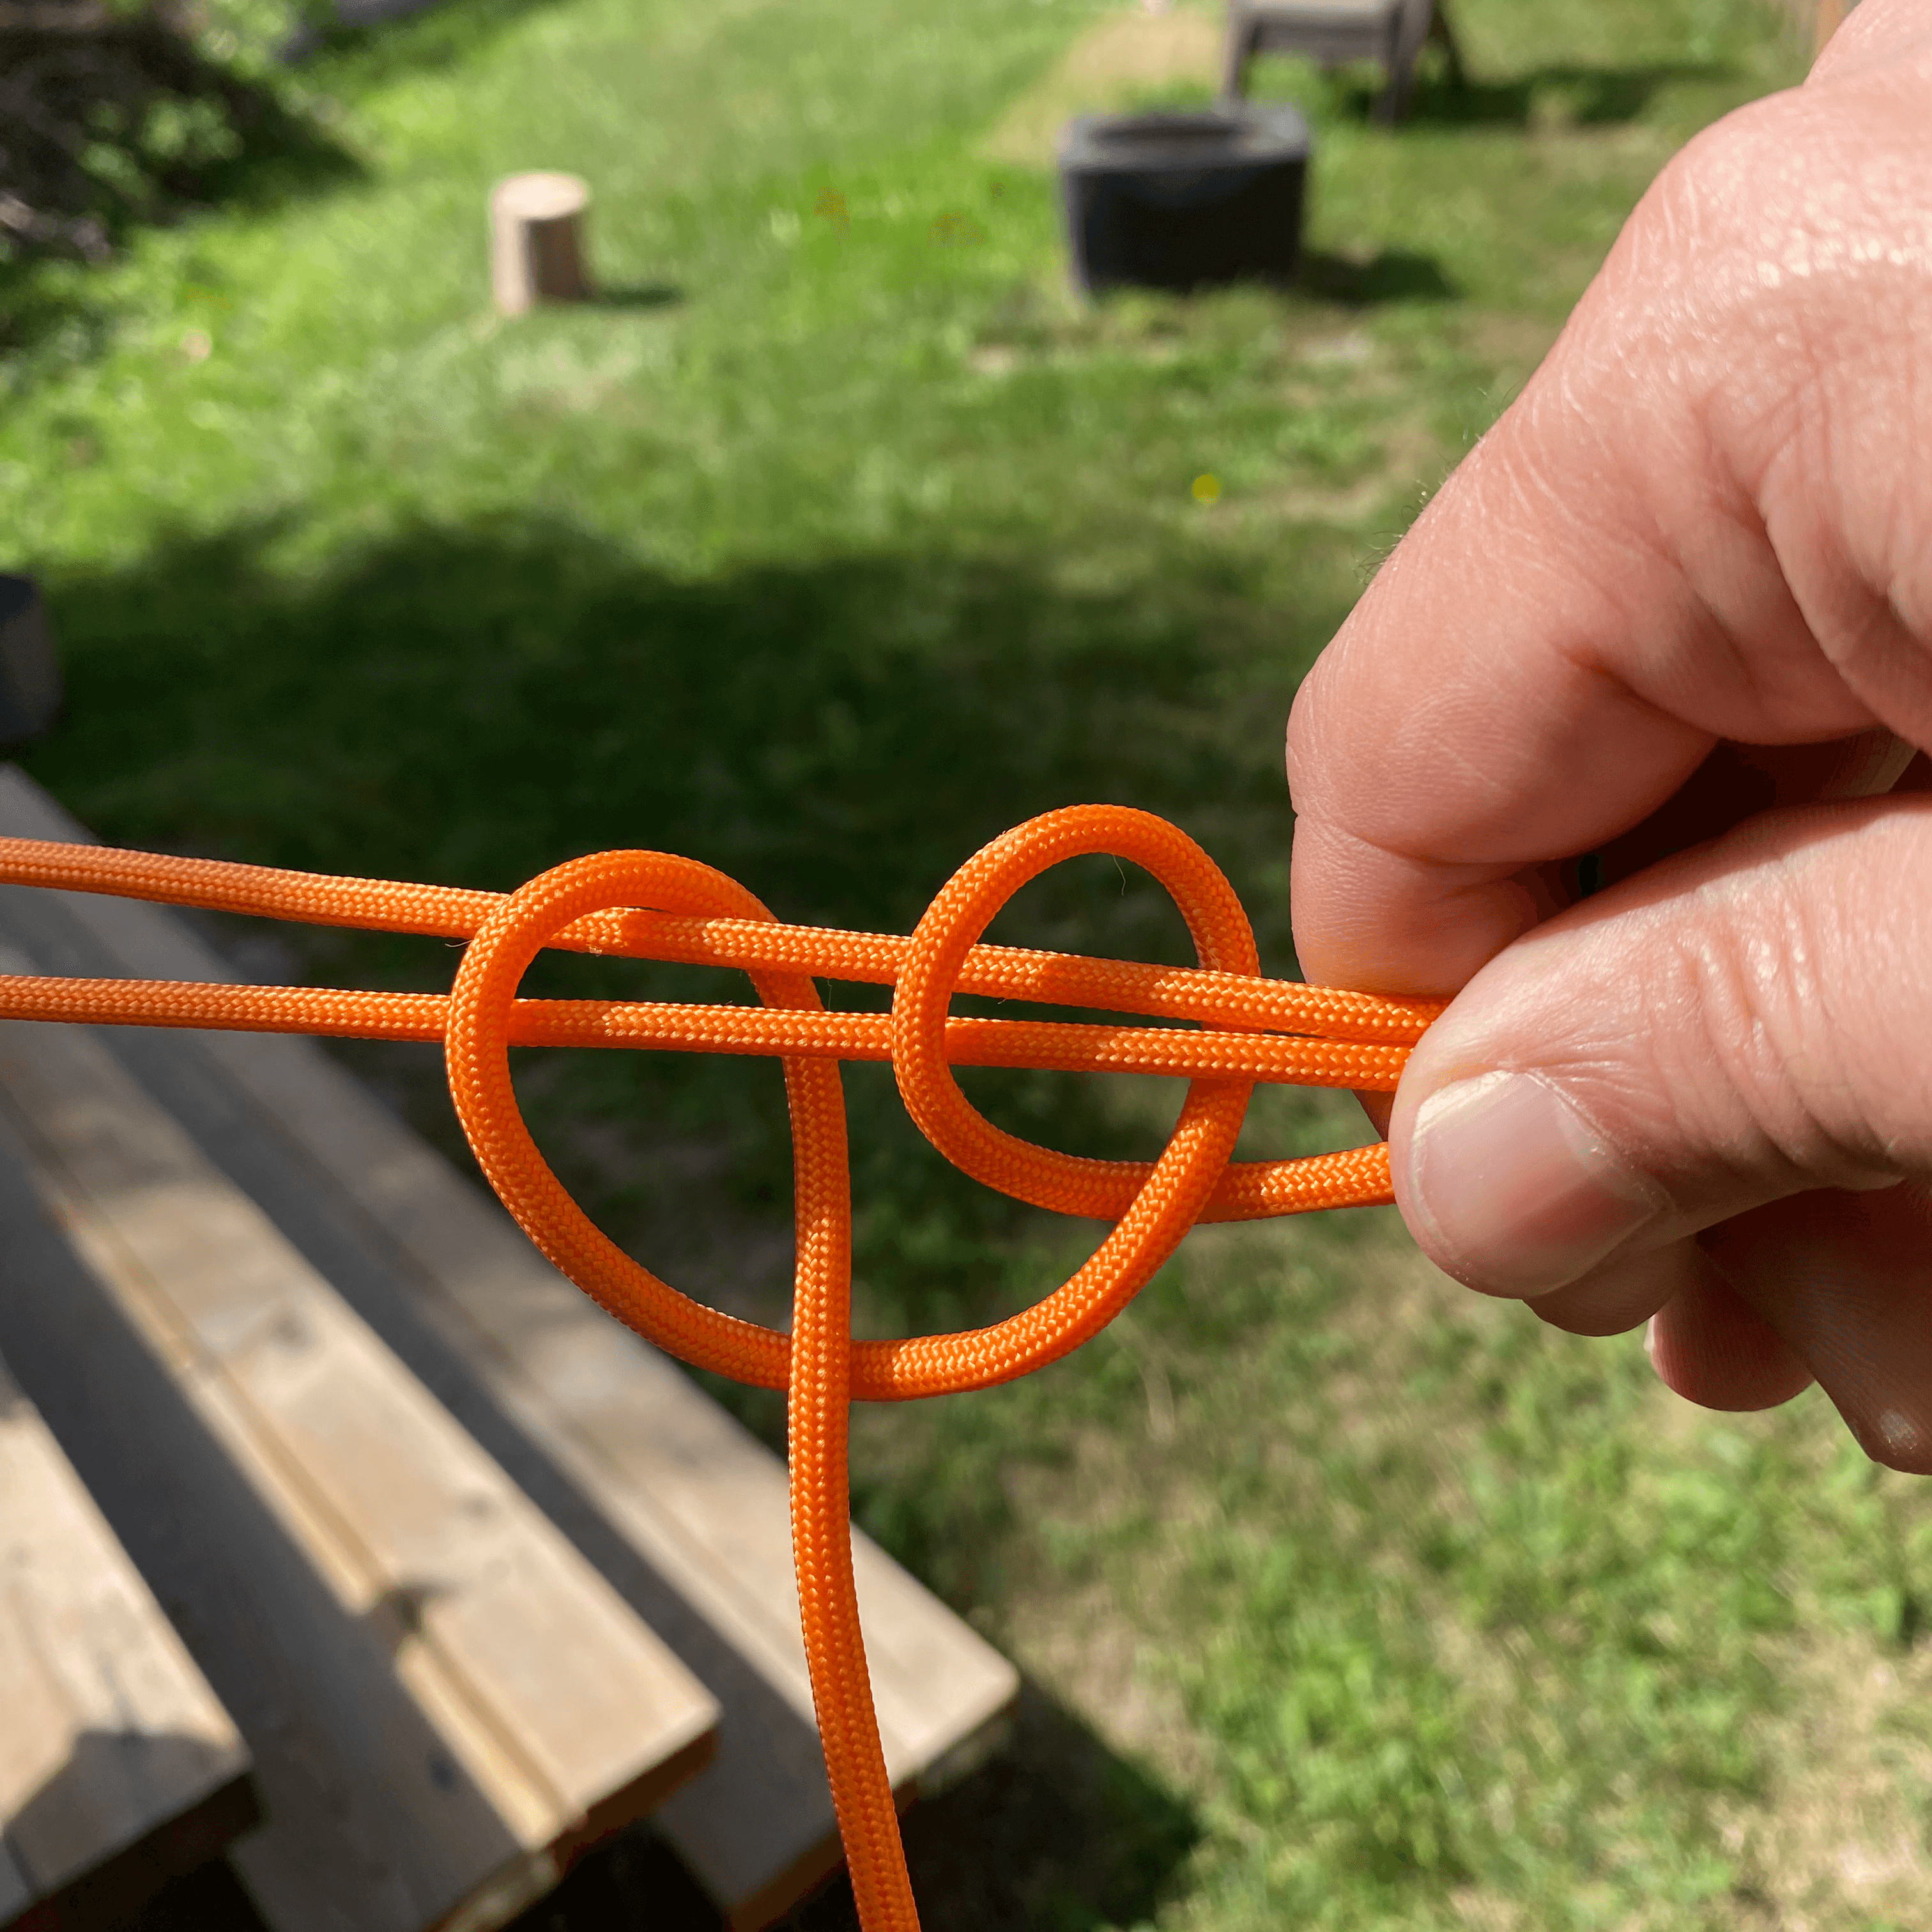
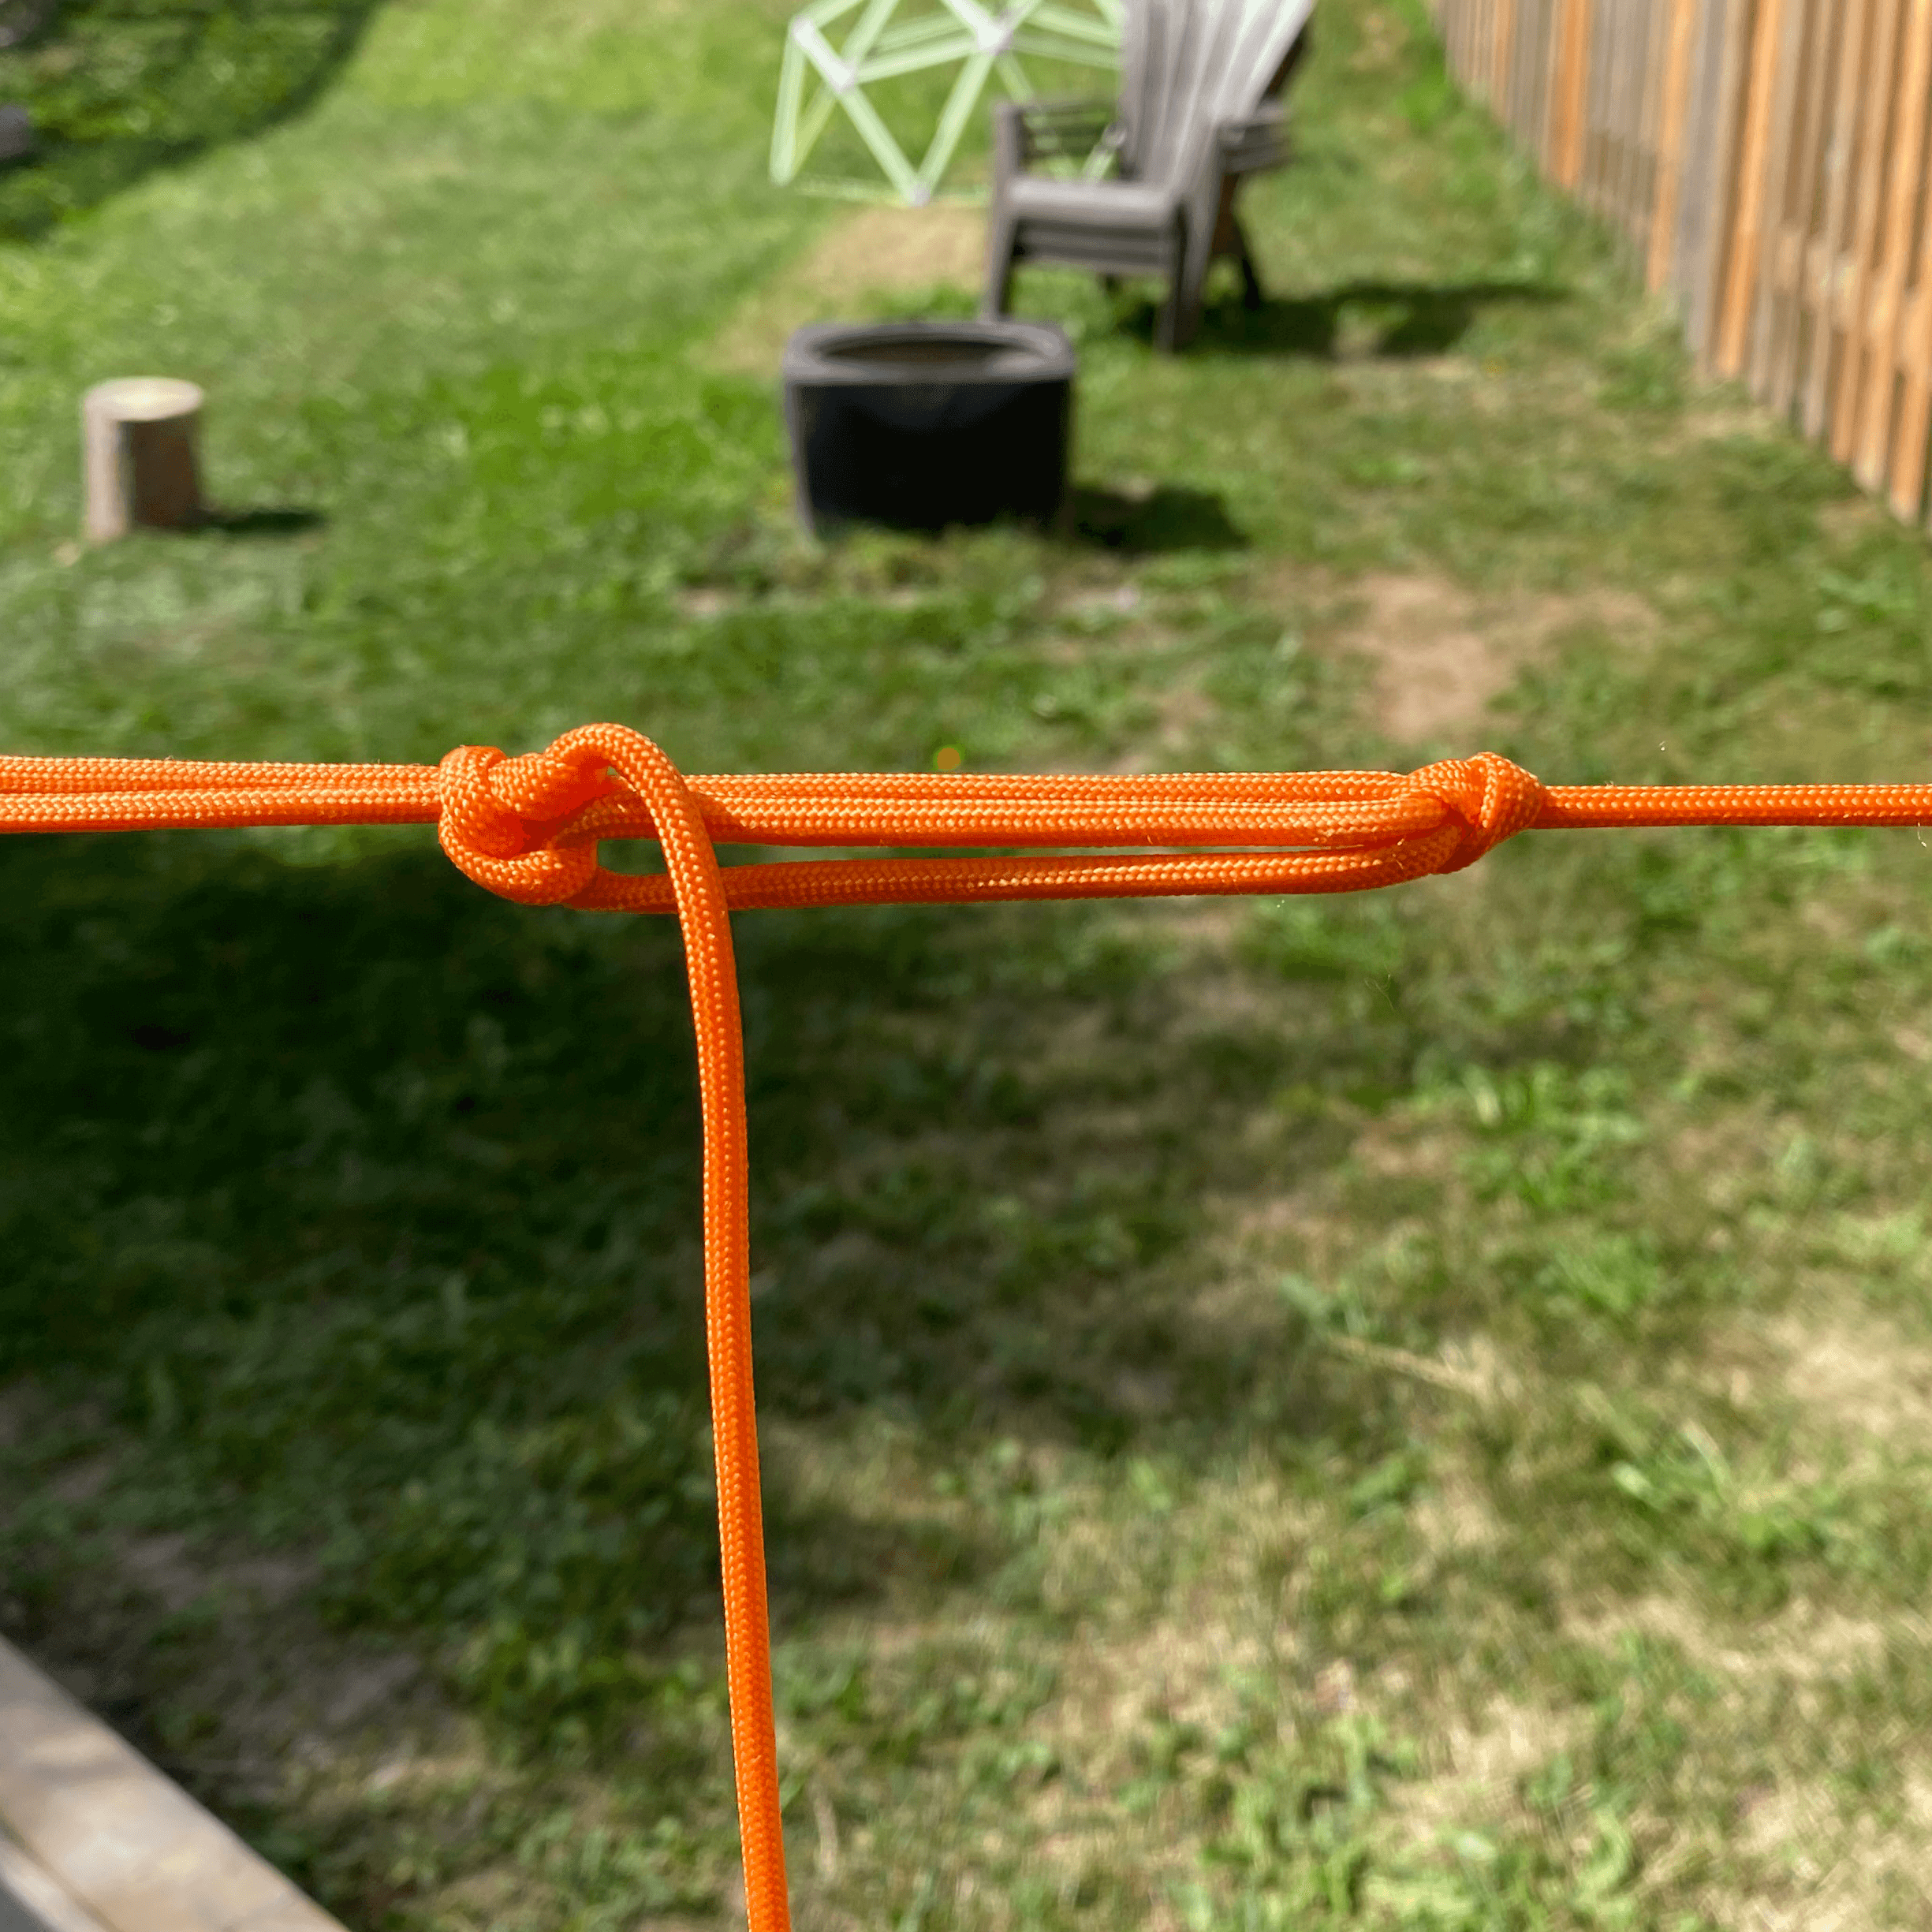
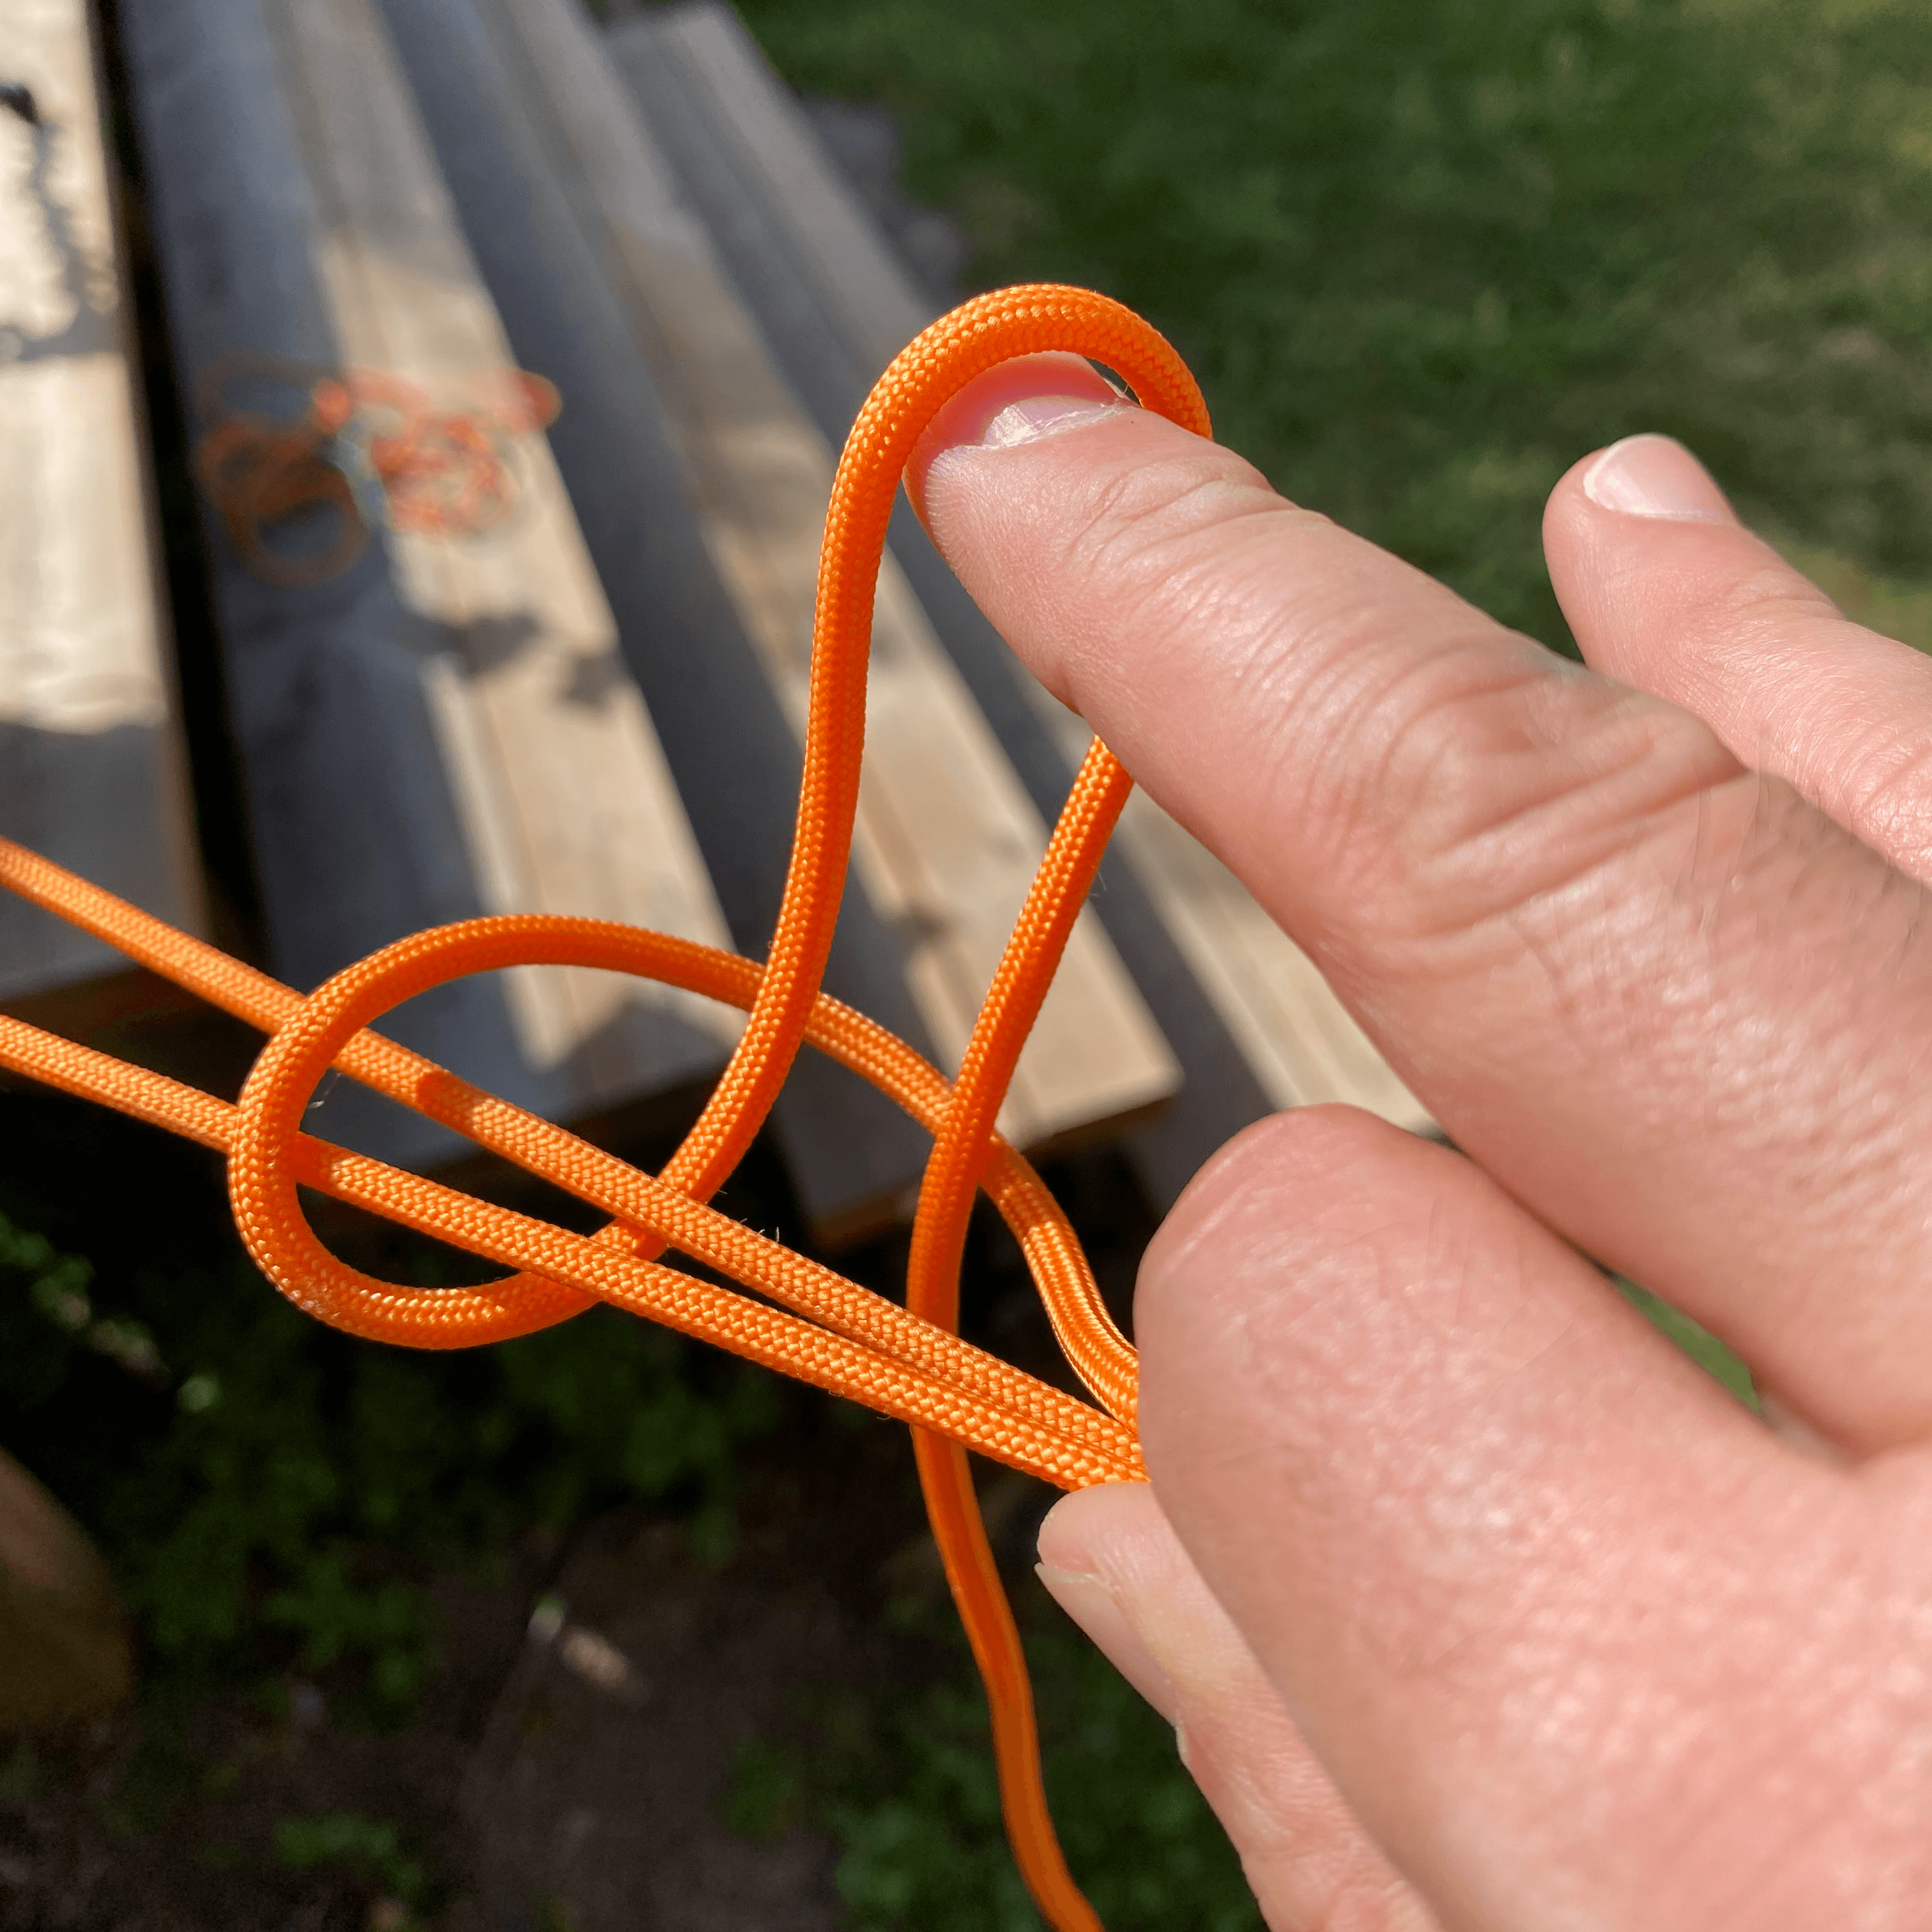
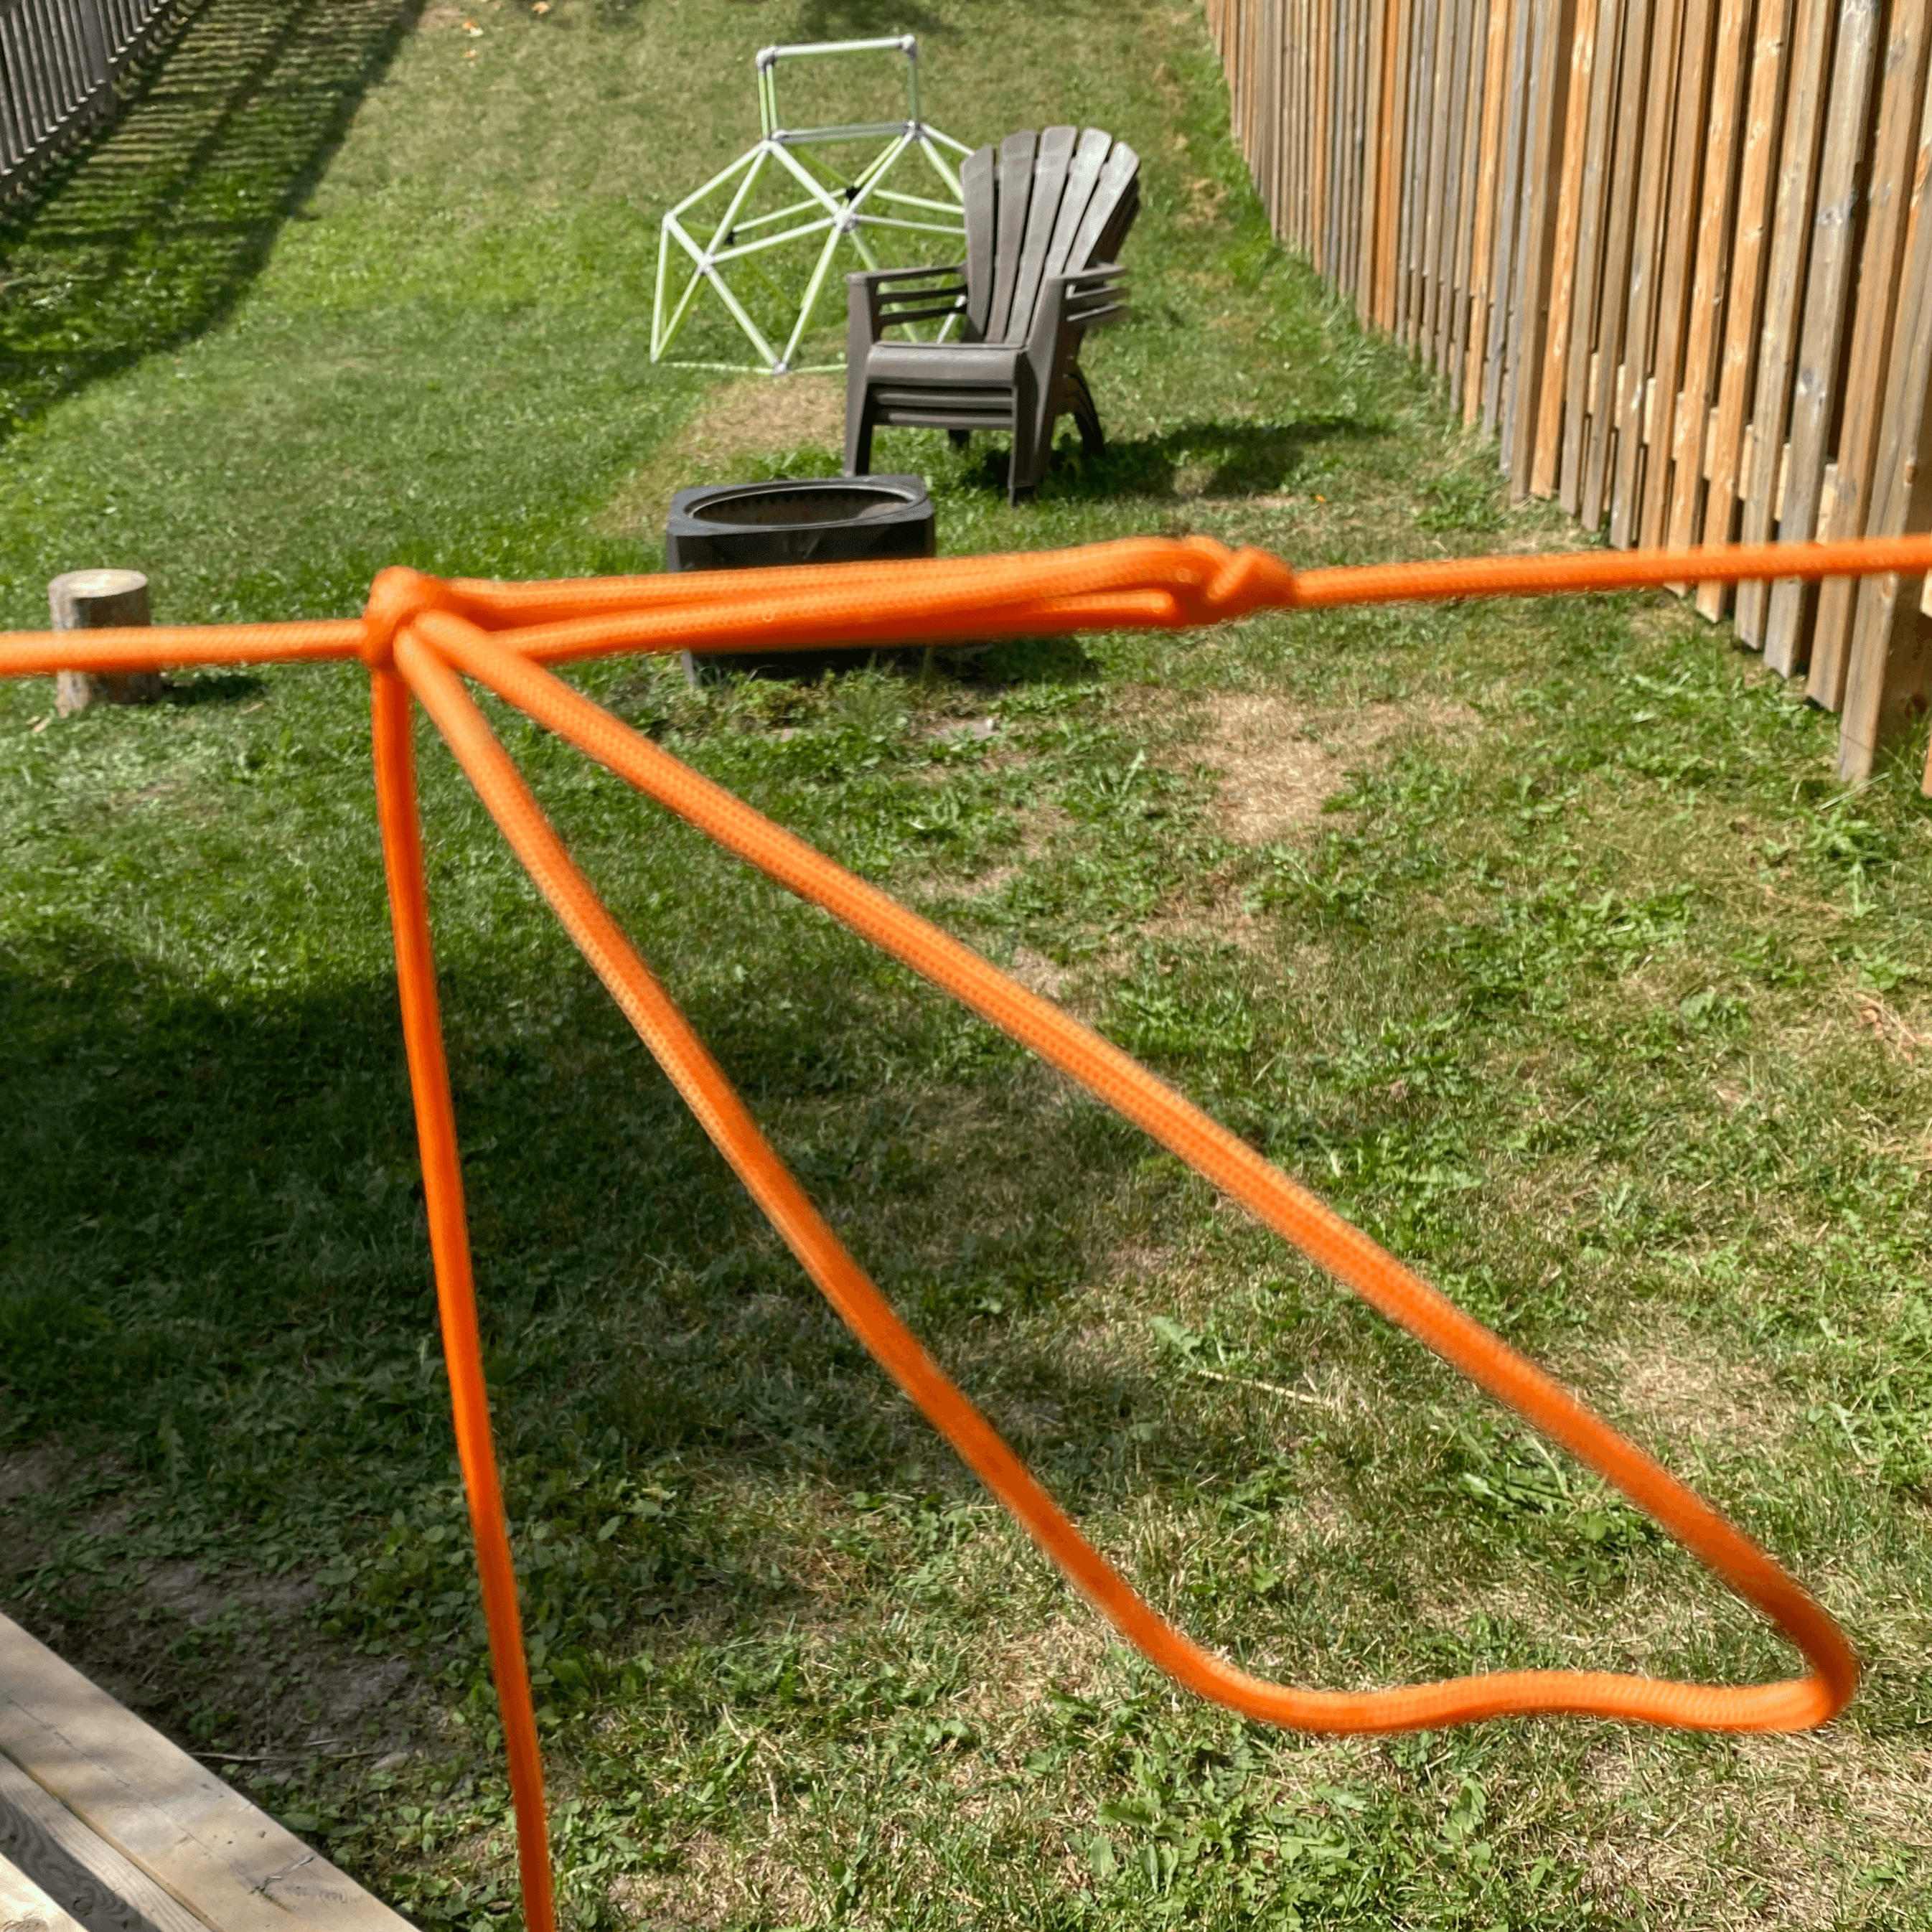
3) Trucker’s Hitch (Pulley Hitch)
Purpose: A pulley-style knot for maximum tension.
Uses:
- Tarp ridgelines.
- Storm pitching.
- Securing canoes or heavy gear.
How to Tie (Camping Method):
- Anchor first end — Tie rope to first anchor with a Bowline or a Round Turn + Two Half Hitches.
- Wrap second anchor — Take rope around second anchor. Pull slack — About an arm’s length.
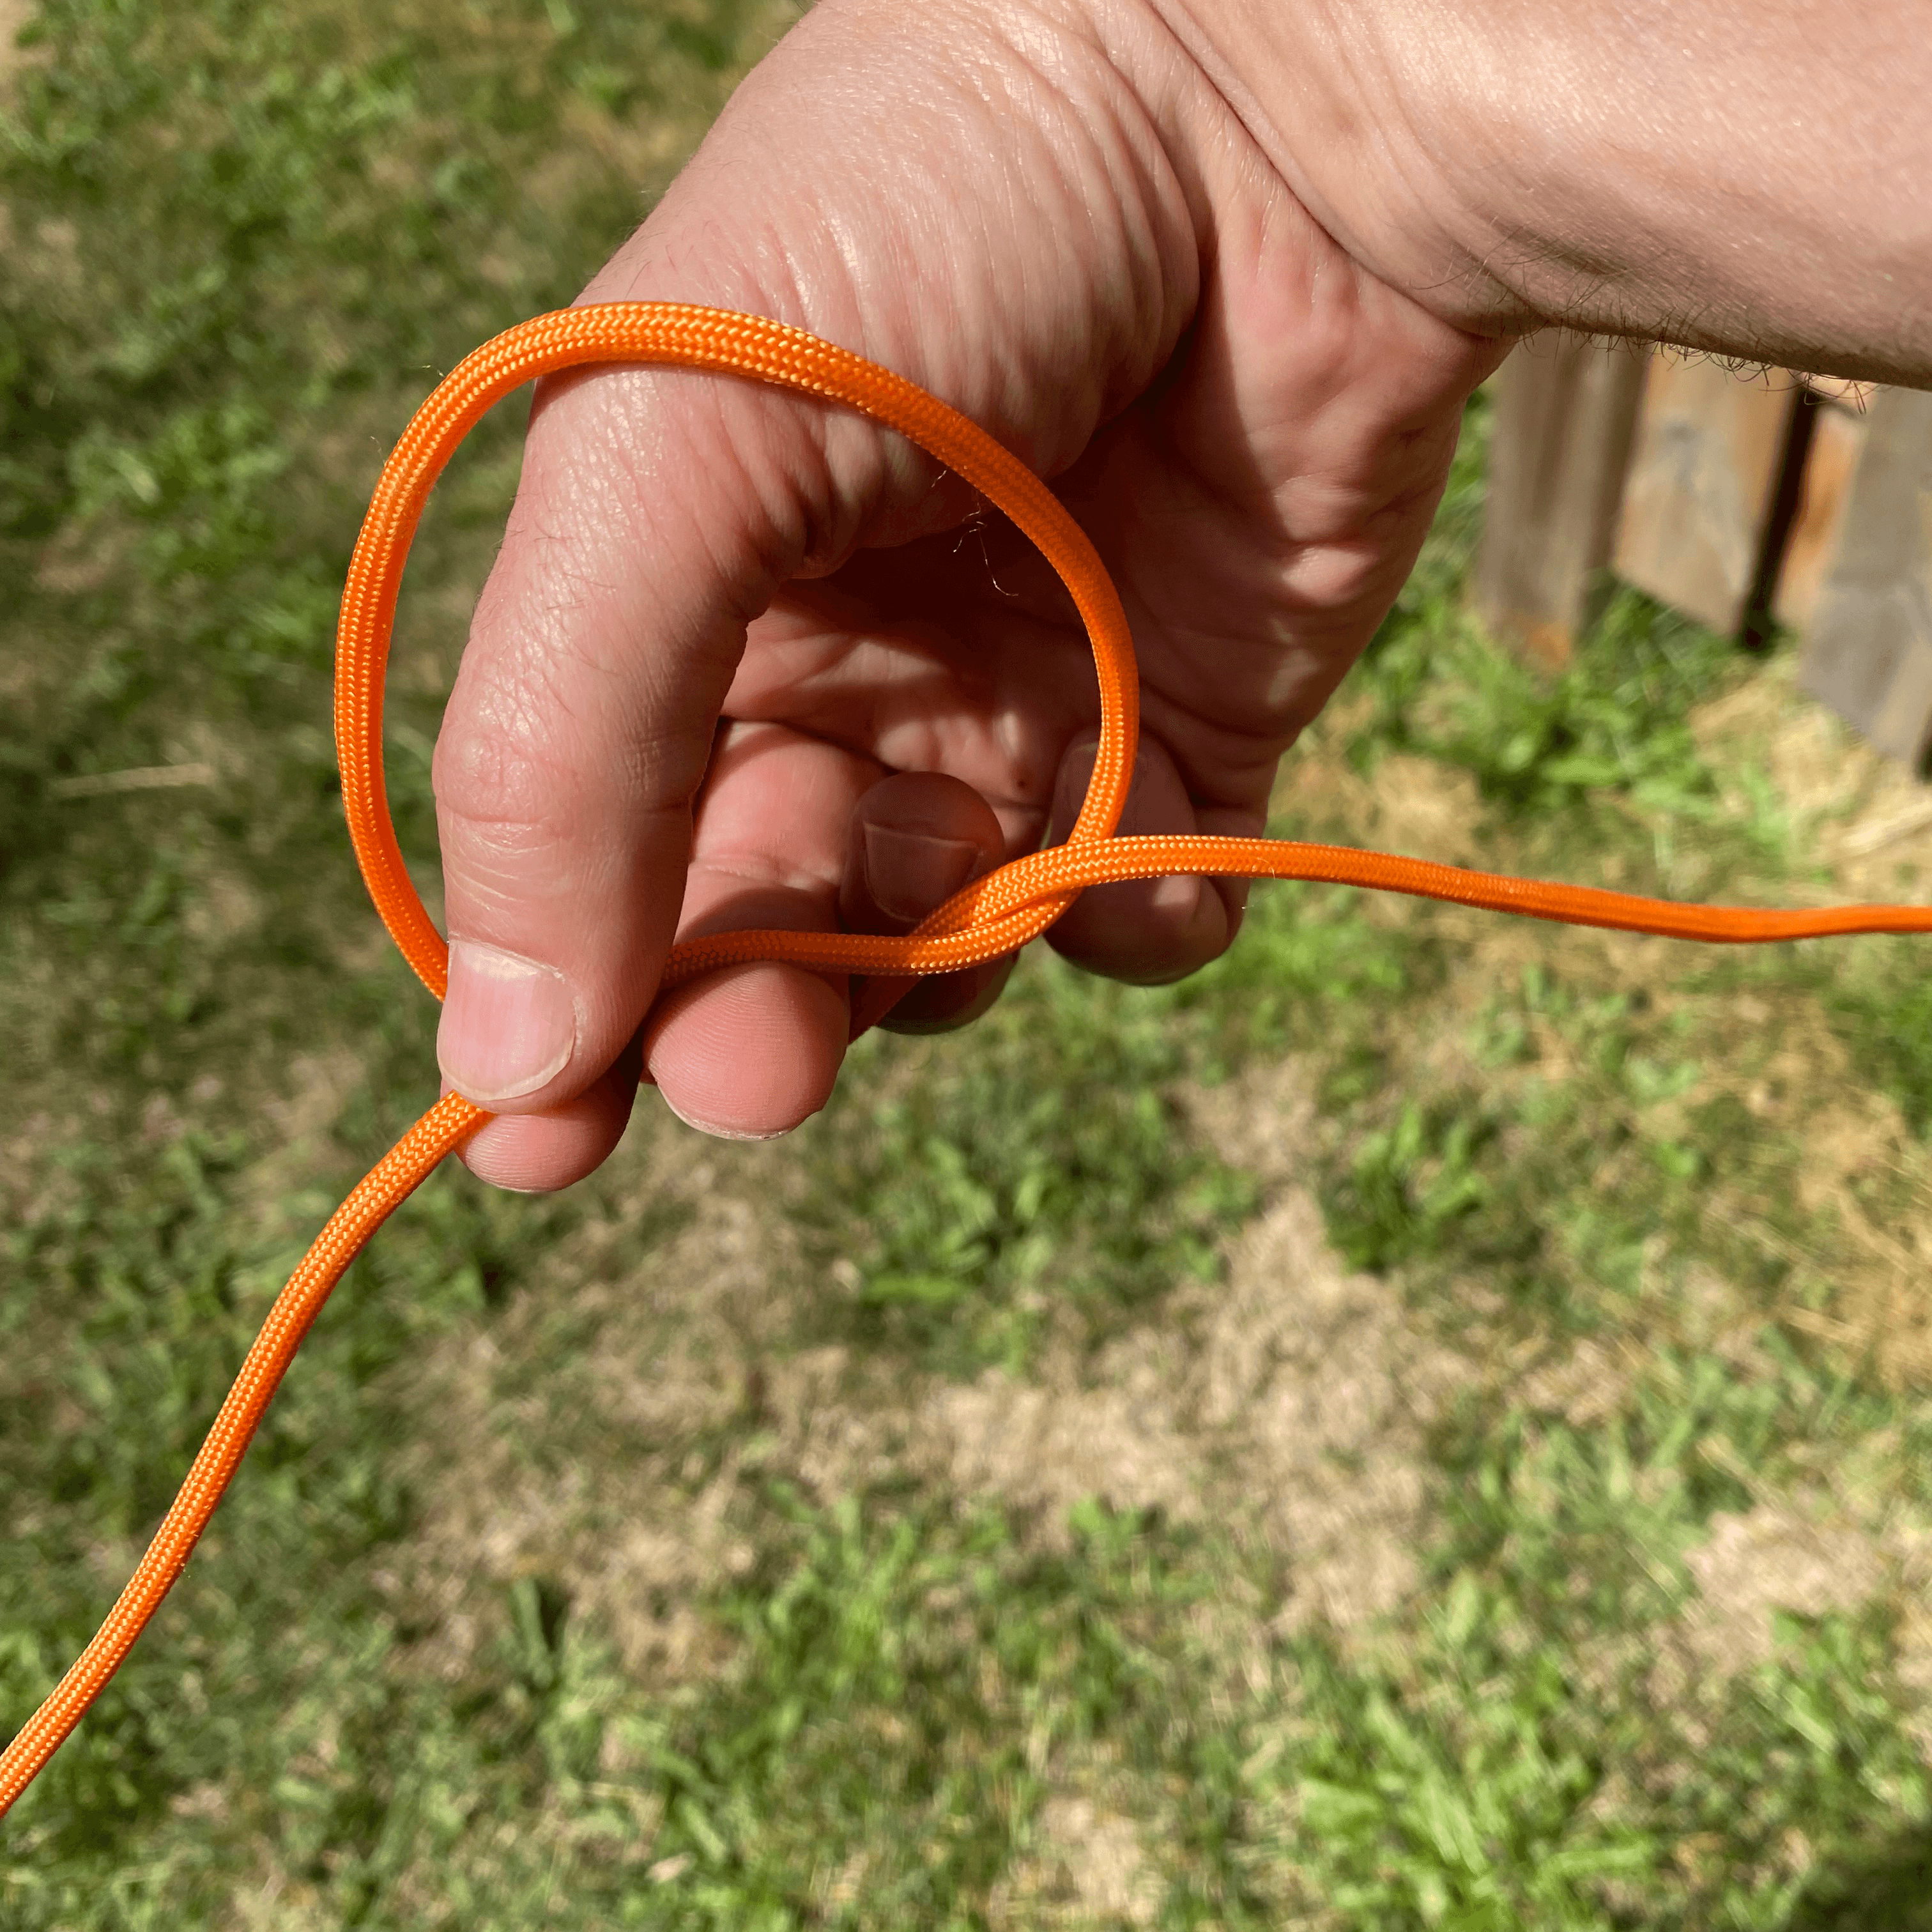
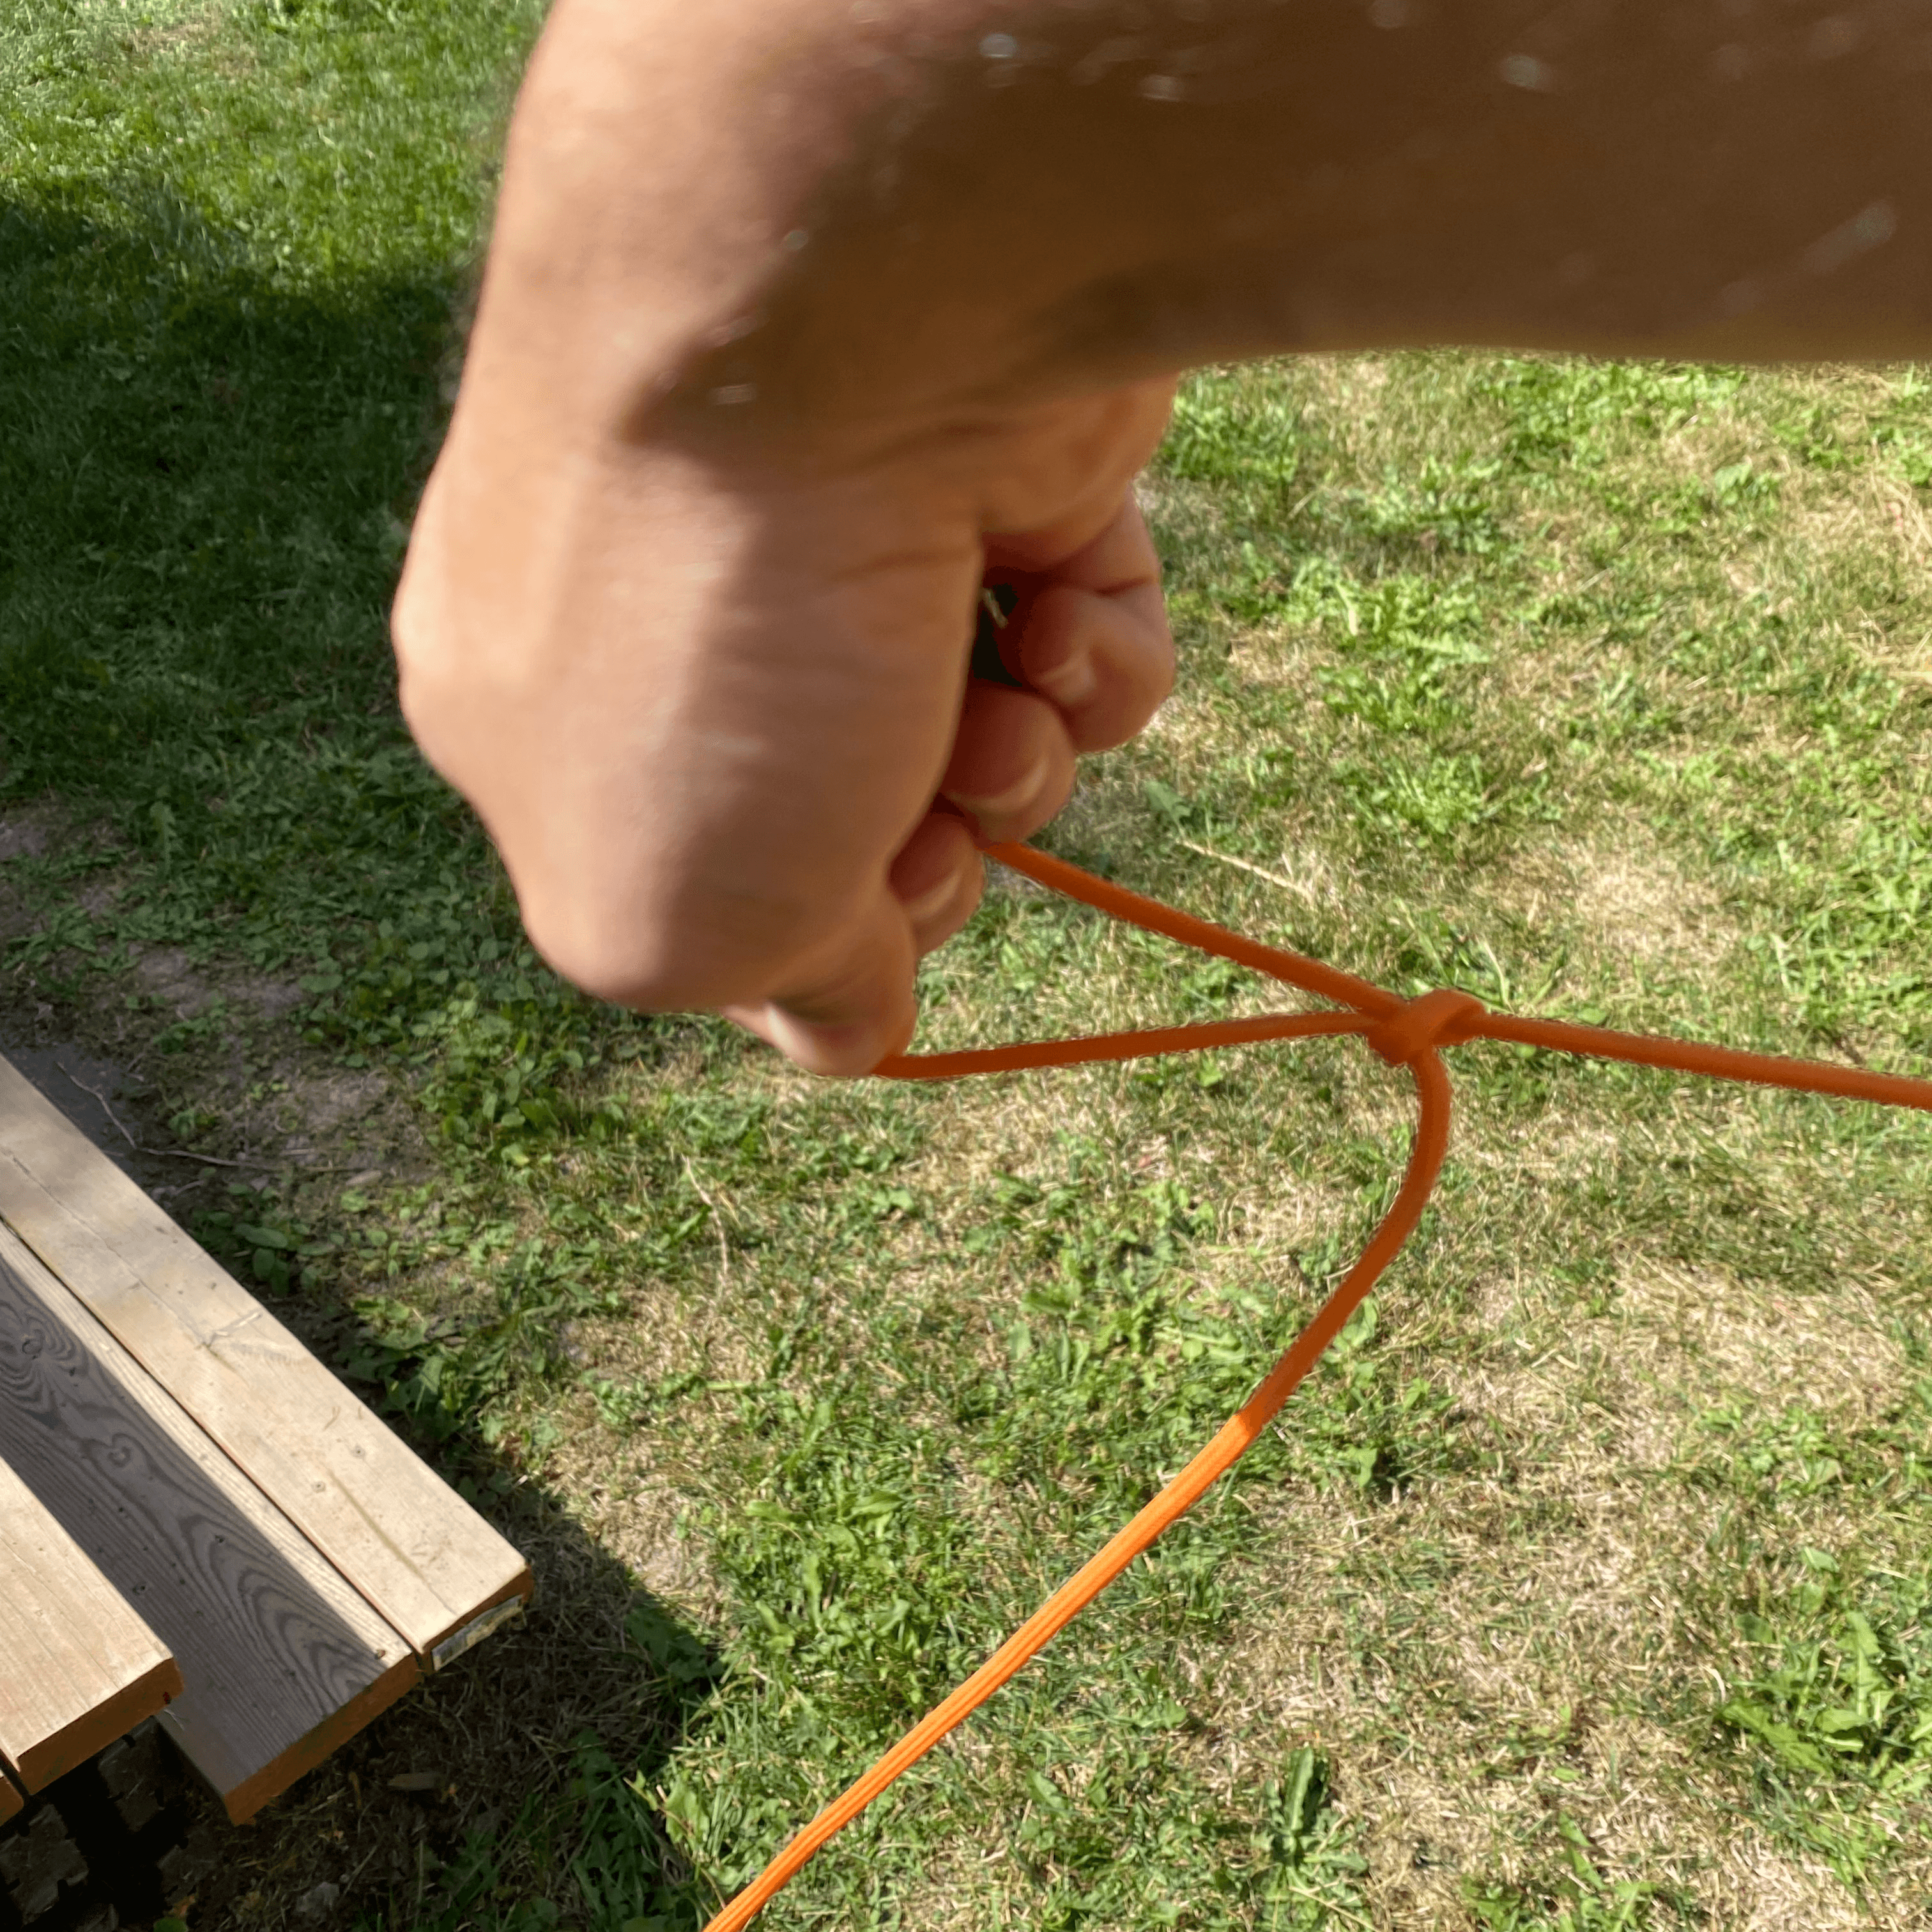
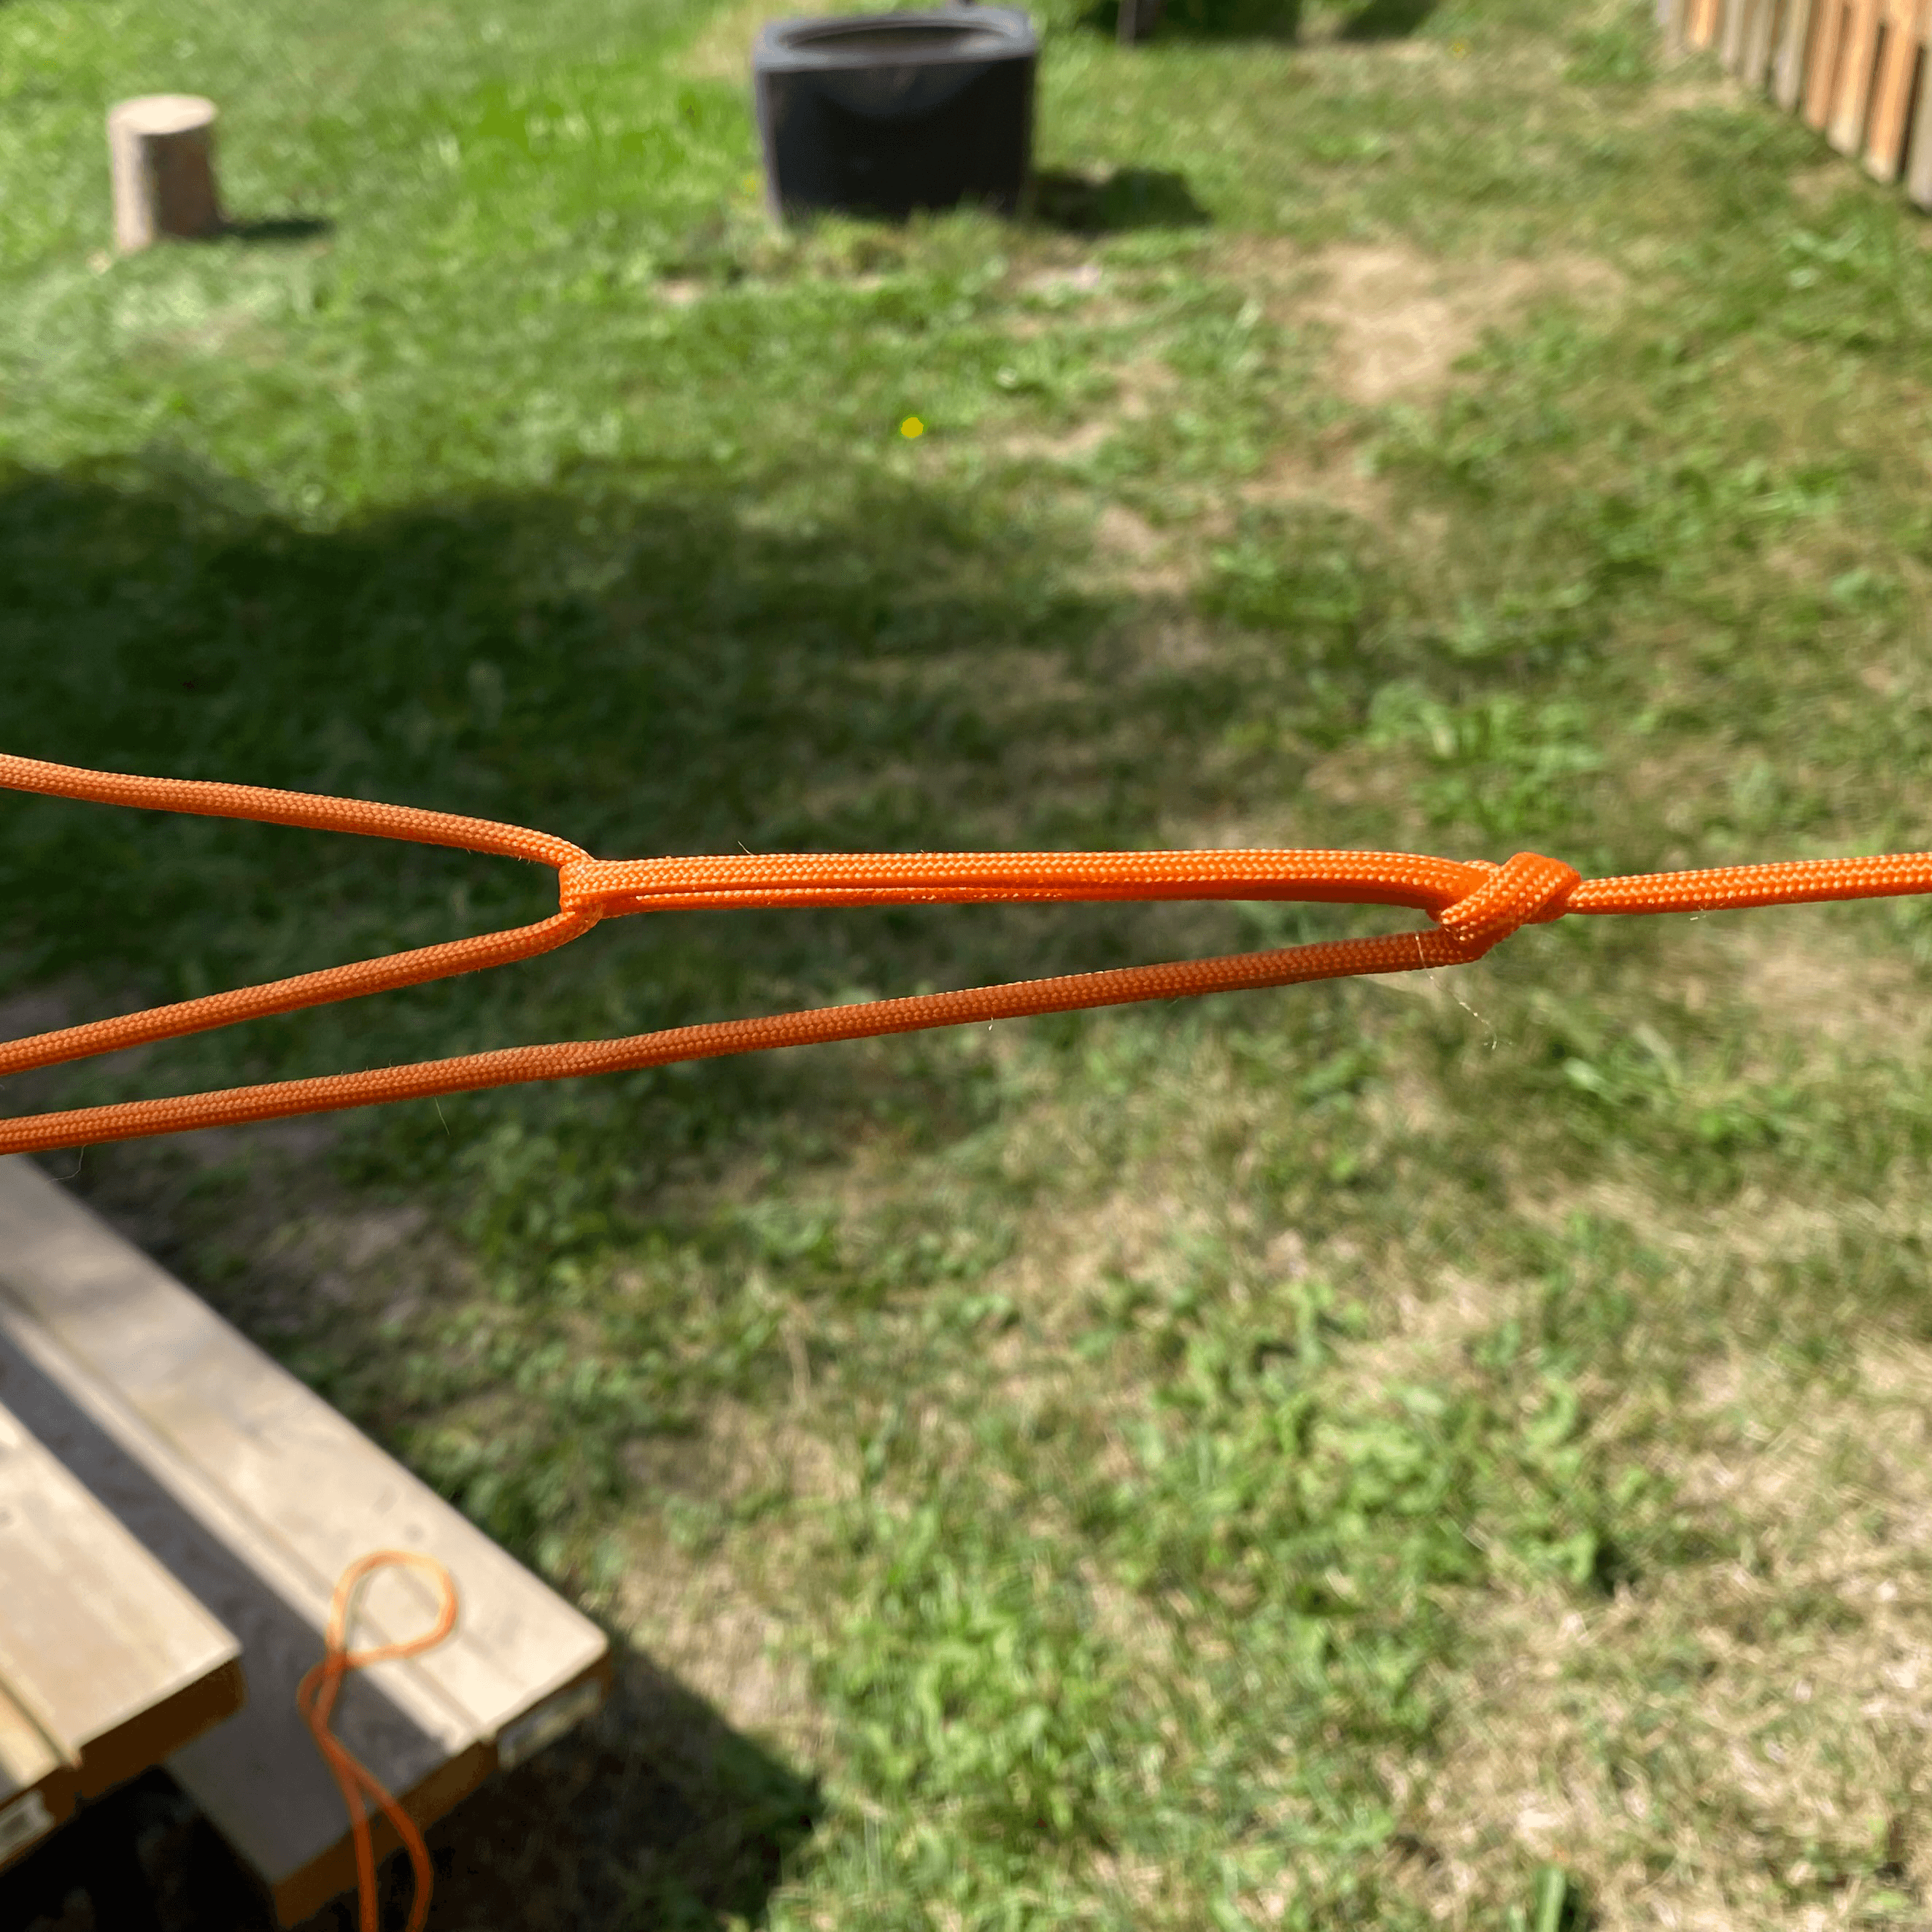
- Make pulley loop — Take the hand closer to the 1st anchor and turn it clockwise so that the back of the hand is facing the ground and the palm is facing the sky. grab the standing line from this hand position. Turn the hand back towards the original starting point with the palm facing up. You now have a loop in the standing rope. Form a claw shape with your hand and pinch a bight of the working end. Pass the bight through the loop and pull it towards the 2nd anchor until the loop tightens around the bite and you are left with the pulley loop.
🔄 To undo: Pull standing line and working end apart. Loop collapses.
👉 There are alternate methods for the pulley loop but this is the easiest to become second nature. - Tension — Pass working end through the pulley loop, pull hard toward second anchor.
- Secure:
- Grip the tensioned line where it passes through the pulley loop. Finish with:
- 🔒 Two Half Hitches (secure).
- ⚡ Slipped Half Hitch (quick release).
✅ Shape Check: Pulley loop sits near anchor, line feels tight like a guitar string, finish is locked.

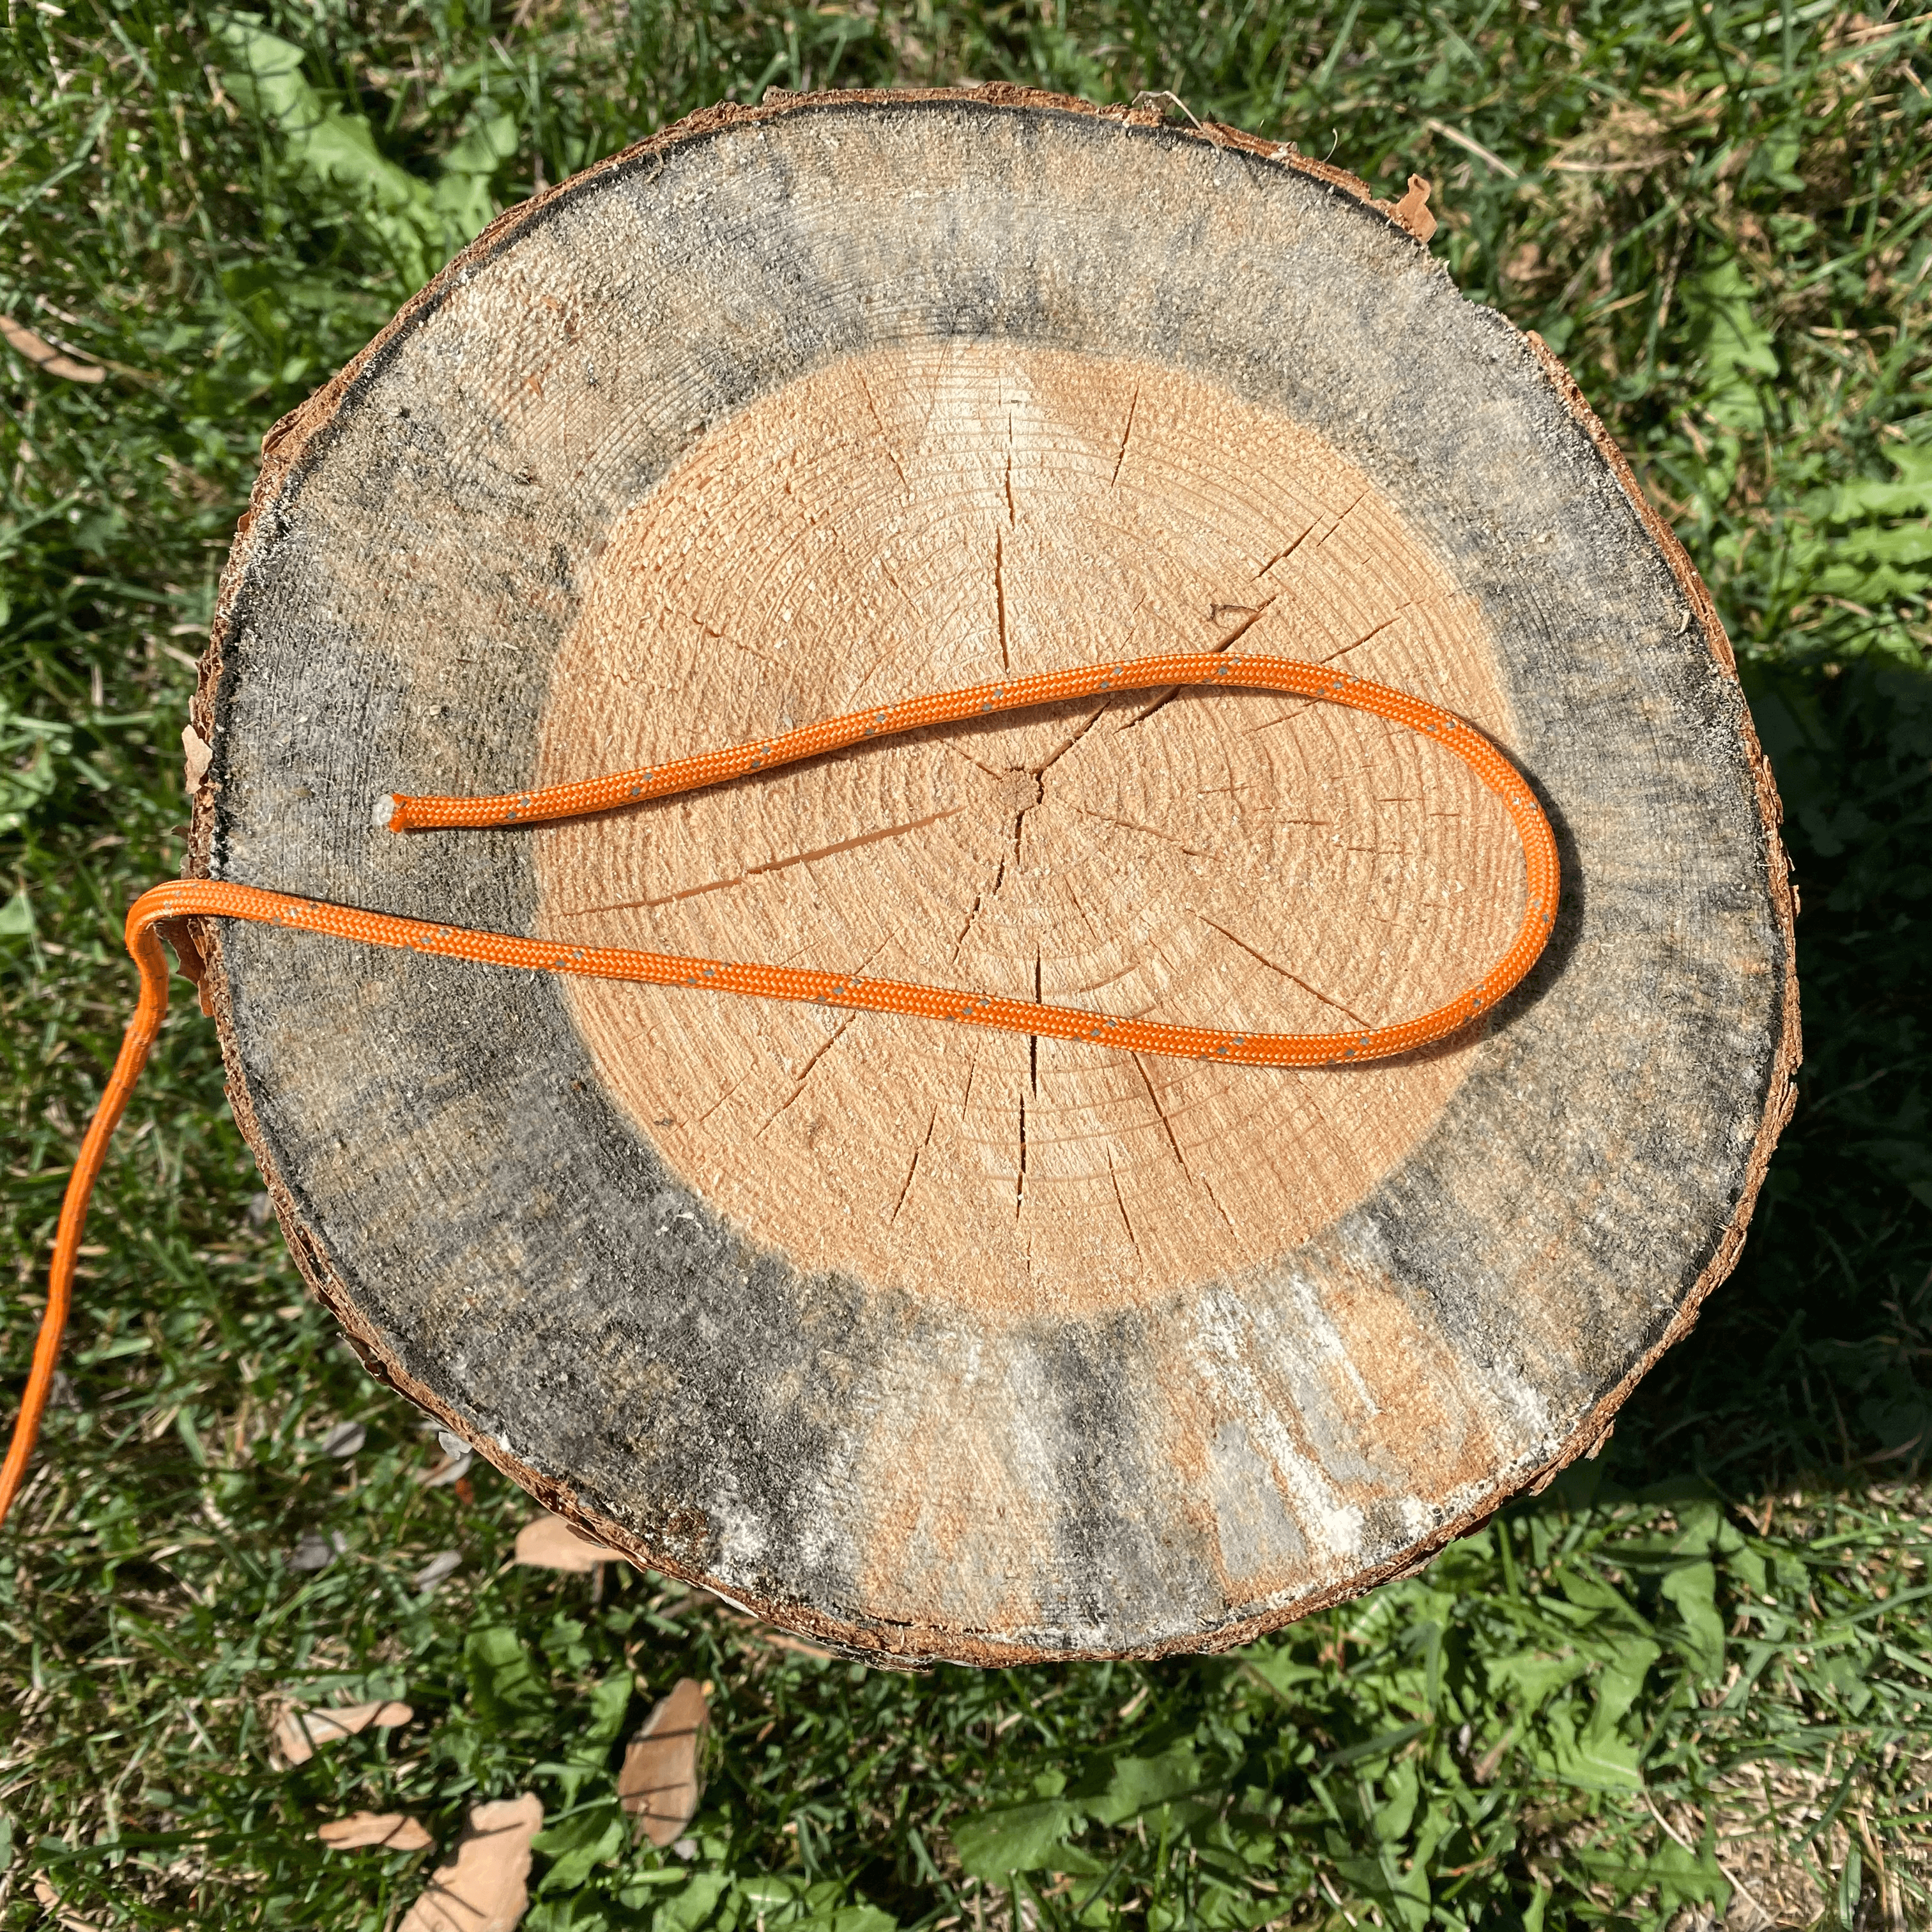
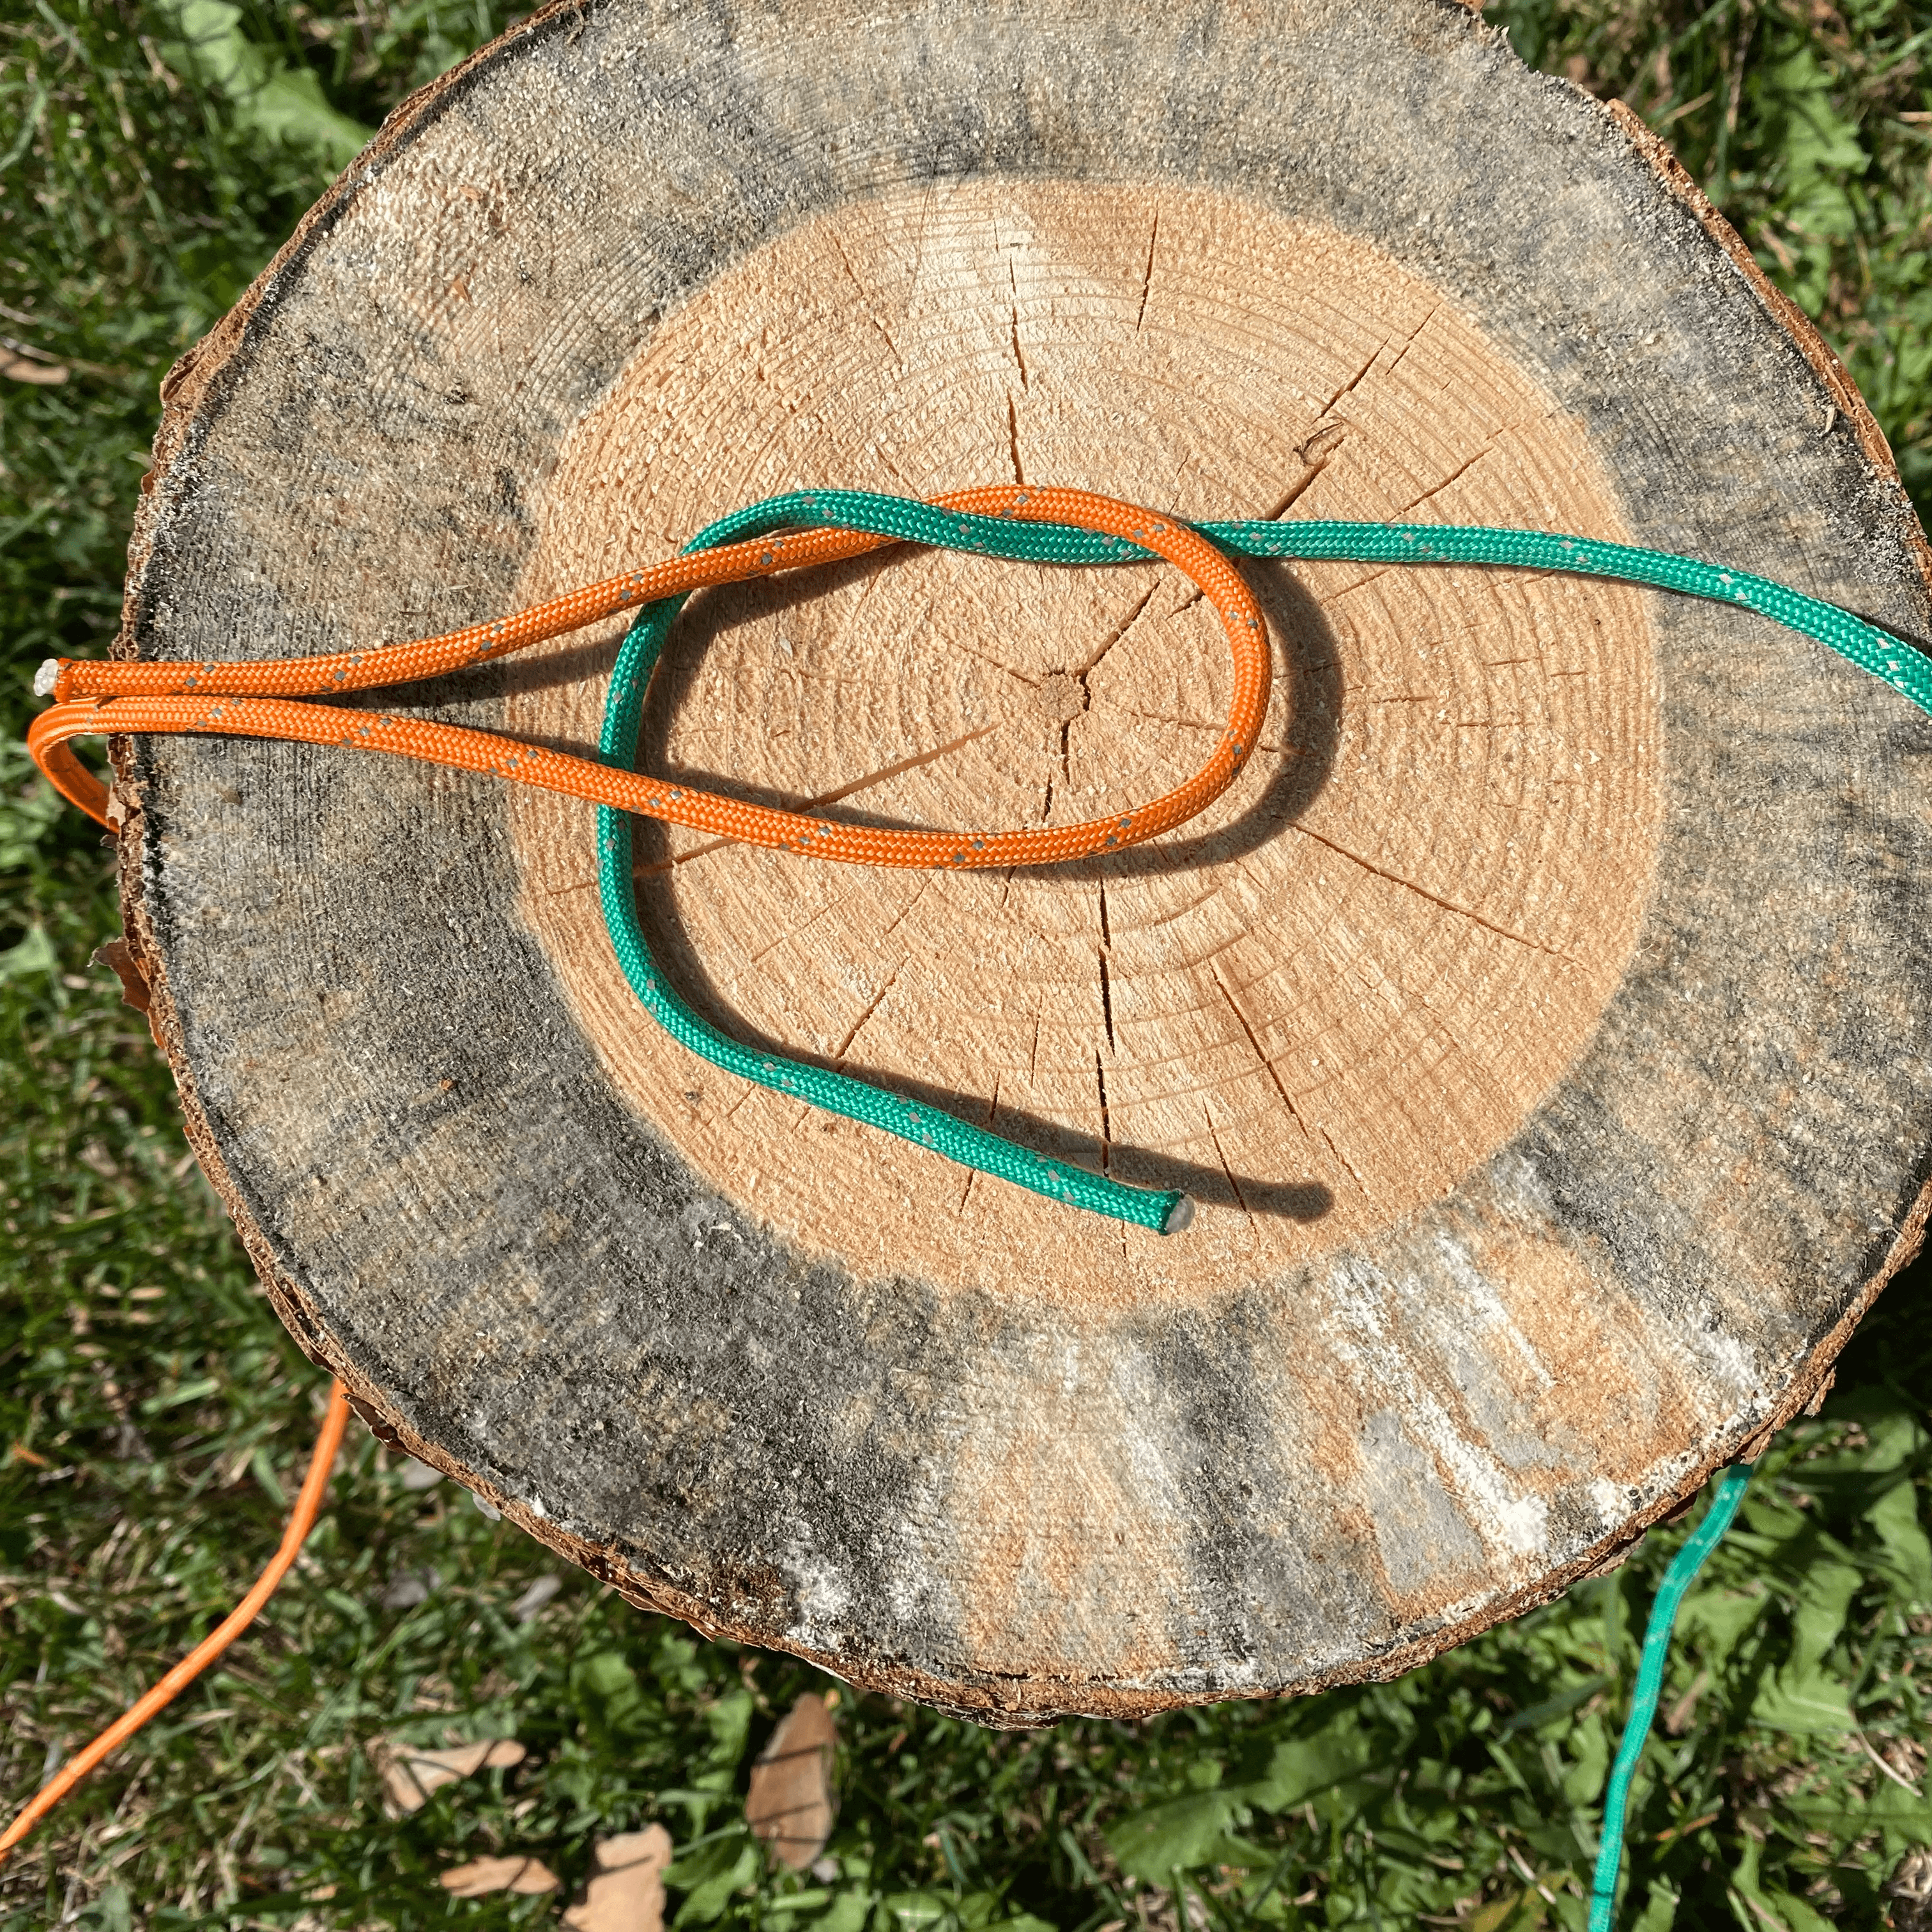
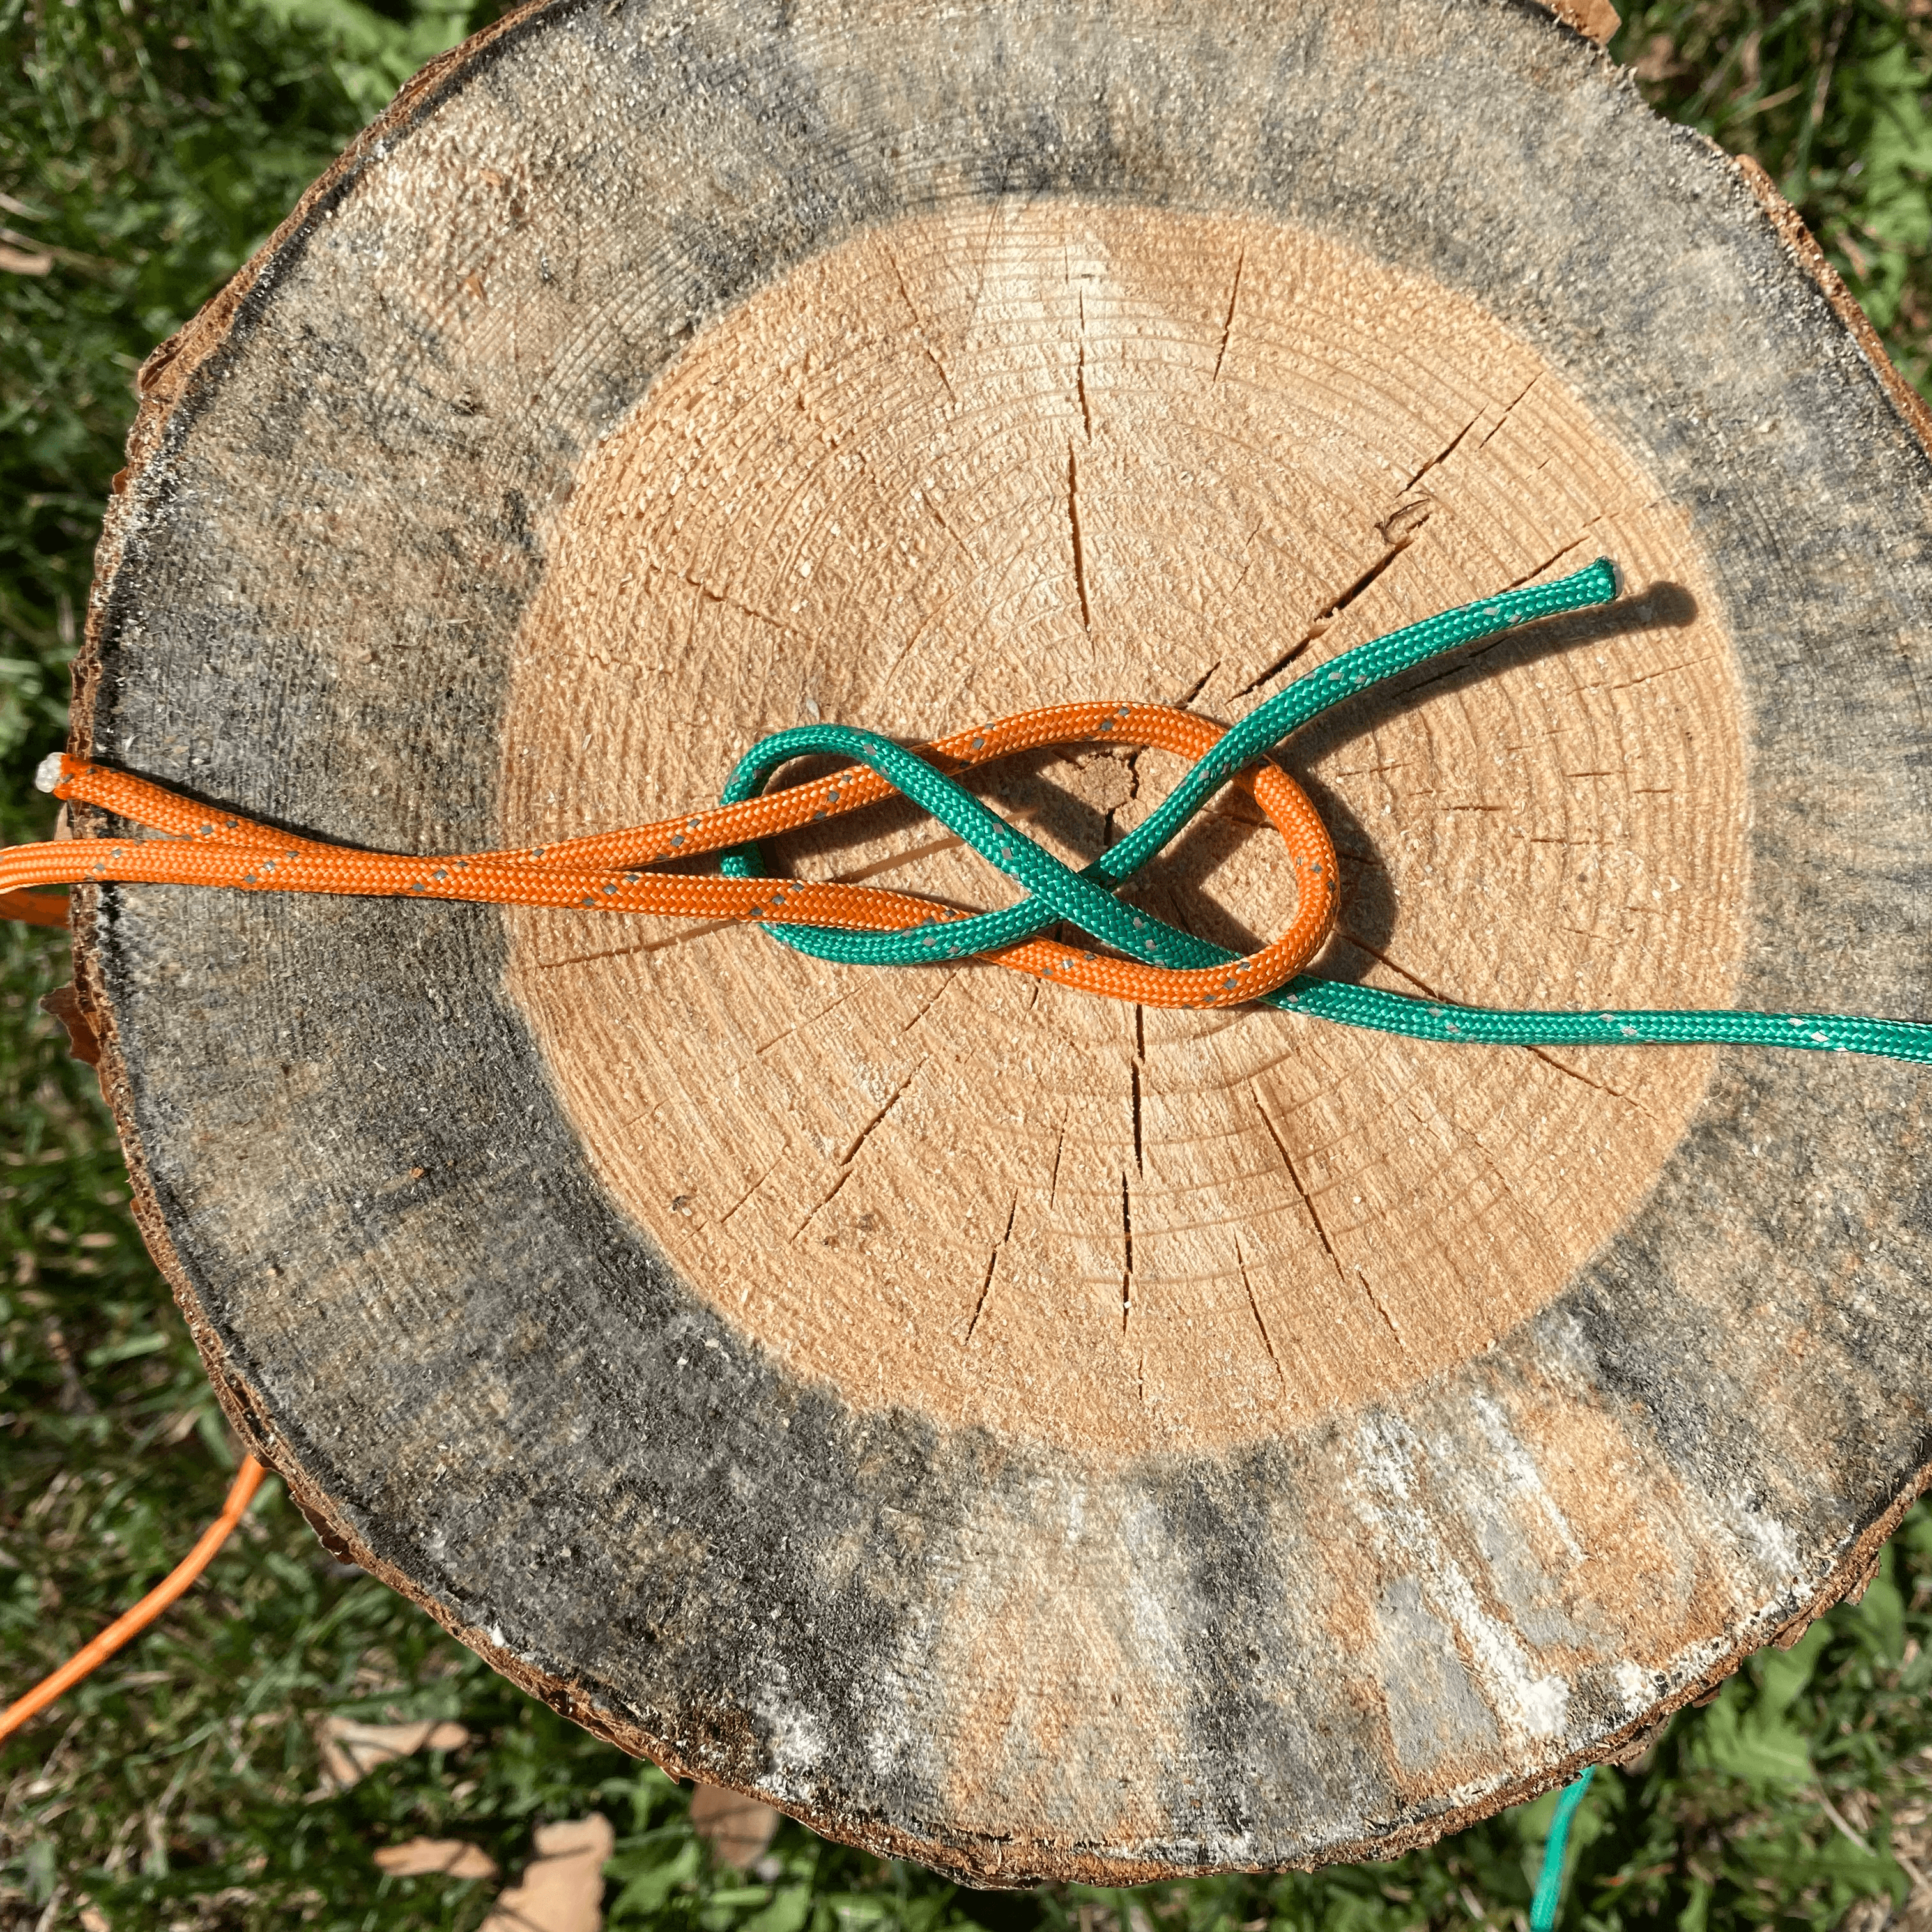
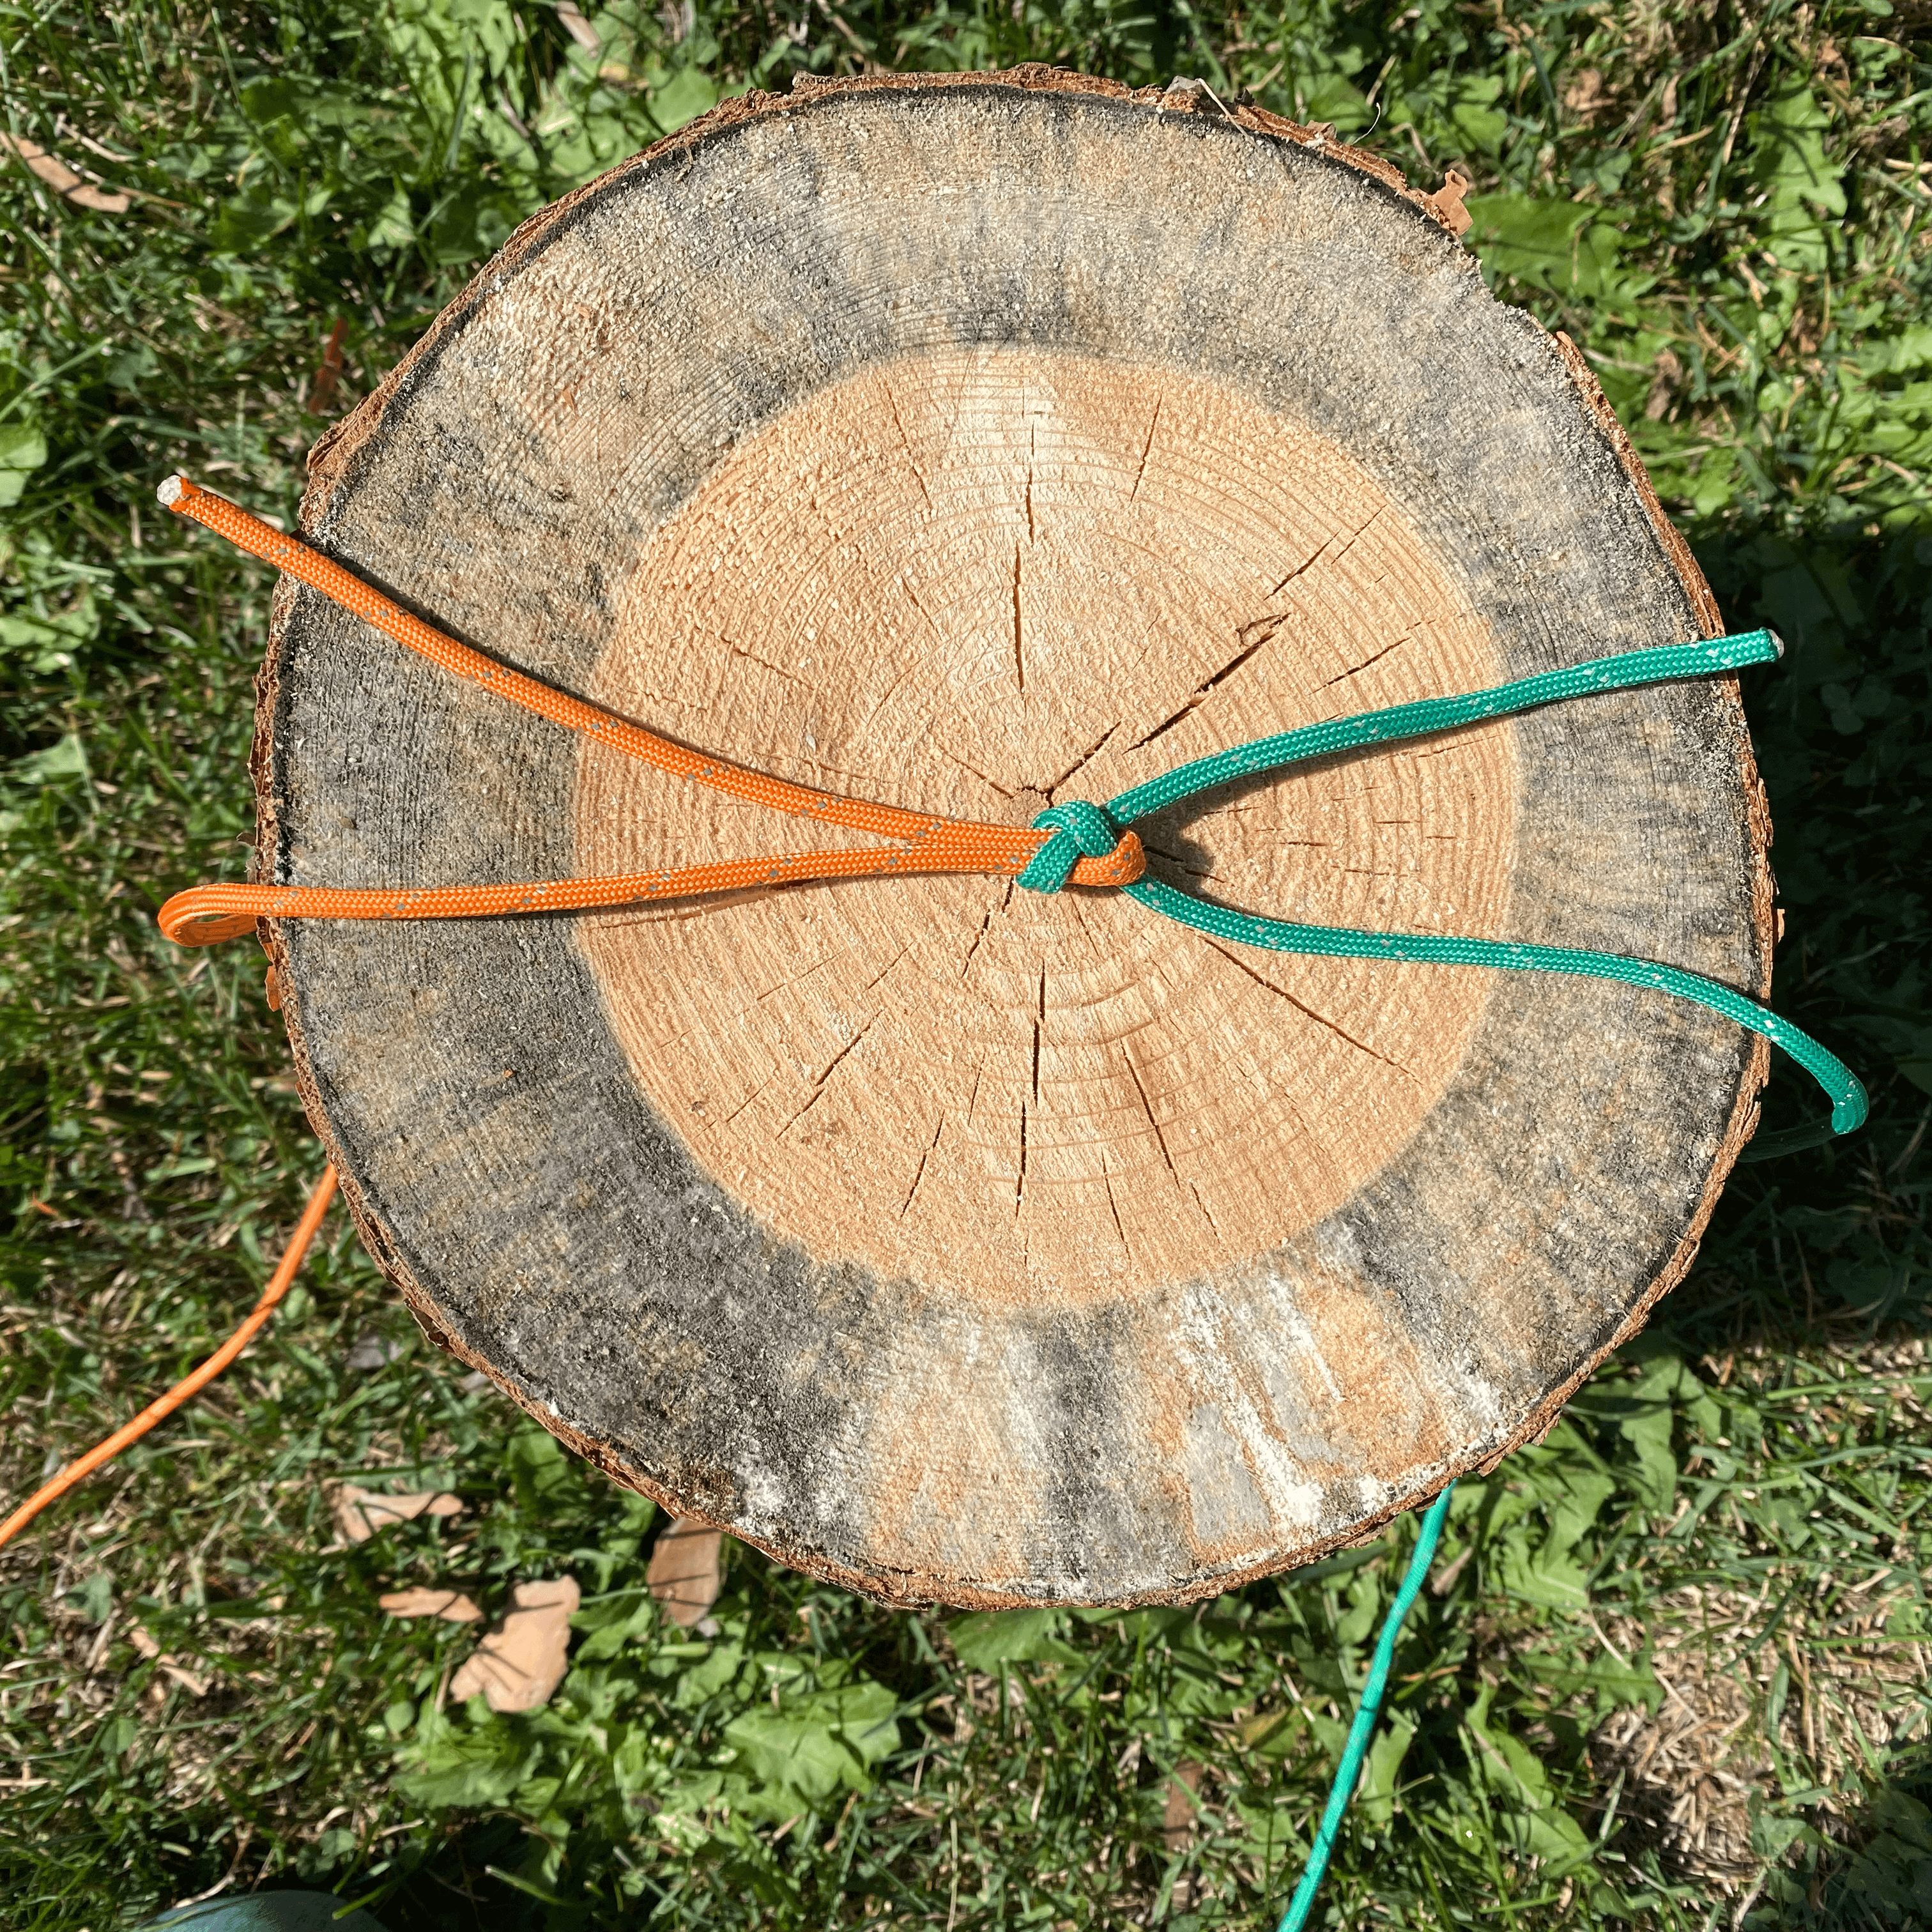
4) Sheet Bend (Rope Bend)
Purpose: Joins two ropes securely, even if different sizes.
Uses:
- Extend guy-lines.
- Repair broken rope.
- Tie cord to tarp loops.
How to Tie:
- Make a bight in thicker rope, shorter end on top.
- Pass thinner rope’s working end up through the bight.
- Wrap it behind both legs of the bight.
- Tuck it under its own standing line, and above the bight.
- Pull snug, leave 3–4 in tail.
✅ Shape Check: Thinner rope clamps both legs of the bight; working end exits same side it entered.
👉 Use Double Sheet Bend if ropes are slick or very different in size.

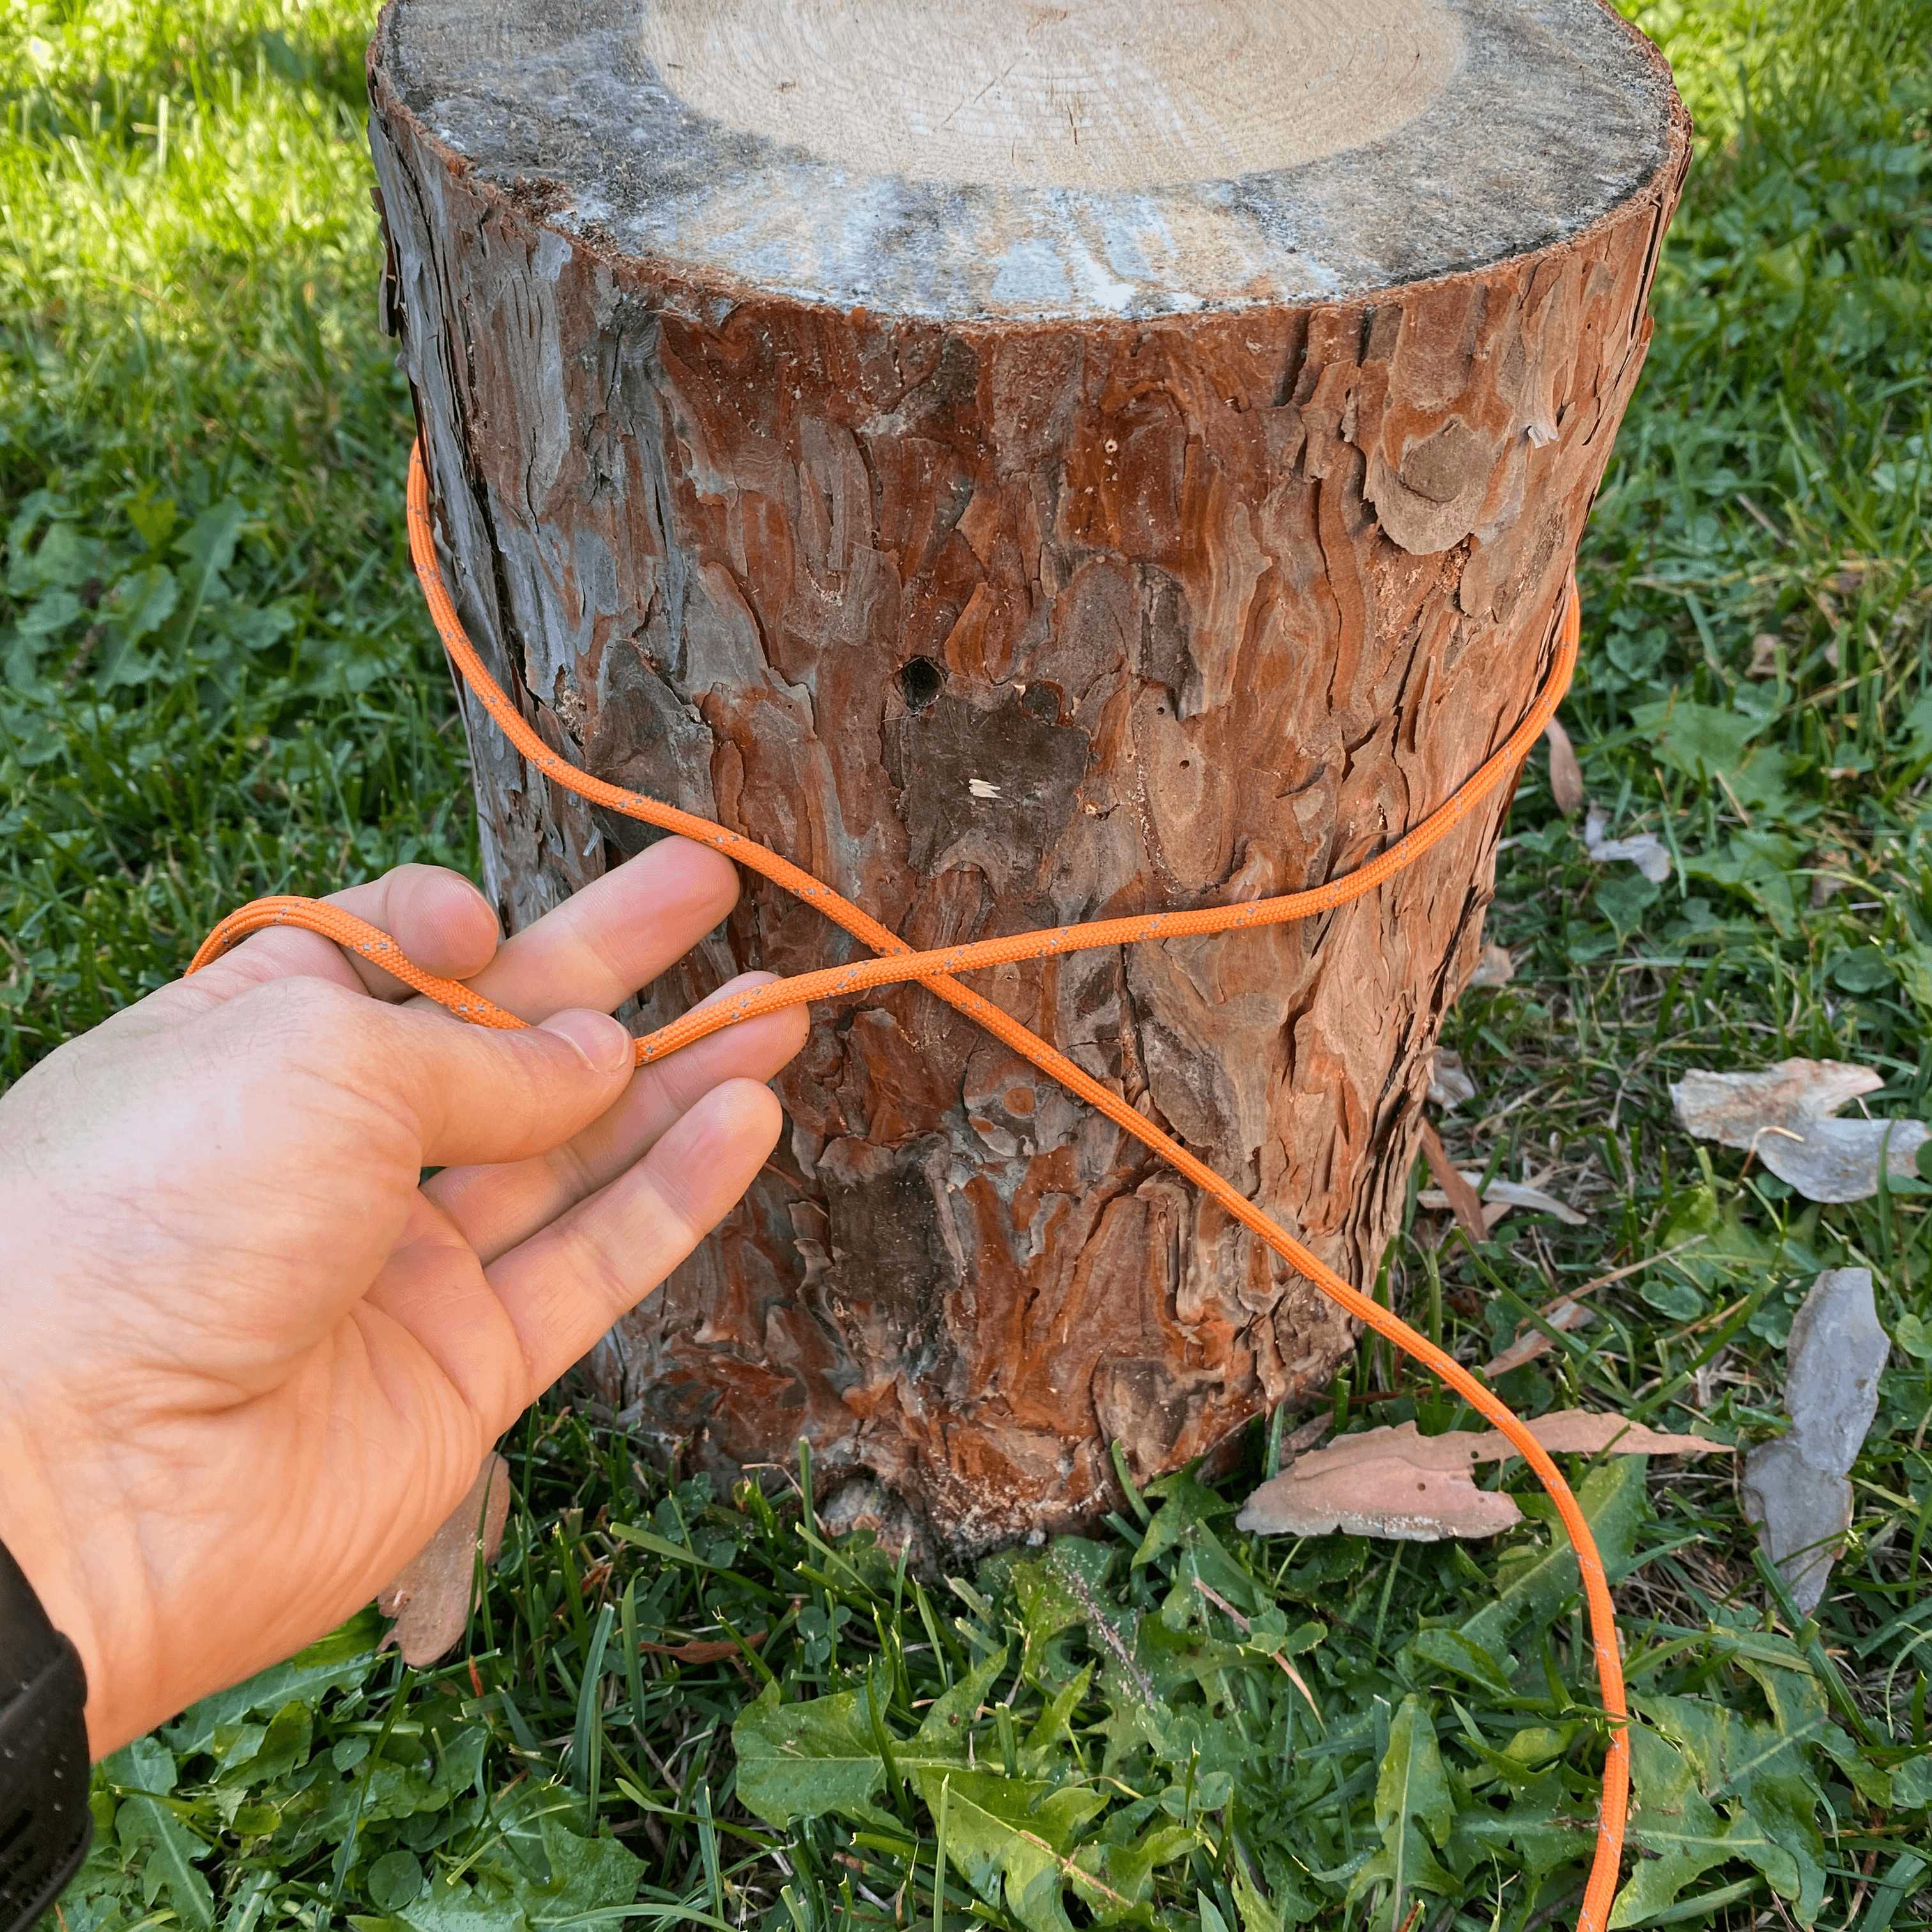
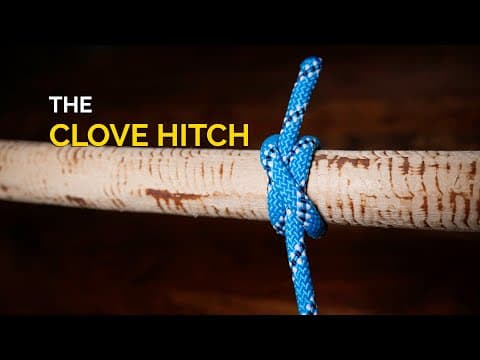
5) Clove Hitch (Quick Hitch)
Purpose: Quick hitch around a pole, stake, or post. Best under steady tension.
Uses:
- Tie tarp to trekking poles.
- Clotheslines or drying racks.
- Temporary tie-offs.
How to Tie:
- Wrap rope once around anchor.
- Wrap again, crossing over standing line to form an “X.”
- Tuck working end under second wrap.
- Pull snug, leave 2–3 in tail.
✅ Shape Check: Rope makes a clean X on anchor; working end exits under second wrap, pointing along the standing line away from the anchor.
⚠️ Limitations:
- Can slip if load changes or slackens.
- ❌ Not for tarp ridgelines.
- ❌ Not for securing critical items like canoes, cargo, or heavy gear.
👉 Best for steady, non-critical loads (clotheslines, poles, lashings).
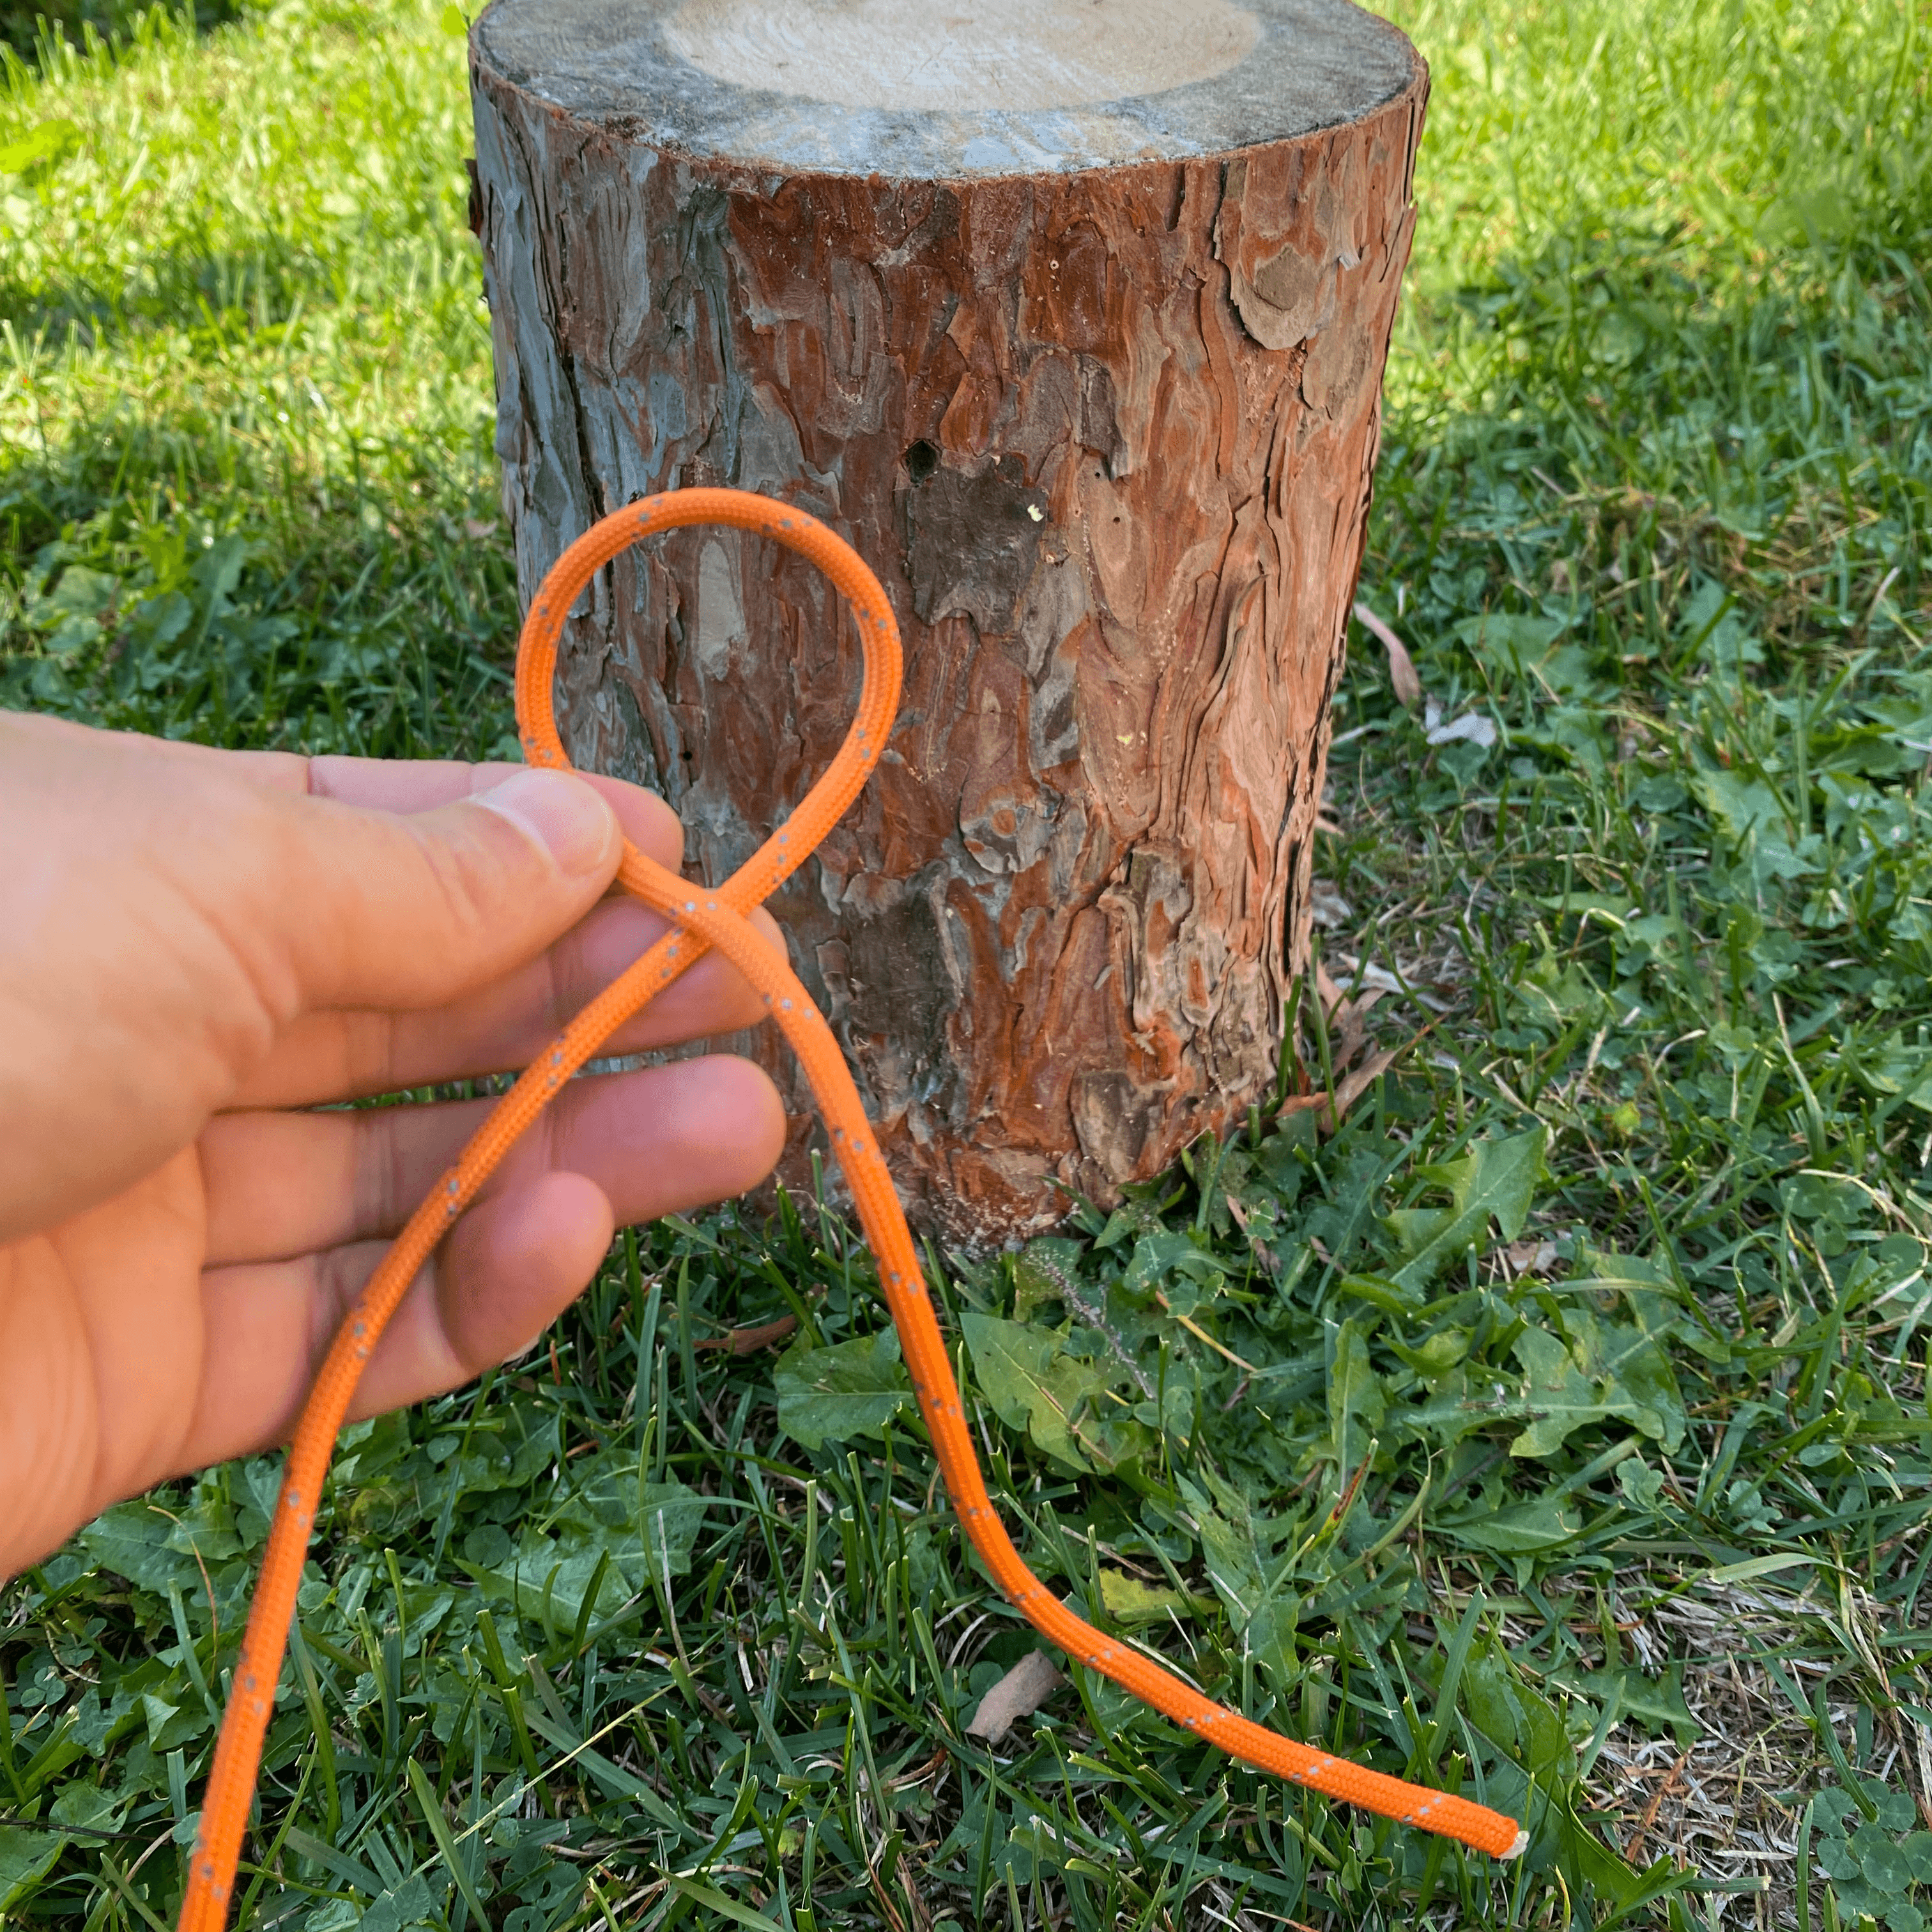
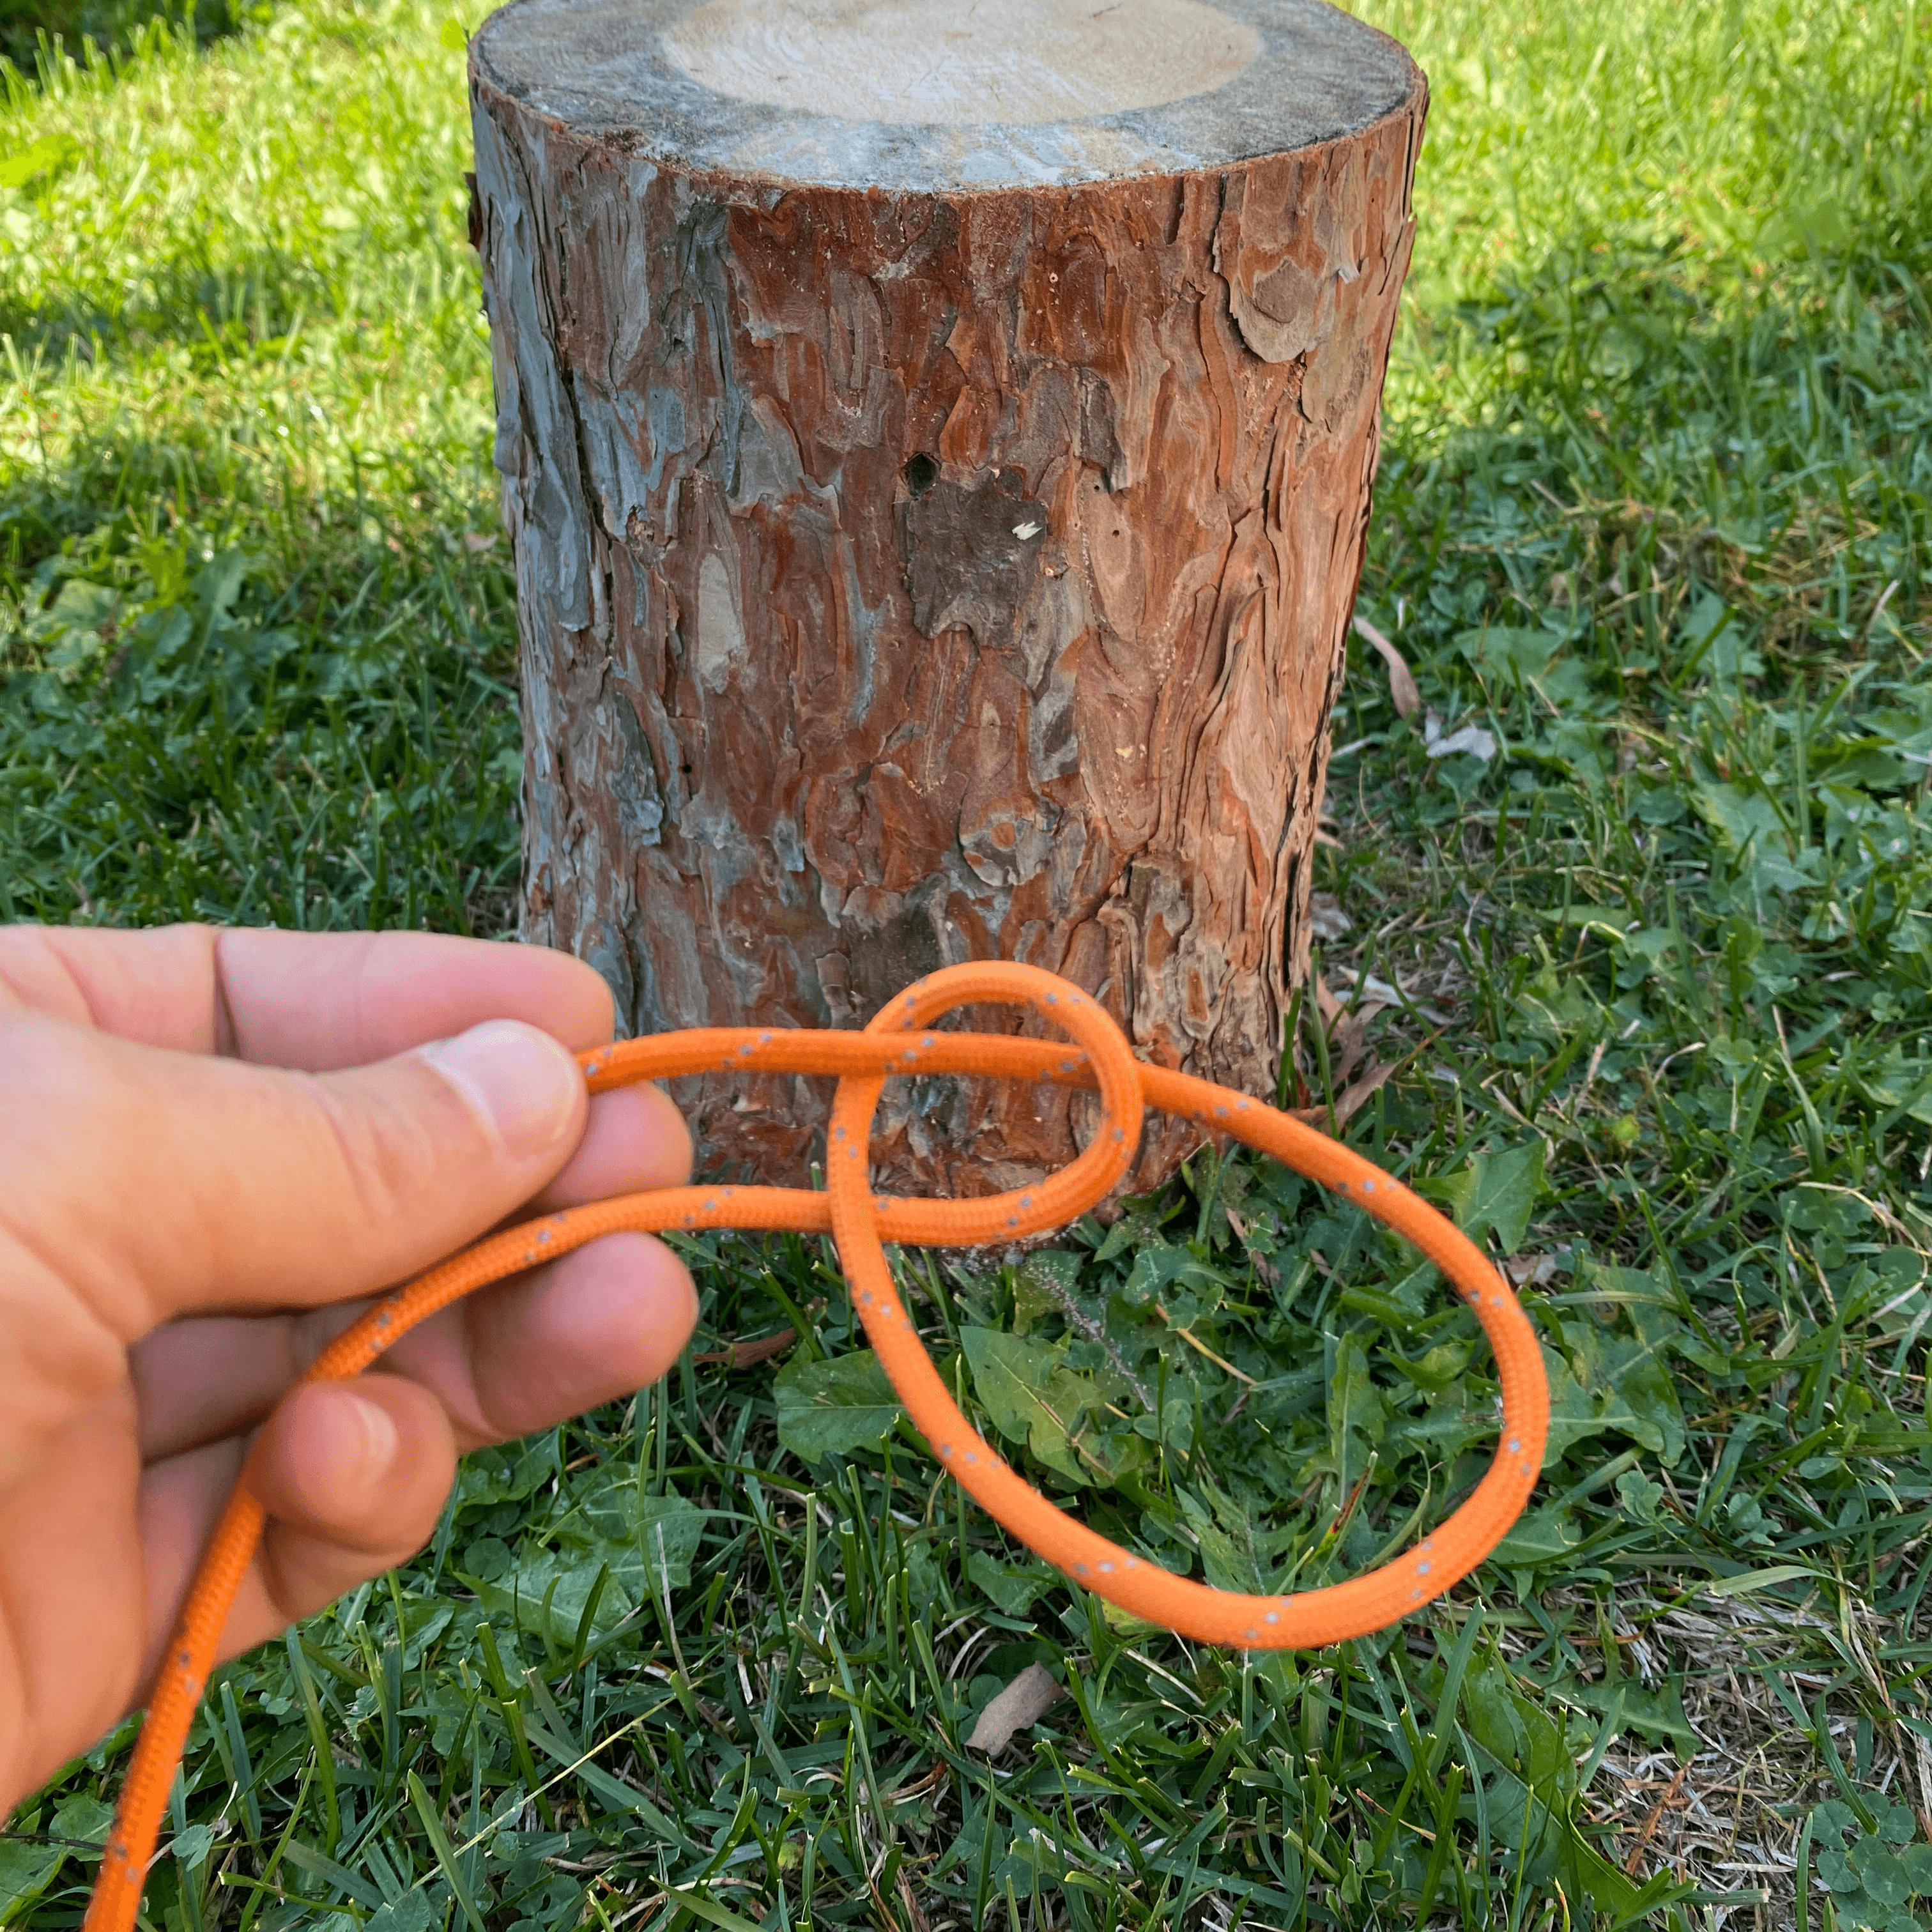
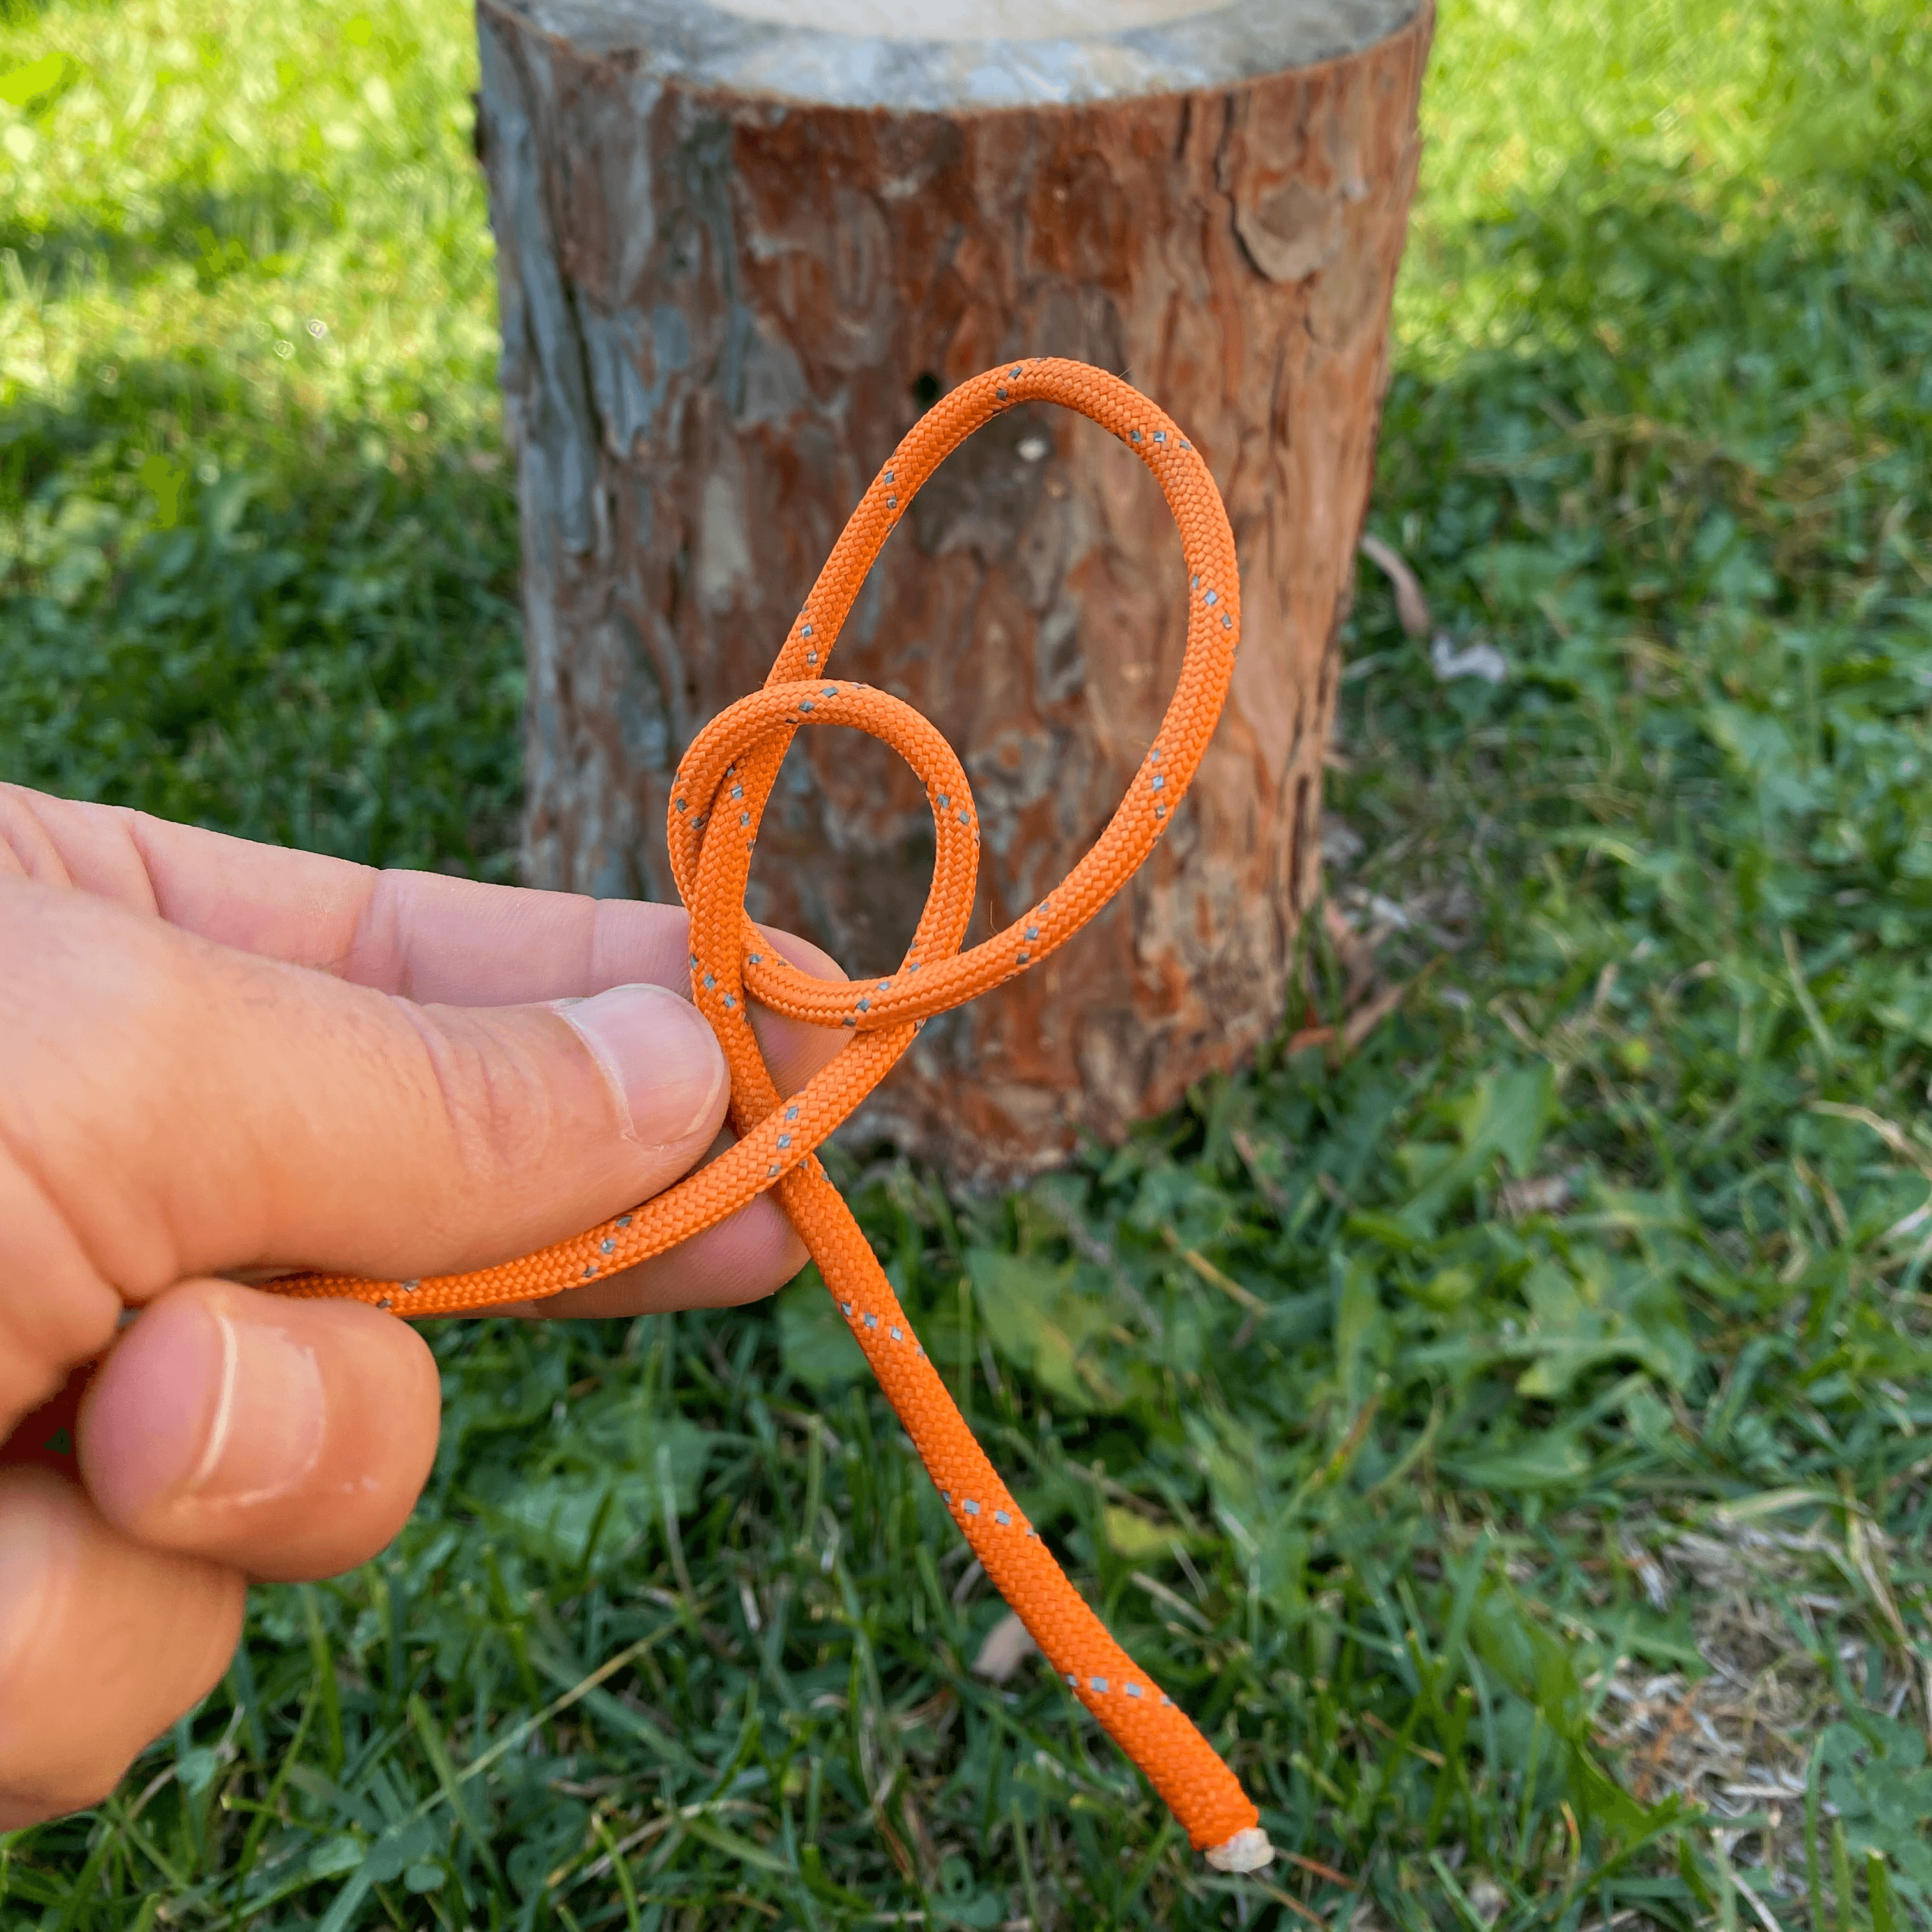
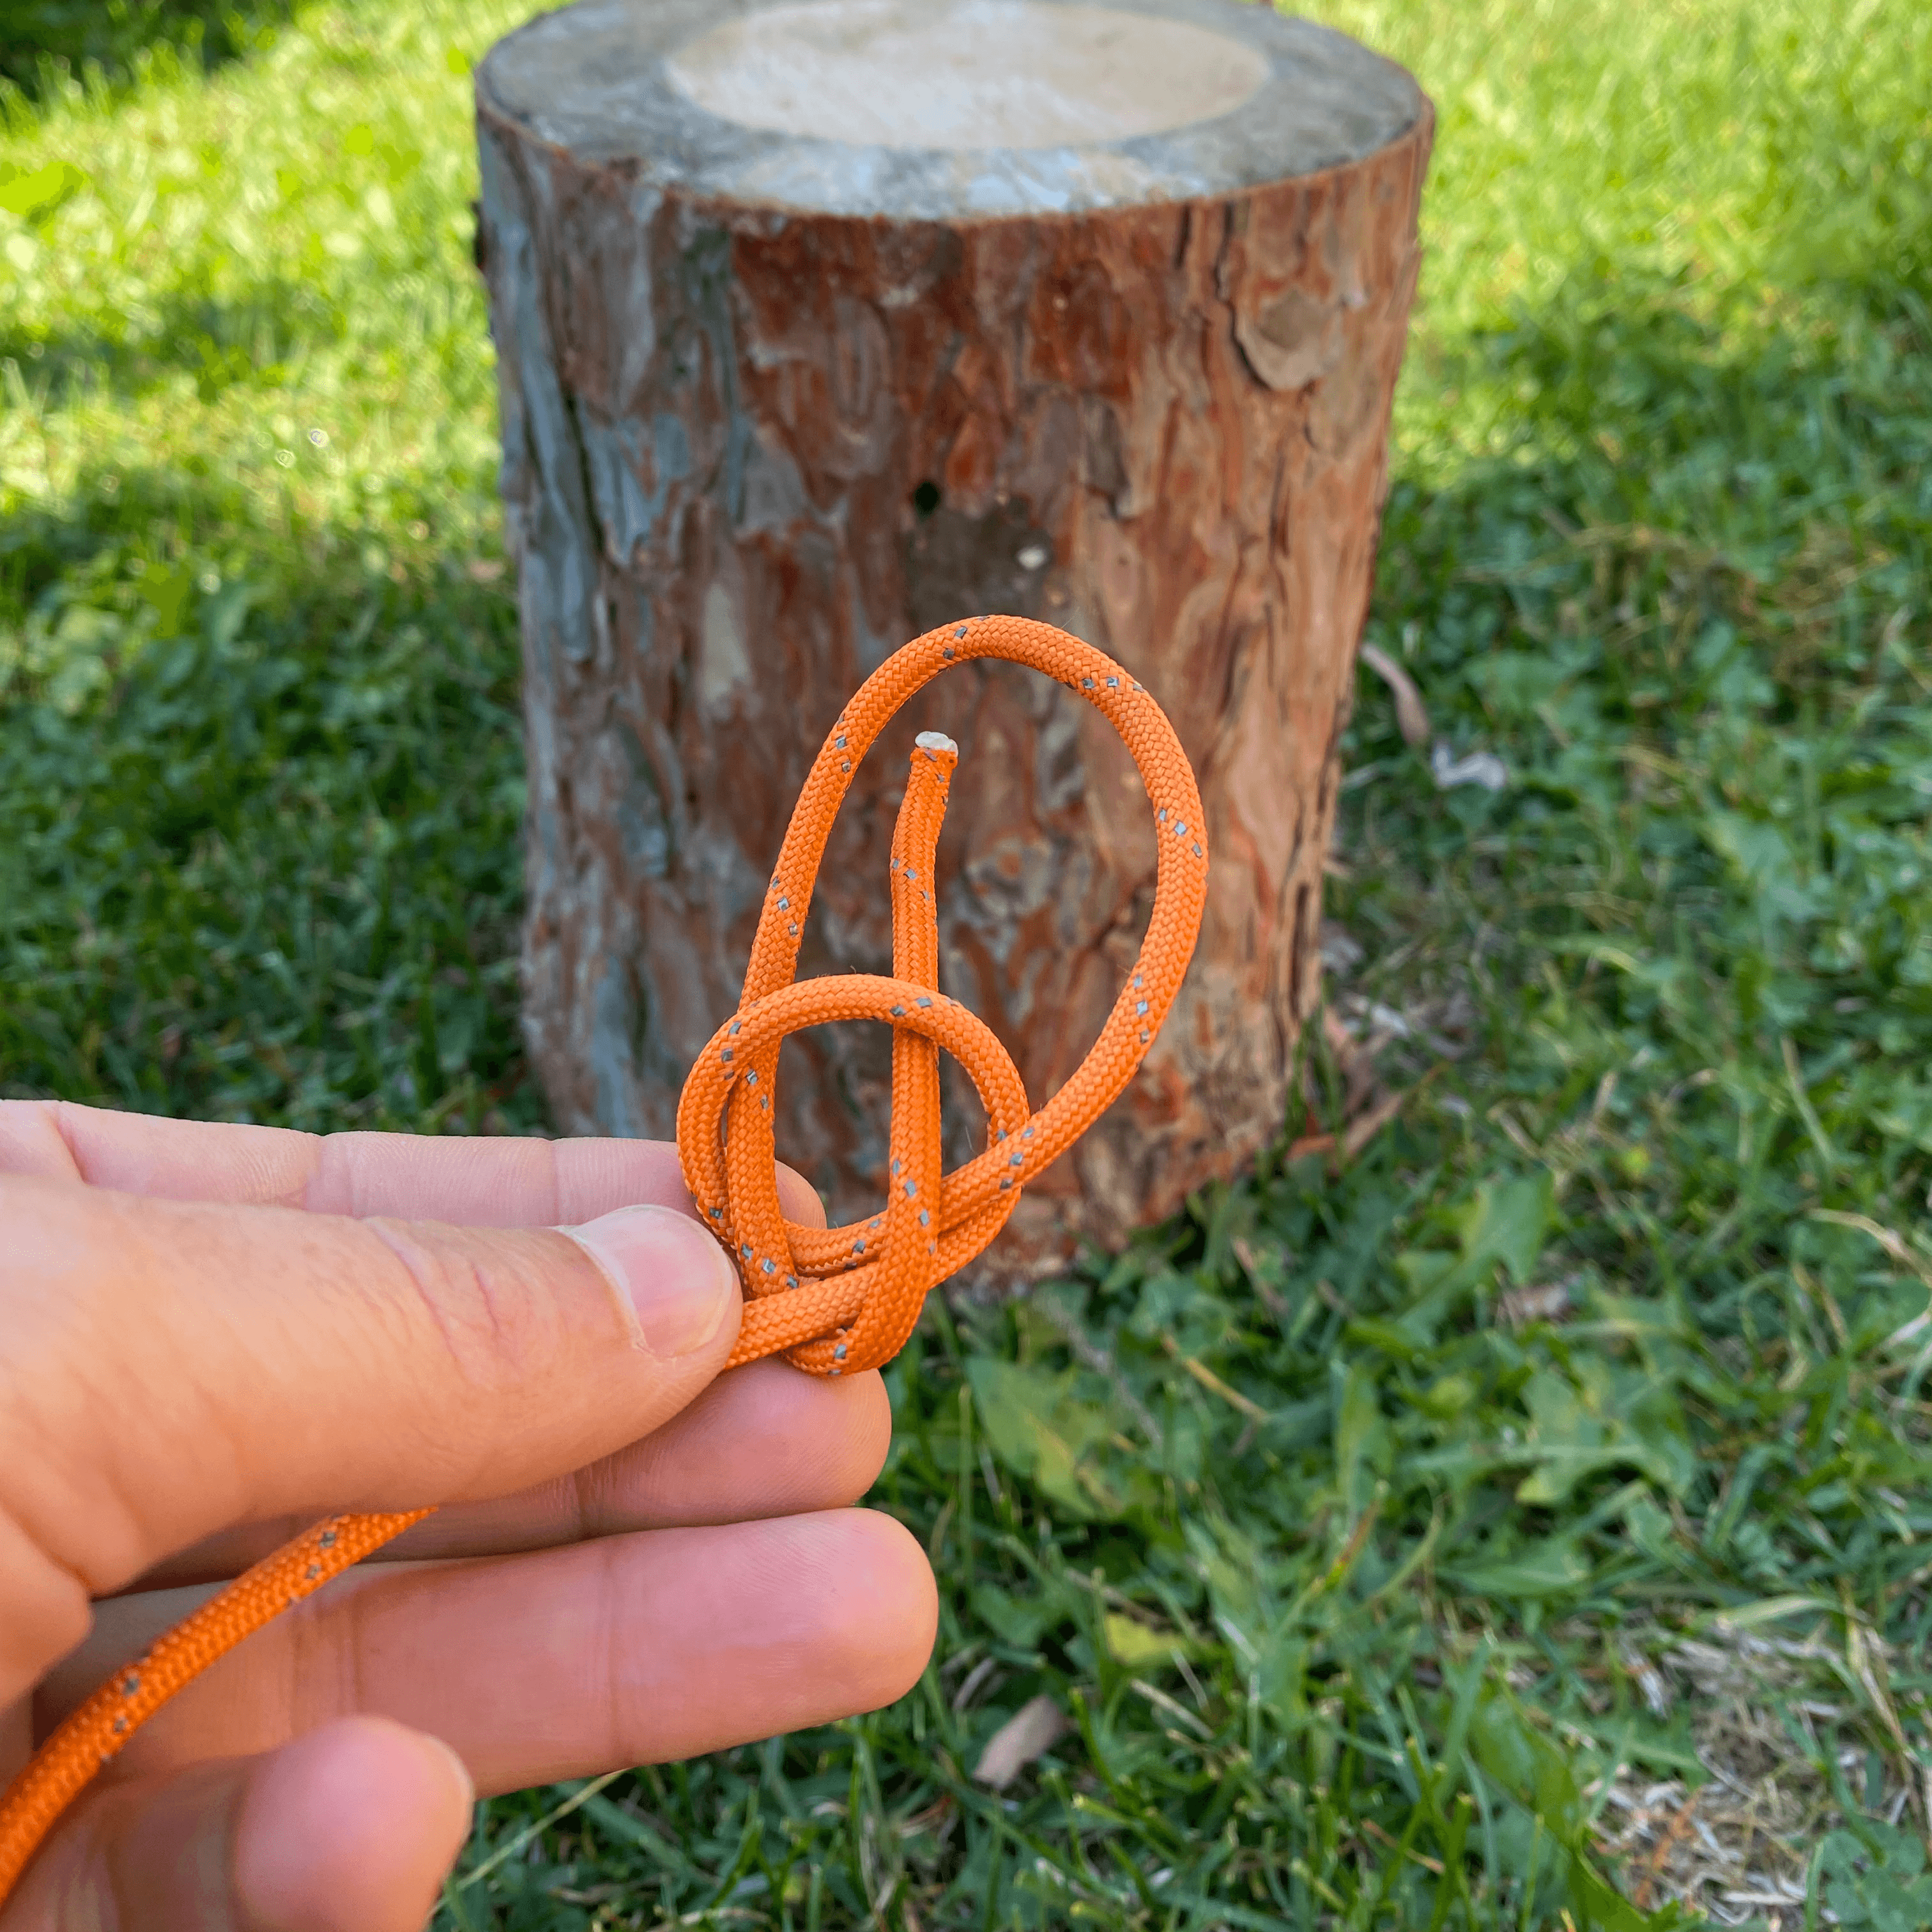
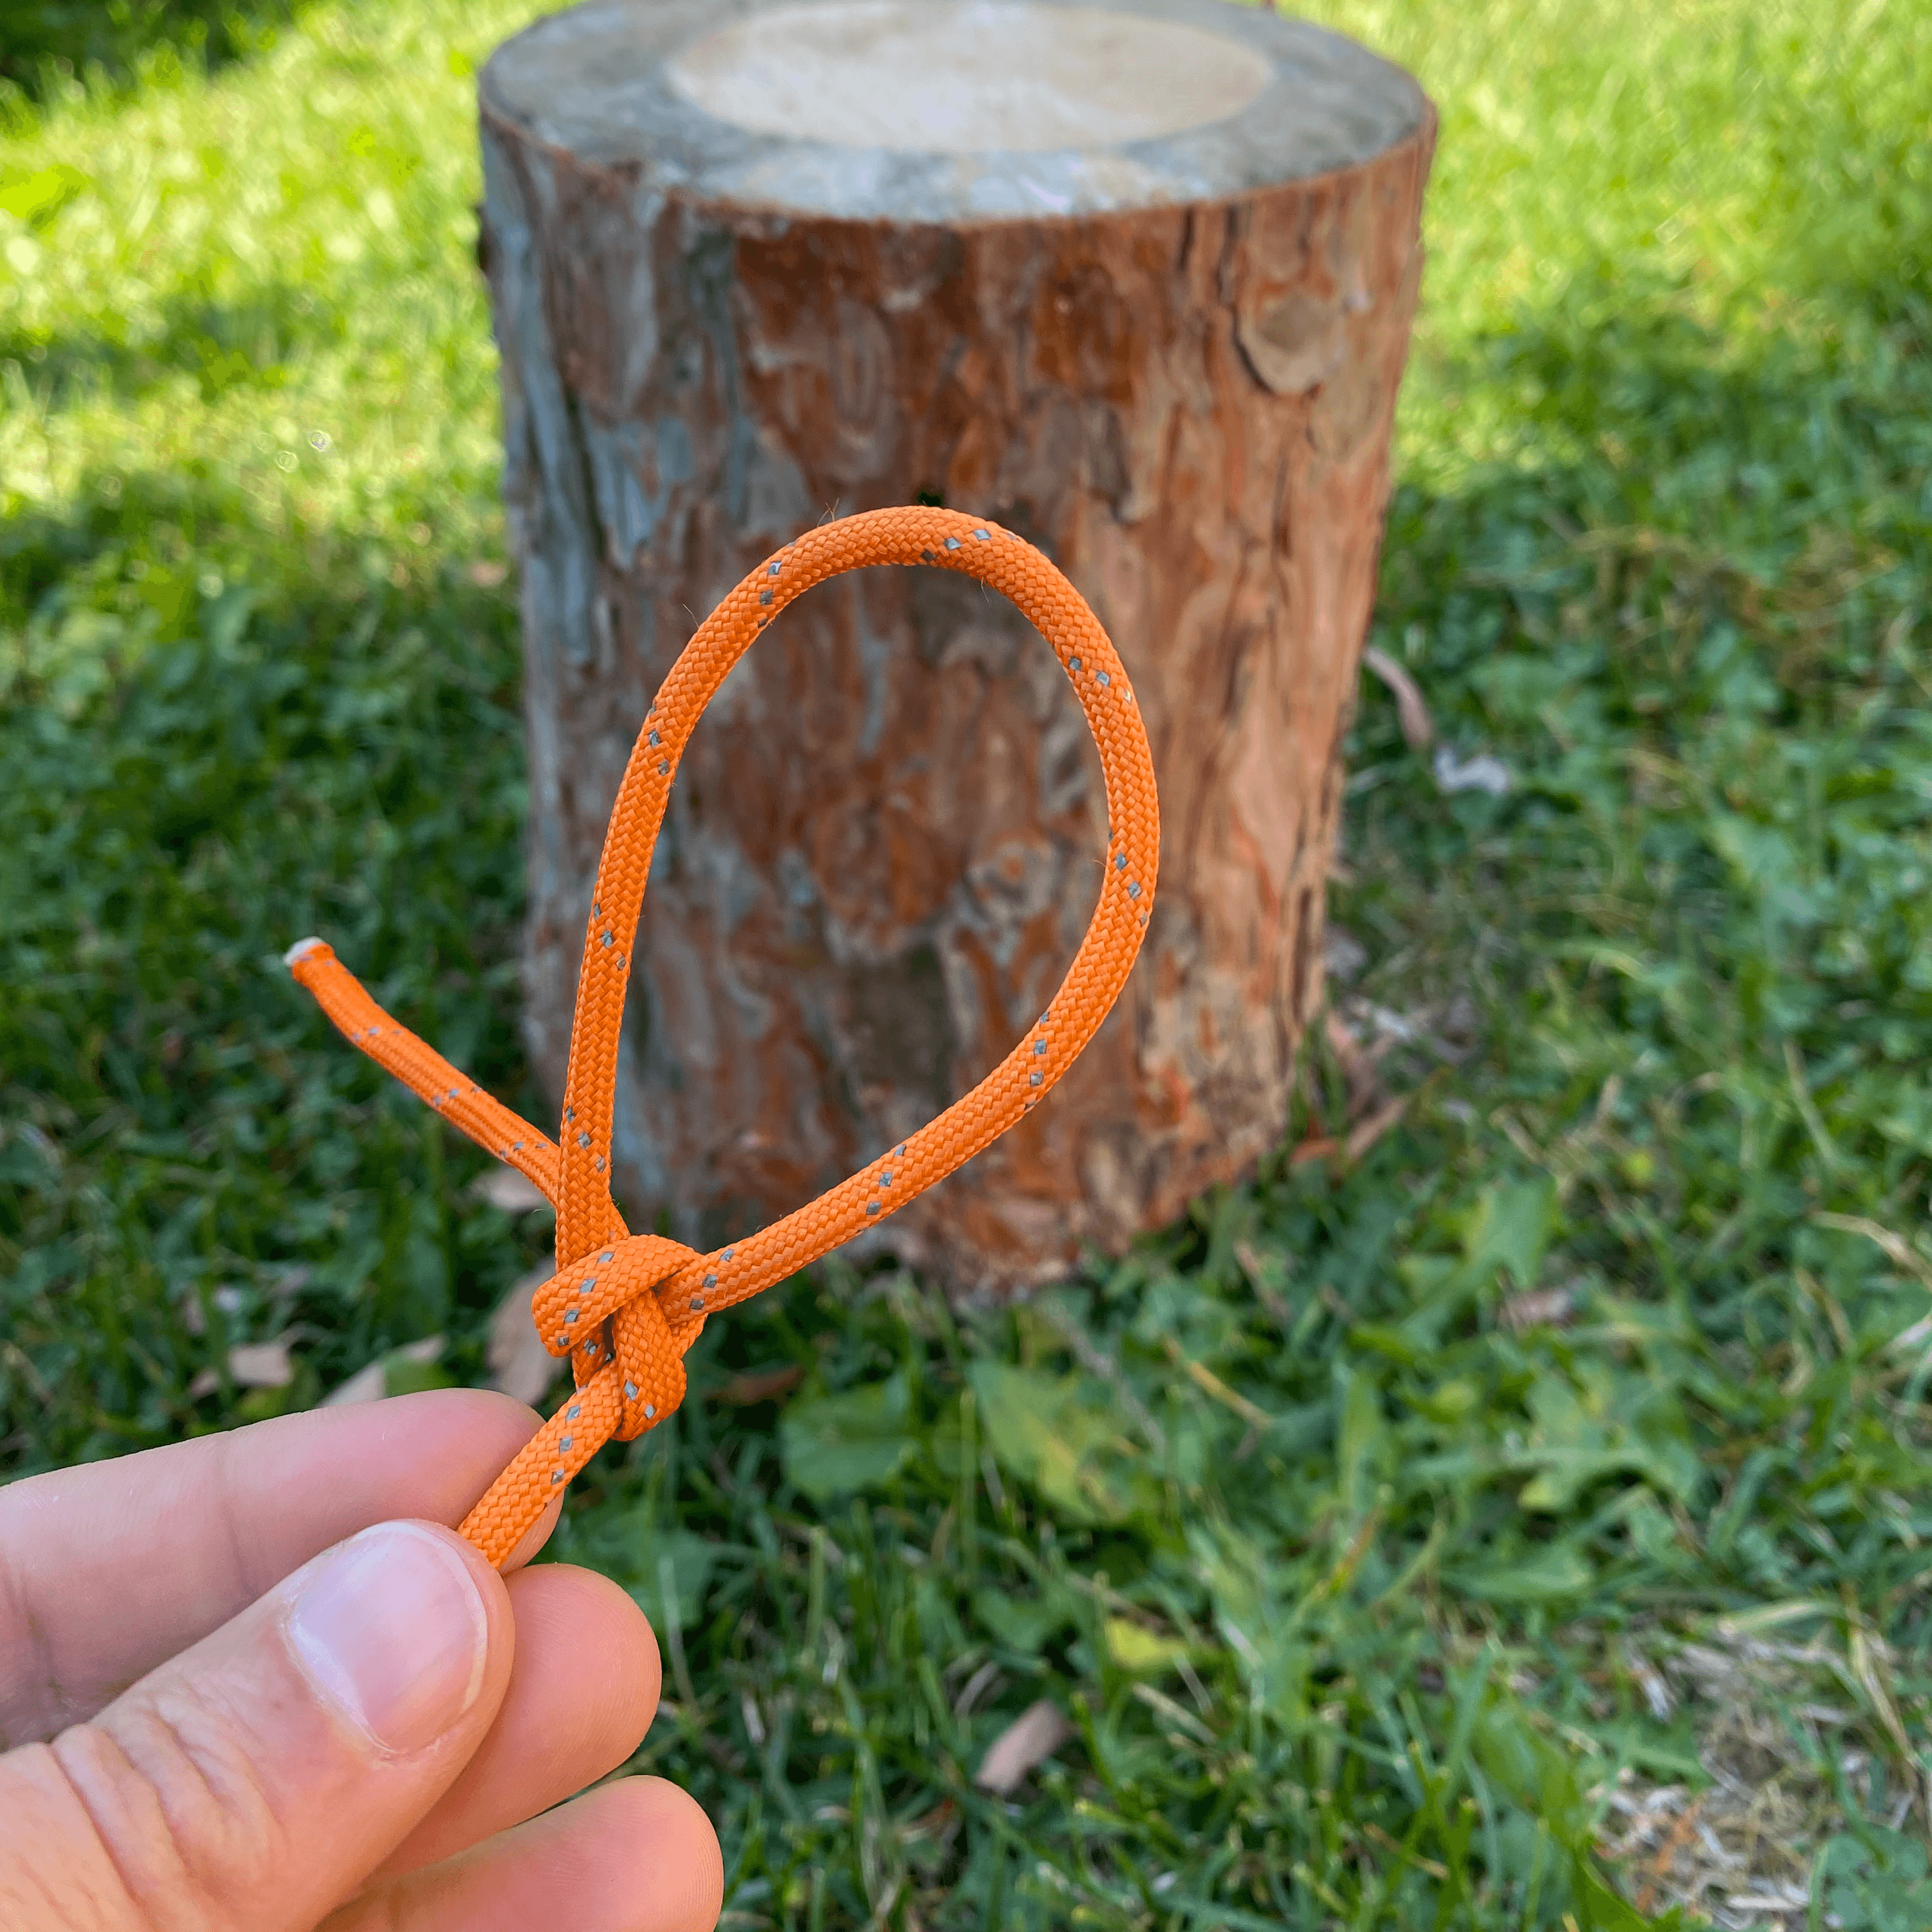
6) Bowline (Anchor & Attachment Knot)
Purpose: Creates a fixed loop that won’t slip. Reliable for anchors and tarp attachments.
Uses:
- First anchor point for tarp ridgelines.
- Attaching to tarp grommets or corner tie-outs.
- Rescue or hauling loop.
- General camp repairs.
How to Tie:
- Leave 6–8 in working end. Make a small loop in the standing line (crossing so it holds shape).
- Pass working end up through the loop.
- Wrap behind standing line.
- Bring it back down through the loop.
- Pull snug, leave 2–3 in tail.
✅ Shape Check: Fixed loop; working end exits inside loop, pointing toward the standing line.
⚠️ Easier to untie than most knots after normal loads, but may jam under very heavy strain. In camping, this is rare and usually not a problem.
👉 Use this as your anchor when you need a loop, or to secure tarp grommets and tie-outs.
7) Slipped Half Hitch (Quick Release Hitch)
Purpose: Quick-release finisher knot.
Uses:
- Finish Trucker’s Hitch.
- Temporary tarp tie-downs.
- Quick-release tie-offs.
How to Tie:
- Wrap working end around standing line or anchor.
- Instead of tucking full end through, make a bight.
- Pass the bight through (not the whole working end).
- Pull snug.
👉 To release: tug free end. Knot collapses instantly.
✅ Shape Check: Looks like a normal half hitch but leaves a pull-tab loop.
Pro Tips
- ✅ Practice with thick cord first; graduate to thin guy-line cord later.
- ✅ Always leave tails — too short = knots slip.
- ✅ Wet ropes tighten harder; leave longer tails.
- ✅ For slippery cord (Dyneema), double-wrap hitches for security.
Common Mistakes to Avoid
- ❌ Using a Clove Hitch as a tarp ridgeline anchor — it slips.
- ❌ Using Clove Hitch for canoes or cargo — unsafe.
- ❌ Forgetting tails — knots pull through under load.
- ❌ Mixing wraps in Taut-Line Hitch — if it doesn’t slide, you reversed over/under.
- ❌ Making Trucker’s Hitch pulley loop too far from anchor — it must be relative to the anchor.
Knot Checklist (Field Quick-Reference)
| Knot | Type | Purpose | Best Use | Shape Check |
|---|---|---|---|---|
| Round Turn + 2 Half Hitches | Hitch | Default anchor | Trees, posts, food hangs | Two hitches snug on standing line |
| Taut-Line Hitch | Hitch | Adjustable tension | Guy-lines, clotheslines | Two wraps anchor side, one wrap free side |
| Trucker’s Hitch | Hitch | High tension | Ridgelines, storm tie-downs | Pulley loop near anchor, line tight |
| Sheet Bend | Bend | Join ropes | Extend lines, repairs | Working end exits same side it entered |
| Clove Hitch | Hitch | Quick tie | Poles, clotheslines | Clean X on anchor, working end under wrap |
| Bowline | Loop | Anchor & attachment | Ridgelines, grommets, hauling | Loop fixed, working end inside loop |
| Slipped Half Hitch | Hitch | Quick release | Tie-down finish | Half hitch with visible pull-tab loop |
Outcome / Success Check
You’re ready if you can:
- Pitch and tension a tarp with only these knots.
- Adjust guy-lines without untying.
- Join ropes securely.
- Make fixed loops, quick releases, and strong anchors.
- Recognize correct shapes for each knot.
Conclusion
These seven knots are the true camping essentials. With them, you can build shelter, secure gear, and improvise fixes in the field. Practice until they’re second nature, and rope will become one of the most powerful tools in your pack.


Disclaimer
This guide is intended as a general starting point. Conditions vary by rope type, load, and environment. Always practice knots before relying on them in the field, and inspect cordage for wear before use.